Take control of your Prius’ health without calling a tow. Knowing how to reset red triangle Toyota Prius codes is the first step to diagnosing battery, oil, or hybrid-system issues like an experienced owner.
That red triangle — Toyota calls it the Master Warning Light — is your car’s way of saying, “Something needs attention.” Don’t panic. In this guide I’ll walk you through why it appears, safe prep steps, several reliable reset methods, and when to get professional help. I’ve worked on many Priuses, and I’ll share tips that save time and avoid common mistakes.
Let’s get started!
Red Triangle Warning Meaning
The red triangle warning on a Toyota Prius signals a problem. It appears on the dash to alert the driver that a system needs attention. The warning can be for something minor or something more serious. The key is to diagnose it, not just clear it.
How the Master Warning System Works
The Master Warning Light combines alerts from many systems: engine, hybrid battery, braking system, emissions, and some sensor faults. When the car’s ECU (engine control unit) or hybrid control module detects a fault, it stores one or more Diagnostic Trouble Codes (DTCs) and lights the triangle. Clearing the light without reading those codes is like ignoring a check-engine light — you might hide an important clue.
Common Causes
Several issues commonly trigger the red triangle:
- Low oil pressure or low oil level.
- Hybrid system faults (inverter, battery pack, or hybrid control module).
- Brake system warnings, including ABS or brake-fluid low messages.
- Loose or faulty fuel cap causing EVAP system codes.
- Electrical faults in sensors, wiring, or the 12V battery.
Each of these can set one or more DTCs. Using an OBD-II scanner or the Prius diagnostic mode helps pinpoint the exact cause.
Impact On Vehicle Performance
The red triangle can affect how your Prius drives. In some cases the car will go into a limp or reduced-power mode. You may notice:
- Loss of engine power or rough idling.
- Reduced electric-assist or hybrid functionality.
- Lower fuel economy.
- Unusual noises, smells, or poor braking feel with brake-related warnings.
Driving with an unresolved warning can worsen damage or leave you stranded. If you see the red triangle, treat it as important and diagnose it promptly.
Preparing To Reset
Before you try to reset the red triangle, do a little prep. Proper preparation makes the process safer and more reliable. It also helps you avoid chasing a false alarm.
Safety Precautions
Follow these basics every time:
- Park on a level surface. Put the shifter in Park and set the parking brake.
- Turn the vehicle off and remove the key (or press the Power button so the car is fully off).
- Wait a few minutes for systems to power down before touching electrical parts.
- Wear gloves and eye protection if you’ll work under the hood.
- Have a fire extinguisher nearby when working on batteries or electrical systems.
- If you’re uncomfortable with any step, stop and consult a technician.
Tools Needed
These tools will make the process easier and safer:
- A quality OBD-II scanner or Bluetooth OBD2 adapter and app (recommended).
- Small flathead and Phillips screwdrivers for panels.
- Wrenches or ratchet set for battery terminals (usually 10mm).
- Digital multimeter to check 12V battery voltage.
- Jumper cables or a fully charged 12V battery if the battery is weak.
- Your vehicle’s owner’s manual for model-specific notes.
Once you’ve located the diagnostic plug using our guide on Where is the OBD2 Port in Toyota Prius, you can safely follow the steps below to clear the Master Warning Light.
Quick Checklist Before You Start
- Scan for codes with an OBD-II tool and note them down.
- Check oil level, coolant, and brake fluid—top up if needed.
- Verify 12V battery voltage (should be ~12.6V when engine off).
- Look for obvious damage, loose connections, or corrosion at battery terminals.
Step-by-step Reset Process
Here are simple, safe reset methods. I’ll start with power-cycle and battery disconnect methods you can do at home. I also explain using an OBD-II scanner if you want a cleaner solution.
Turning Off The Vehicle
Begin by turning the Prius fully off. If you have a push-button start, press the Power button until the dash is dark. Confirm the gear lever is in Park and remove the key or fob a safe distance away if possible. This prevents accidental restarts while you work.
Disconnecting The Battery
Disconnecting the 12V battery can clear transient faults and reset some modules. Steps I use:
- Open the hood and locate the 12V battery.
- Loosen and remove the negative (-) terminal first using a 10mm wrench.
- Then loosen and remove the positive (+) terminal.
- Leave both disconnected for about 10 minutes to allow modules to discharge and reset.
- Inspect terminals and clean corrosion if present before reconnecting.
Note: Disconnecting the battery may reset radio presets, clock, and some learned settings. It won’t clear stored DTCs in all modules — a scanner gives a more reliable reset.
Reconnecting And Restarting
When reconnecting:
- Connect the positive (+) terminal first and tighten securely.
- Connect the negative (-) terminal last and tighten firmly.
- Close the hood and get into the car. Start the Prius and let it complete its start-up checks.
- Check the dash. If the red triangle remains, read the codes with a scanner or try the diagnostic mode below.
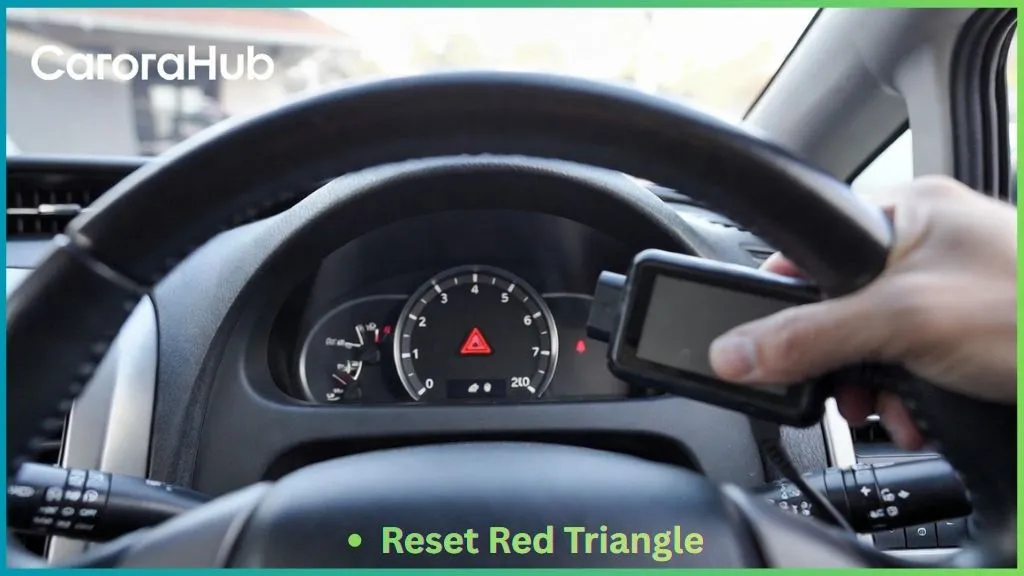
Reset with an OBD-II Scanner (Recommended)
Using an OBD-II scanner is my preferred method. It tells you the exact DTCs before you clear them. Steps:
- Plug the scanner into the OBD-II port (see Where is the OBD2 Port in Toyota Prius).
- Turn the ignition to the ON position (or use the Power button so electronics are on), but don’t start the engine.
- Scan and record all stored and pending codes. Take a clear photo or write them down.
- Address any obvious issues (low oil, low battery, loose fuel cap) if needed.
- Use the scanner’s “Clear Codes” or “Erase DTCs” function to reset the stored codes. Some scanners also reset the Master Warning Light automatically.
- Start the car and confirm the light is off. If codes return immediately, you have a persistent fault that needs diagnosis.
Using The Prius Diagnostic Mode
The Prius diagnostic mode is a built-in way to view system information and error codes without specialized tools. It’s useful for quick checks and for owners who prefer not to use a scanner.
Accessing Diagnostic Mode
To enter diagnostic mode (common method on many Prius models):
- With the vehicle off, press and hold the trip meter reset button (the small button on the dash).
- While holding it, press the Power button once to turn the vehicle to the ON position (do not start the engine).
- Keep holding the trip meter button for about 10 seconds until the display changes to diagnostic information.
- The screen will show error codes and system statuses you can scroll through with the trip meter button.
Behavior and exact steps vary slightly by model year. If you’re unsure, consult your owner’s manual.
Clearing Error Codes
To clear codes from diagnostic mode:
- Note any displayed codes first. Write them down or photograph the screen.
- Turn the car off.
- Press and hold the trip meter button again and press the Power button to enter diagnostic mode.
- Hold until the codes disappear or follow on-screen prompts (varies by year).
Clearing codes this way can turn off the red triangle, but it doesn’t fix the underlying fault. If a true fault remains, the light and codes will likely return.
When To Visit A Professional
Some issues are OK to handle at home. Others need a shop. Here are signs it’s time to get professional help.
Persistent Warning Lights
If the red triangle stays on after you reset it and correct visible items (oil, cap, battery), you likely have a persistent fault. Examples that need a technician:
- Codes that return immediately after clearing.
- Hybrid-system error codes related to the inverter or HV battery.
- ABS or brake system warnings combined with spongy pedals or poor stopping feel.
A shop can use Toyota Techstream or a professional-grade scanner to read manufacturer-specific codes and live data. They can test the high-voltage components safely and perform repairs that require special tools.
Complex Issues Beyond Reset
Get professional help for issues like:
- Hybrid battery pack faults or capacity loss.
- Inverter failures or coolant leaks in the inverter cooling system.
- Major engine faults, oil-pressure failures, or internal engine noises.
- Persistent electrical gremlins that need wiring diagnostics.
When you visit a shop, bring the code list, any photos, and notes on recent events (e.g., low oil light before the triangle appeared). This helps technicians reproduce the problem and speeds up diagnosis.
Preventing Future Warnings
Prevention is the best fix. A few habits keep the red triangle from coming back and protect your hybrid systems.
Regular Maintenance Tips
Do these regularly:
- Change oil and filter on the schedule in your owner’s manual. Low oil pressure is a common trigger.
- Use the correct oil grade recommended for your Prius.
- Check and maintain correct tire pressure monthly to reduce stress on vehicle systems.
- Replace air and cabin filters as needed.
- Service brake pads and brake fluid on schedule.
- Inspect the 12V battery and clean terminals; replace the battery if voltage sits below ~12.0V when resting.
Monitoring Vehicle Systems
Stay proactive:
- Watch the dashboard for early warnings and unusual messages.
- Use an OBD-II tool for occasional quick scans — it helps catch issues before they trigger the Master Warning Light.
- Monitor hybrid battery health and inverter coolant (some Priuses have specific maintenance intervals for inverter coolant).
- Address odd sounds, smells, or performance changes promptly.
Early detection saves money and downtime.
Final Verdict
Resetting the red triangle on your Toyota Prius is straightforward if you follow safe steps. My recommended approach is:
- Scan and record codes first with an OBD-II tool.
- Fix obvious, simple issues (oil, fluid, 12V battery, loose fuel cap).
- Use the diagnostic mode or a scanner to clear codes.
- If the light returns or the car drives poorly, seek professional diagnosis.
Routine maintenance and a basic scanner will keep you ahead of most warnings. Stay calm, be methodical, and act quickly when the light appears — your Prius will thank you.
You’ve got this — a little knowledge and the right tools go a long way toward keeping your Prius safe and reliable on the road.
FAQs Of How to Reset Red Triangle Toyota Prius
What Does The Red Triangle Warning Mean On Prius?
The red triangle indicates a critical system issue. It alerts you to check the vehicle immediately. Ignoring it may cause serious damage or safety risks. Always scan for codes and investigate the root cause rather than just clearing the light.
How Do I Reset The Red Triangle On Toyota Prius?
To reset, first scan and record fault codes with an OBD-II scanner. Try simple fixes (check oil, gas cap, 12V battery). You can clear codes with a scanner, disconnect the 12V battery for about 10 minutes, or use the Prius diagnostic mode. If the light returns, seek professional help.
Can I Drive My Prius With The Red Triangle On?
Driving is not recommended when the red triangle is on. It signals a potentially serious problem needing prompt attention. If you must drive, go slowly and avoid long trips. If the car feels unsafe (loss of power, braking issues), stop and get professional help.
What Causes The Red Triangle To Appear On Prius?
Common causes include low oil pressure, engine faults, or hybrid system issues. Sensor malfunctions, low 12V battery voltage, or a loose fuel cap can also trigger it. Use a scanner or diagnostic mode to identify the exact cause before attempting a reset.

Hello, I’m Norman. I work as a car researcher. I am the voice behind CaroraHub. I have over 15 years of experience. I give simple and useful car advice. I help with car care, cleaning, and small repairs. My goal is to help you keep your car healthy. I want car care to be easy and cheap for you. You can trust my tips to keep your car working well for a long time.