Your car’s interior is more than just a place to sit—it’s where you spend a lot of your time. Over time, dirt, dust, and grime build up, making your car feel less fresh and comfortable.
You might think a quick wipe-down is enough, but if you want your car to look and feel truly clean, you need to dig deeper. So, what is the best way to deep clean your car’s interior? Keep reading—I’ll walk you through easy, effective steps that will transform your ride and make every drive more enjoyable.
You’ll learn how to remove hidden dirt, tackle stubborn stains, and refresh every surface. I’ll share tools I use, products I trust, and tips that save time. Ready to give your car the deep clean it deserves? Let’s dive in.
Credit: www.youtube.com
Preparing Your Car For Deep Cleaning
Good results start with good prep. I always spend more time preparing than scrubbing. This saves time, stops mess from spreading, and helps me reach every corner. Here’s how I get ready.
Gathering Essential Cleaning Supplies
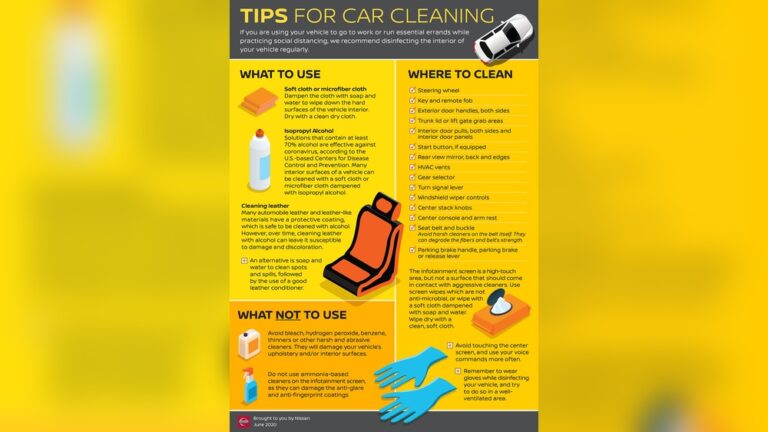
Collect all your tools before you start. Lay them out so you don’t run back and forth. Essentials include:
- Vacuum with crevice and brush attachments (a wet-dry vacuum is ideal)
- Microfiber cloths in several sizes
- Soft-bristle brushes and small detailing brushes
- Upholstery cleaner, leather cleaner, and a pH-balanced multi-surface cleaner
- Carpet cleaner or extractor (for heavy soils)
- Compressed air or a small air blower for vents and tight spots
- Baking soda and activated charcoal for odors
- Leather conditioner and UV dashboard protectant
These tools cover most jobs: vacuuming, stain removal, odor control, and protecting surfaces. I recommend testing any cleaner on a small hidden spot first. That prevents surprises like color loss or spotting.
My go-to cleaning kit
I keep a small kit in my trunk so I’m always ready. It has a microfiber towel, a soft brush, a travel-sized multi-surface spray, a stain pen, and a trash bag. For deeper jobs, I bring the extractor and a backup battery for my cordless vacuum. Being prepared cuts a lot of stress.
Removing Personal Items And Trash
Empty the car completely. Take out bags, reusable cups, chargers, and any loose items. Toss trash and remove floor mats. This gives you full access to seats, carpets, and under-seat areas. I sort items into “keep,” “discard,” and “relocate” piles. It’s fast and keeps things organized.
Choosing The Right Cleaning Environment
Pick a shaded, well-ventilated spot. Direct sun dries cleaners too fast and can leave streaks. A garage or carport works well. If it’s humid, run a fan to speed drying. Good airflow helps upholstery and carpets dry faster and prevents musty smells.
Cleaning Car Seats And Upholstery
Seats take the most abuse. Food crumbs, spills, and daily wear all add up. Clean them right and you’ll improve comfort, air quality, and resale value. Different materials need different care, so I treat fabric and leather separately.
Fabric soaks up spills and odors. Leather needs gentle cleaners and conditioners to avoid drying and cracking. Let’s cover both.
Vacuuming And Dusting
Start by vacuuming every seat. Use the soft brush to reach seams and the crevice tool for gaps. Don’t rush—crumbs hide in folds. I often remove headrests to vacuum under them. Dusting first keeps particles from being smeared during wet cleaning.
Treating Fabric Seats
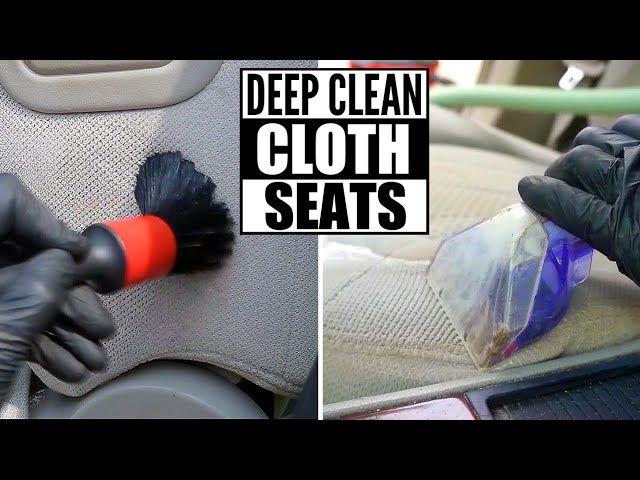
For fabric seats, use a dedicated upholstery cleaner or a mild soap solution. Spray sparingly. Work with a soft brush in short strokes. Blot, don’t rub, to lift stains. I avoid over-wetting because damp cushions can grow mold. After cleaning, open doors and run fans to dry the fabric fully.
Steam cleaning vs. shampooing fabric seats
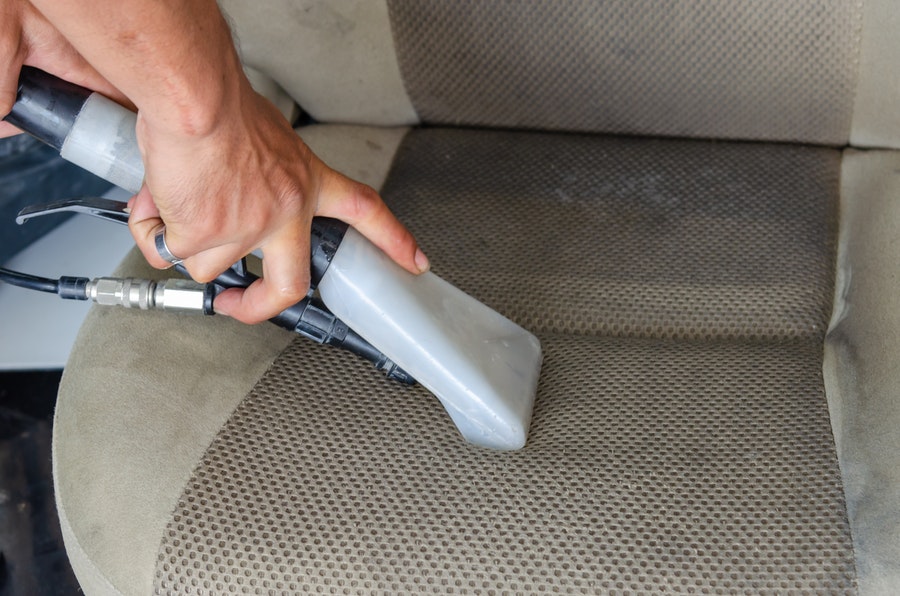
Steam cleaning sanitizes and loosens grime with hot vapor. It’s great for smells and light stains. A shampoo or extractor removes deep dirt and leaves less moisture when used correctly. I use a steam cleaner for quick refreshes and an extractor for heavy soiling. Both work if you follow drying steps.
Cleaning Leather Seats
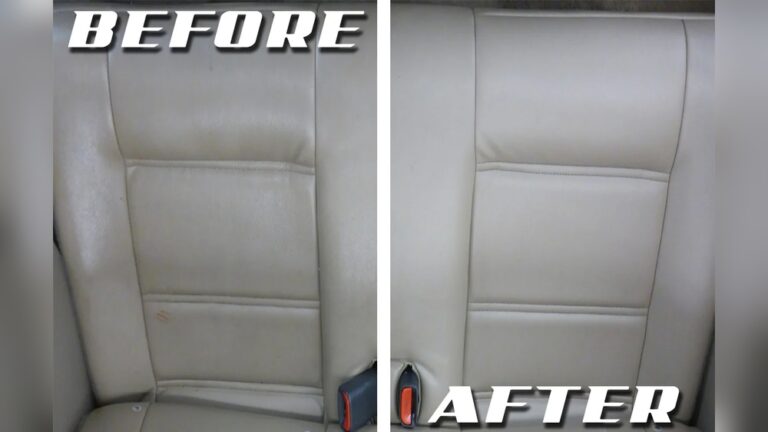
Use a leather cleaner or a mild soap solution. Apply with a soft microfiber cloth. Clean in small circular motions. Keep water to a minimum. After cleaning, let the leather dry and apply a leather conditioner. This keeps the leather supple and prevents cracking. I apply conditioner every few months or after a heavy clean.
Dealing With Stains And Odors
Treat stains fast. For fabric, blot liquids immediately with a clean towel. For greasy stains, use a degreasing cleaner made for upholstery. For leather, use a leather-specific stain remover. For odors, sprinkle baking soda on fabric seats and carpets. Let it sit overnight, then vacuum it up. For persistent smells trapped in padding, activated charcoal bags under seats work well.
Restoring Carpets And Floor Mats
Carpets and mats show dirt fast. Deep cleaning them brightens the whole cabin and removes trapped odors. I give these areas extra attention because they store grime and moisture.
With the right steps, carpets and mats can look almost new again. Protect them afterward with a fabric guard to repel future stains.
Removing And Shaking Mats
Take mats out and shake them well. Beat the back to dislodge sand and grit. For rubber mats, hose them down and scrub with a brush. Let them dry fully in the sun. Cleaning mats outside keeps your car cleaner while you work.
Deep Cleaning Carpets
Vacuum carpets thoroughly with a brush tool to lift fibers. Apply a carpet cleaner suited for automotive use. Scrub with a soft brush and focus on soiled areas. If you have an extractor, use it to pull out the cleaner and grime. A wet-dry vacuum helps when you don’t have an extractor.
How I dry carpets fast
I use a fan and open doors for cross-flow air. On sunny days, I park with doors open to speed drying. Avoid placing mats back until everything is bone dry. Damp carpets cause odors and mildew.
Drying And Protecting Surfaces
Let carpets and mats dry completely before reinstalling. For protection, apply a fabric protector spray to repel future stains. For rubber or vinyl mats, use a non-slip protectant to keep them in place. Protecting surfaces extends their life and keeps the interior looking tidy.
Credit: downtownautobody.com
Detailing The Dashboard And Console
The dashboard and console are the face of your car’s interior. Dust, fingerprints, and spills gather here first. Clean and protect these areas to preserve materials and keep controls working smoothly.
Dusting And Wiping Surfaces
Start with a dry microfiber cloth to remove loose dust. Wipe in small sections with a mild cleaner. Avoid harsh chemicals and abrasive pads that can dull finishes. Work carefully around screens and vents. I keep a separate cloth for sensitive areas like the infotainment screen.
Cleaning Vents And Controls
Vents trap dust and affect cabin air quality. Use a small detailing brush, compressed air, or foam swabs to get between slats. Clean buttons and knobs with a cotton swab dampened in cleaner. Keep moisture low to avoid damaging electronics. I often run the blower briefly after cleaning to remove any loosened dust.
Polishing And Protecting Materials
Polish plastic and vinyl with a product made for car interiors. Apply sparingly to avoid greasy buildup. For leather, use a conditioner after cleaning to restore oils and flexibility. Apply a UV protectant to dashboards to reduce cracking and fading from sun exposure.
Protecting screens and touch surfaces
For screens, use a screen-safe cleaner and a very soft microfiber cloth. Avoid sprays that leave residues. For fingerprint-prone controls, a quick wipe with an alcohol-free wipe keeps them looking sharp without harming coatings.
Cleaning Windows And Mirrors
Clean windows and mirrors for safety and appearance. Smudges and film reduce visibility and make the cabin feel unkempt. Use the right tools and technique to avoid streaks.
Choosing The Right Glass Cleaner
Use an ammonia-free, automotive glass cleaner. Ammonia can harm window tint and some plastics. A streak-free formula keeps your windshield and mirrors clear. I keep a dedicated glass microfiber cloth in my kit for best results.
Avoiding Streaks And Smudges
Spray cleaner onto the cloth, not directly onto the glass. Wipe in a circular motion, then finish with vertical or horizontal strokes. Flip or replace the cloth when it gets dirty. This reduces streaks and leaves a clean finish.
Cleaning Window Tracks And Seals
Tracks collect grit that can jam windows. Use a small brush or old toothbrush to loosen debris, then vacuum it up. Wipe seals with a damp cloth and a mild cleaner. Keep seals lubricated with a silicone spray if they feel stiff. Clean tracks and seals regularly to ensure smooth window operation.

Credit: www.actonservicecentre.co.uk
Eliminating Odors And Freshening Air
Odors make a car feel unclean even after a thorough wash. I tackle smells at the source—carpets, seats, and vents—so the cabin actually smells fresh. Here are reliable, low-chemical options.
Using Natural Deodorizers
Baking soda absorbs odors. Sprinkle it on carpets and seats, let it sit for at least 15 minutes (overnight for strong odors), then vacuum. Activated charcoal bags trap smells and moisture without chemicals. I also use a small dish of coffee grounds for a short-lasting neutral scent after heavy spills.
Replacing Cabin Air Filters
The cabin air filter cleans incoming air. Over time it gets clogged with pollen, dust, and odors. Replace it per your owner’s manual. A fresh filter improves airflow and cabin smell. I check mine twice a year or whenever the AC seems weak or smells musty.
Preventing Future Odors
Prevention is simple: remove trash, avoid eating in the car, and dry wet items before putting them back inside. Use moisture absorbers in humid climates. Open windows for a few minutes each week to refresh the air. These habits stop smells before they start.
Maintaining A Clean Interior
After a deep clean, maintenance keeps things easy. Small daily steps prevent major messes. I recommend a short routine you can do in five minutes each time you finish a trip.
Regular upkeep keeps your materials healthy and reduces the need for frequent deep cleans.
Regular Cleaning Tips
Vacuum seats and mats weekly. Wipe high-touch surfaces with a damp microfiber cloth. Empty trash after each trip. Treat spills immediately. Air out the car regularly. These small actions keep the cabin comfortable and clean.
Protective Measures
Use seat covers to shield fabric or leather. Apply dashboard protectant to prevent cracks from sun exposure. Park in shade when you can. Use floor mats to catch dirt and moisture. I keep a small, sealed trash bin in the car to stop wrappers and receipts from piling up.
Scheduling Deep Cleanings
I deep clean my car every three to six months. This includes shampooing carpets, cleaning vents, and conditioning leather. If you transport pets or kids, consider a deeper clean more often. Set a calendar reminder so the job doesn’t slip.
Frequently Asked Questions
What Is The Best Product For Deep Cleaning Car Interiors?
I recommend a pH-balanced, multi-surface cleaner that is safe on leather, fabric, and plastic. Look for one with antibacterial properties if you want extra hygiene. Always test on a hidden spot first to avoid discoloration.
How Often Should I Deep Clean My Car Interior?
Aim for a deep clean every three to six months. If you have pets, kids, or carry messy gear, clean more often. Regular spot cleaning and weekly tidying stretch the time between full deep cleans.
Can I Deep Clean Car Seats Myself Safely?
Yes. Use the right cleaners and tools for your seat material. Avoid over-wetting and test products first. If you’re unsure about severe stains or delicate materials, consider a professional detailer. For routine jobs, DIY works well and saves money.
What Tools Are Essential For Deep Cleaning Car Interiors?
Essential tools include a vacuum with attachments, microfiber cloths, soft brushes, a steam cleaner or extractor, and compressed air. These remove dirt from tight spots, sanitize, and lift stains effectively. Good tools make the job faster and safer for your car’s materials.
Conclusion
Deep cleaning your car’s interior keeps it fresh, healthy, and more enjoyable to drive. Start by removing trash and vacuuming seats and floors. Use the right cleaners for leather, fabric, and plastic. Pay attention to vents, cup holders, and window tracks where grime hides.
Do a little maintenance often and schedule full deep cleans every few months. With the right tools and a clear plan, you can get professional-level results at home. A clean interior not only feels better but helps your car last longer. Keep your cabin neat and enjoy every drive.

I am Julian Drive, an automotive enthusiast and repair expert with over 7 years of hands-on experience in vehicle maintenance. At Carora Hub, I simplify complex car issues into easy-to-follow DIY guides to help drivers stay safe and save on repair costs.