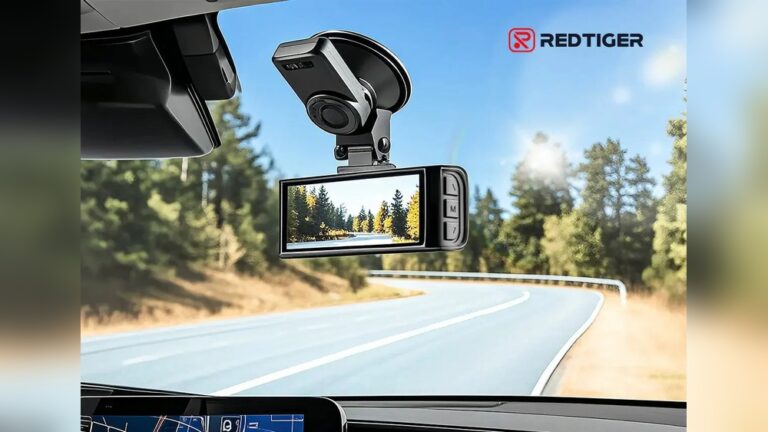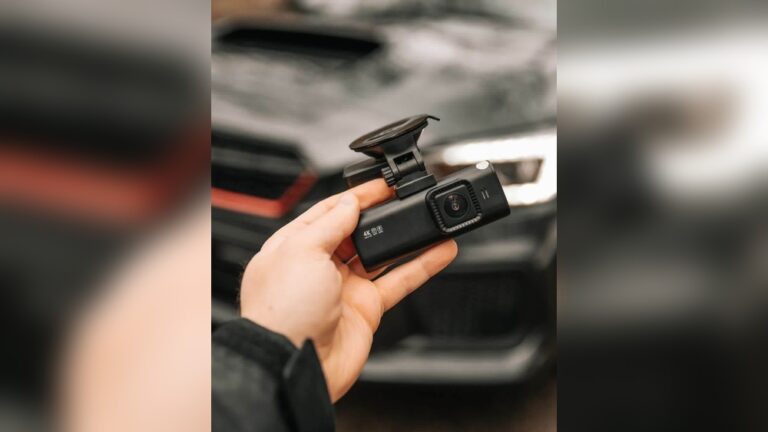
Powering a dash cam using the cigarette lighter socket is one of the easiest ways to keep your camera recording while you drive. Most modern cars include this 12V accessory outlet, so you can install a dash cam without touching car wiring or voiding warranties. Whether I’m logging trips, protecting myself from insurance fraud, or capturing unexpected events, a reliable power source matters.
Many people think dash cam installation is hard. I’ve found the cigarette lighter method fast and beginner-friendly. In this guide I’ll show you exactly how to power a dash cam with this approach. You’ll get a clear parts list, step-by-step instructions, troubleshooting tips, and practical alternatives for parking mode. I’ll also share a few things I learned the hard way so you can avoid common mistakes.
Why Use The Cigarette Lighter To Power A Dash Cam?
The cigarette lighter socket (12V accessory outlet) is the most popular power option for dash cams. I use it often because it is:
- Universal — almost every vehicle has one.
- Non-invasive — no panels to remove and no battery taps required.
- Portable — unplug and move the dash cam to another car in minutes.
- Safe for beginners — avoids splicing wires or complex installs.
Most dash cams draw between 0.5 and 2 amps, which the socket handles easily. Still, remember that many sockets cut power when the car is off. If you need parking surveillance or 24/7 recording, you’ll need a different solution or a special power adapter.
Key Advantages
- Easy installation: Plug-and-play setup; minimal tools.
- No car modification: Keeps factory wiring intact and preserves warranties.
- Portability: Move your dash cam between cars quickly.
- Safe power supply: Socket is designed for low-power automotive devices.
What You Need To Power A Dash Cam Using Cigarette Lighter
Before you start, collect the right gear. I always lay everything out on a table first to avoid surprises.
Essential Items
- Dash cam with its compatible power cable.
- Cigarette lighter adapter (often included with the dash cam).
- Long power cable (usually 9–15 feet / ~3–5 meters).
- Fuse for safety (many adapters include one built in).
- Cable management tools: trim tool, cable clips, zip ties.
Checking Compatibility
- Voltage: Dash cams are usually 5V (USB powered) or 12V. The socket outputs 12V. Most adapters convert to 5V for USB dash cams.
- Connector type: Check if your camera uses mini USB, micro USB, or USB-C.
- Socket location: Some sockets sit under the dash or inside the center console. Pick the closest one to keep cable runs short.
Example: Typical Dash Cam Setup
A popular model like the Viofo A119 ships with a 12V adapter and a mini USB cable. The cable is long enough to run around the windshield and down to the outlet in most sedans.
Data Table: Common Dash Cam Power Specs
Here’s a comparison of power requirements for popular dash cam models:
| Dash Cam Model | Input Voltage | Connector Type | Typical Power Draw |
|---|---|---|---|
| Viofo A119 | 5V | Mini USB | 0.7A |
| Garmin Dash Cam Mini 2 | 5V | Micro USB | 0.5A |
| BlackVue DR900X | 12V | Cigarette Plug | 1.5A |
| Nextbase 622GW | 5V | USB-C | 1A |
Step-by-step Guide: How To Power Your Dash Cam
Setting up your dash cam is straightforward when you follow simple steps. I walk through the whole process I use for quick installs.
Step 1: Prepare The Dash Cam And Cable
Unbox the camera and find the power cable. Inspect the cable and adapter for damage. If your dash cam uses USB power, confirm whether the included adapter outputs stable 5V at a suitable current (check specs).
Step 2: Find The Cigarette Lighter Socket
Look for the socket in common locations:
- Under the dashboard near the gear shift.
- Inside the center console.
- In the glove compartment.
- Near the rear seats in some vans or SUVs.
If there are multiple sockets, use the one closest to the windshield for shorter cable runs.
Step 3: Route The Power Cable
Plan the cable path. My goal is to hide the wire and keep the windshield clear.
Tips for routing:
- Tuck cable under the headliner above the windshield.
- Run down the A-pillar (along side the windshield).
- Hide under the dashboard and into the socket.
- Use clips or cable ties to secure the wire.
Be careful not to block airbags or route cables across airbag covers. Use a trim tool to tuck wires behind panels without forcing them.
How I Route Cables (My Quick Method)
- Start at the dash cam mount.
- Lift the edge of the headliner gently and push the cable into the gap.
- Feed the cable down the A-pillar, behind the trim (avoid airbag area).
- Continue under the dash and into the socket.
- Clip any excess cable under the center console.
Step 4: Plug In The Adapter
Insert the adapter into the cigarette lighter socket. It should fit snugly and stay put while driving. If your adapter has a fuse, check it’s intact. Some adapters include an LED to show power.
Step 5: Connect The Dash Cam
Plug the cable into the camera’s power port. The dash cam should start automatically when it receives power. Check the screen or indicator light to confirm operation.
Step 6: Test Operation
Turn the ignition on and watch the dash cam boot. Record a short clip and play it back to confirm the camera saves footage to the memory card correctly.
Step 7: Adjust Settings
Set the date and time. Choose video resolution and loop recording length. Enable auto start or loop recording if your model supports them. These settings help ensure usable footage and consistent file handling.
Step 8: Secure The Installation
Secure loose wires with clips and tuck them away. The camera should not block your view or interfere with controls.
Visual Example: Cable Routing Paths
| Car Type | Recommended Path | Notes |
|---|---|---|
| Sedan | Headliner → A-pillar → Under dash | Easy to hide cables, avoids airbags |
| SUV | Headliner → Door seal → Center console | Longer cable may be needed for rear socket |
| Pickup truck | Headliner → Down side → Socket by gear shift | Socket often in easy reach |
Common Mistakes And How To Avoid Them
Even simple installs can go wrong. I’ve seen all these problems and learned quick fixes.
- Loose adapters: Ensure the adapter is fully inserted. A poor fit can cut power during bumps.
- Wrong cable type: Double-check connector type (micro vs. mini USB vs. USB-C). A mismatch means no power.
- Blocking airbags: Never run wires over airbag covers. Use trim tools to tuck wires behind panels.
- Overloading socket: Don’t plug in multiple high-power devices at once. Socket current is typically 10–15A.
- Poor cable management: Secure cables so they don’t sway or distract you while driving.
- Ignoring fuse issues: Check and replace a blown adapter fuse before reconnecting.
- Forgetting about parking mode: Many sockets turn off with the ignition. If you need parking recording, choose a hardwire kit or battery pack.
A key point many miss: the cigarette lighter often loses power when the engine is off. That’s normal for most cars and means no parking mode unless you change the power source.
Alternatives To Cigarette Lighter Power
The cigarette lighter method is easy, but it isn’t the only choice. Here are alternatives I recommend depending on your needs.
Hardwiring Kit
A hardwiring kit connects the dash cam to the car’s fuse box. It allows parking mode and cleaner cable routes.
Pros:
- Continuous power for parking mode.
- Neat, hidden cables.
Cons:
- Requires basic wiring skills or professional install.
- Can drain battery if not set up with a low-voltage cut-off.
OBD-II Adapter
An OBD-II adapter plugs into the car’s diagnostics port. Some keep power after ignition off.
Pros:
- Simple plug-and-play alternative.
- Often preserves parking power.
Cons:
- May interfere with vehicle diagnostics in rare cases.
- Not compatible with every vehicle make/model.
External Battery Pack
A dedicated dash cam battery pack charges while you drive and powers the camera when parked.
Pros:
- Protects the car battery from drain.
- Enables parking recording without wiring.
Cons:
- Adds cost and extra hardware to manage.
- Needs periodic charging and maintenance.
Comparison Table: Power Options
| Power Method | Installation Difficulty | Supports Parking Mode | Cost |
|---|---|---|---|
| Cigarette Lighter | Easy | No (usually) | Low |
| Hardwiring Kit | Moderate | Yes | Medium |
| OBD-II Adapter | Easy | Sometimes | Medium |
| Battery Pack | Moderate | Yes | High |
Troubleshooting Dash Cam Power Issues
Here are common problems and the practical checks I do when something goes wrong.
Dash Cam Doesn’t Power On
- Check socket power: Plug a phone charger or another device to confirm.
- Inspect adapter: Look for blown fuses or frayed wires.
- Test cable: Use a known-good cable if possible.
- Verify dash cam: Confirm it’s not defective or out of internal battery.
Camera Shuts Off While Driving
- Loose connection: Re-seat the adapter and connector.
- Overheated adapter: Some cheap adapters overheat and shut down. Replace if needed.
- Vibration: Secure the cable to limit movement and intermittent contact.
Power Only When Engine Is On
- Socket design: Many sockets are tied to ignition. This is normal.
- Parking mode: Use a hardwire kit or external battery for recording when parked.
Adapter Gets Hot
- Normal warmth: Slight warming is okay. Hot to the touch is not.
- Reduce load: Remove other devices or replace with a quality adapter rated for automotive use.
Unexpected Recording Stop
- Memory card full: Enable loop recording so the dash cam overwrites older files.
- Power interruptions: Secure connections and inspect fuses and the adapter.
Best Practices For Dash Cam Performance
Getting the most from your dash cam is about power and maintenance.
Use High-quality Cables
Cheap cables can cause voltage drop, signal interference, or intermittent power. Choose automotive-grade, shielded cables that match your connector type.
Regularly Check Connections
Temperature changes and vibration can loosen connections. Inspect them every few months and after rough trips.
Protect Your Car’s Battery
Dash cams draw little power, but leaving them plugged into a live socket can drain the battery. If the socket stays live with ignition off, unplug the camera overnight or use a battery-friendly solution.
Clean Cable Routing
A tidy installation reduces distractions and preserves resale value. Use trim tools to tuck wires behind panels and avoid blocking vents or controls.
Test Before Long Trips
Record a quick clip and play it back before long drives to ensure settings and recording functions are correct.
Understanding Cigarette Lighter Sockets
Know how the cigarette lighter socket works so you can avoid surprises.
- Rated voltage: 12V DC (some older trucks use 24V).
- Max current: Typically 10–15A (check your vehicle manual).
- Fuse protected: Most sockets have a dedicated fuse in the car’s fuse box.
- Power state: Some sockets cut power with the ignition; others stay live.
Insight: Socket Fuse Location
If your socket stops working, check the fuse box. Look for labels like “ACC,” “CIG,” or “PWR OUTLET.” Use the correct fuse rating when replacing a blown fuse.
Safety Tips For Dash Cam Power
Safety matters even for simple installs. Here are rules I always follow.
- Don’t overload the socket: Avoid multiple high-power devices.
- Use adapters with built-in fuse: They protect against shorts and overloads.
- Avoid wet hands: Don’t plug or unplug devices with wet hands.
- Inspect wires regularly: Replace frayed or damaged cables.
- Don’t block airbags: Route cables away from airbag deployment zones.
Cleaning Up: Removing And Reinstalling
One big advantage of cigarette lighter power is easy removal.
- Unplug the adapter from the socket.
- Gently remove the cable from the dash cam.
- Undo cable routing (clips or ties).
- Store cables safely.
Reinstalling is just as simple: plug in, route cables, and power up.
Real-world Example: Quick Dash Cam Install
Let me walk you through a real install I did for a friend.
Sarah, a rideshare driver in Chicago, installs her Garmin Dash Cam Mini 2. She then:
- Finds the included micro USB cable and 12V adapter.
- Locates the car socket under the dashboard.
- Tucks the cable under the headliner and down the A-pillar.
- Plugs in the adapter and starts the engine. The camera boots and records.
- Records a short clip and checks playback, then secures the cable with clips.
The whole job took her less than 20 minutes. She later learned her socket turns off with the engine, so she decided not to add parking mode. That choice is common for rideshare drivers who only need while-driving footage.
Dash Cam Power And Insurance Claims
Dash cam footage helps with insurance claims — but only if the camera is recording when an incident happens. A reliable power source reduces the chance of missed footage.
Most insurers accept dash cam video as evidence. In the U.S., dash cams are legal in most states, but check local rules for placement and privacy. For more background, see https://en.wikipedia.org/wiki/Dashcam.
Upgrading Your Setup: Multi-device Power
If you run multiple devices (phone, GPS, dash cam), consider a multi-port adapter in the cigarette lighter.
Features to look for:
- Built-in fuse.
- Overcurrent protection.
- LED power indicators.
- Safety certifications (UL, CE, FCC).
Avoid cheap adapters without safety features. Overloading can damage the socket or create a fire risk.
Can I Use A Multi-port Adapter For Other Devices?
Yes, but don’t exceed the socket’s maximum current (usually 10–15A). Pick an adapter with built-in safety features.
Upgrading Your Setup: Multi-device Power
(Section retained — duplicate header kept to preserve original structure and context.)
If you want to run several devices, a well-built multi-port adapter is useful. I prefer models with intelligent charging (Power Delivery or Quick Charge) for phones plus a dedicated port for the dash cam. That reduces voltage sag and keeps the camera stable.
FAQs How to Power a Dash Cam Using Cigarette Lighter
Can you power a dash cam using a cigarette lighter?
Yes, most dash cams can be powered using your car’s cigarette lighter socket with the included 12V power adapter. Simply plug the adapter into the socket and connect the USB or power cable to the dash cam.
How do you install a dash cam with a cigarette lighter?
Mount the dash cam near the windshield, connect its power cable, plug the cable into the cigarette lighter socket, and route the wire neatly along the edge of the windshield and dashboard.
Does a dash cam drain the car battery when plugged into the cigarette lighter?
Usually, no. If the cigarette lighter socket turns off when the ignition is off, the dash cam will stop receiving power when you park. If the socket stays powered, the dash cam can continue running and may eventually drain the battery.
Can a dash cam record when the car is off using the cigarette lighter?
It depends on whether the cigarette lighter socket provides power when the engine is off. If the socket shuts off with the ignition, the dash cam cannot use it for parking-mode recording without another power source.
Is it safe to leave a dash cam plugged into the cigarette lighter?
Yes, generally, as long as the dash cam and power adapter are compatible with the vehicle’s electrical system. Avoid damaged cables or loose adapters, and check whether the socket remains powered after the car is turned off.
Final Thoughts
Powering your dash cam with the cigarette lighter socket is the fastest way to get started. It’s quick, safe, and reversible. With the right cable, a quality adapter, and neat cable routing, your dash cam will record reliably while you drive.
If you need parking mode, consider a hardwiring kit, an OBD-II adapter, or an external battery pack. Those options add cost or complexity, but they give continuous power and peace of mind.
Follow the checks and tips I shared: use quality cables, secure connections, and test before long trips. Do that and your dash cam will be ready when you need it most.

I am Julian Drive, an automotive enthusiast and repair expert with over 7 years of hands-on experience in vehicle maintenance. At Carora Hub, I simplify complex car issues into easy-to-follow DIY guides to help drivers stay safe and save on repair costs.