Thinking about installing a dash cam yourself? You’re not alone. Dash cams are everywhere now — in private cars, rideshare vehicles, and commercial fleets. These small cameras record your driving. They give video evidence after crashes, theft, or vandalism. So can you install a dash cam yourself? Yes. In most cases it’s easier than you think. I’ve installed many models, from simple front-only cameras to dual- and three-channel systems. This guide walks you through the full process. You’ll get step-by-step instructions, smart tips, common mistakes to avoid, and extra context on laws, insurance, and hardwiring. Read on and you’ll feel confident installing a dash cam yourself.
Why Install A Dash Cam Yourself?
Installing a dash cam on your own has clear benefits I’ve seen first-hand:
- Save money: A pro installer can charge $50–$200. DIY cuts that cost.
- Fast and convenient: No shop visit. You can do it on your schedule.
- Customize placement: Pick the exact spot and hide the wires your way.
- Learn your gear: Installing it yourself helps you use it better later.
Most modern dash cams are built for DIY. Entry-level models are plug-and-play. Even advanced cams with parking mode, GPS, or cloud features are doable if you take your time. I recommend reading the manual first and planning cable runs before you start.
Types Of Dash Cams And Installation Difficulty
Not all dash cams are the same. The type and features change how hard the install is.
| Dash Cam Type | Features | Installation Difficulty |
|---|---|---|
| Single Front-Facing | Records front view | Easy |
| Dual (Front & Rear) | Records front and back | Moderate |
| Three-Channel | Front, rear, interior | Challenging |
| Advanced (Parking Mode, GPS) | Extra wiring required | Moderate to Difficult |
| Wireless Models | Battery powered, minimal wiring | Very Easy |
Single front-facing cams are fastest. They usually plug into the cigarette lighter or a USB port. Dual cams add the rear camera and a longer cable run. Three-channel systems add an interior view and more wires. Parking mode and GPS often mean hardwiring to the fuse box. Hardwiring is not hard, but it needs care and the right tools.
What You Need For Diy Dash Cam Installation
Before you start, gather these items:
- Dash cam kit: Camera, mount, power cable. Some kits include a memory card.
- Basic tools: Small screwdriver, trim removal tool, cable ties, electrical tape.
- Power source: Cigarette lighter / 12V socket or a hardwire kit for the fuse box.
- User manual: Read the camera’s manual first. It saves time.
- Clean cloth: For the windshield and the lens.
Most kits come with what you need. If you want parking mode or a stealth install, buy a hardwire kit. I also like a small flashlight and a few extra zip ties. They make routing cables neater.
Recommended Tools and Parts
- Trim panel tool set — protects clips and plastic trim.
- Fuse tap (add-a-circuit) — if you hardwire without cutting wires.
- Voltage protection module — prevents battery drain in parking mode.
- High-endurance microSD cards (32GB–128GB) — avoid cheap cards.
- Extension cables — useful for SUVs, vans, or trucks.
Step-by-step Guide: Installing A Dash Cam Yourself
Most basic installs take 20–30 minutes. Dual or hardwired setups can take 1–2 hours. I break the work into clear steps so you won’t miss anything.
1. Choose The Right Location
- Ideal spot: Behind the rearview mirror. High on the windshield and inside the wiper sweep.
- Don’t block your view: Laws vary. Some states limit windshield obstruction.
- Check cable reach: Make sure the power cable and rear camera cable (if any) reach comfortably.
I always mount the camera low enough to stay out of my sight line but high enough to see the road. That gives a clear horizon and useful license plate capture.
2. Clean The Windshield
- Use glass cleaner and a lint-free cloth.
- Remove dust, grease, and film.
- A clean surface helps adhesive and suction sticks hold well.
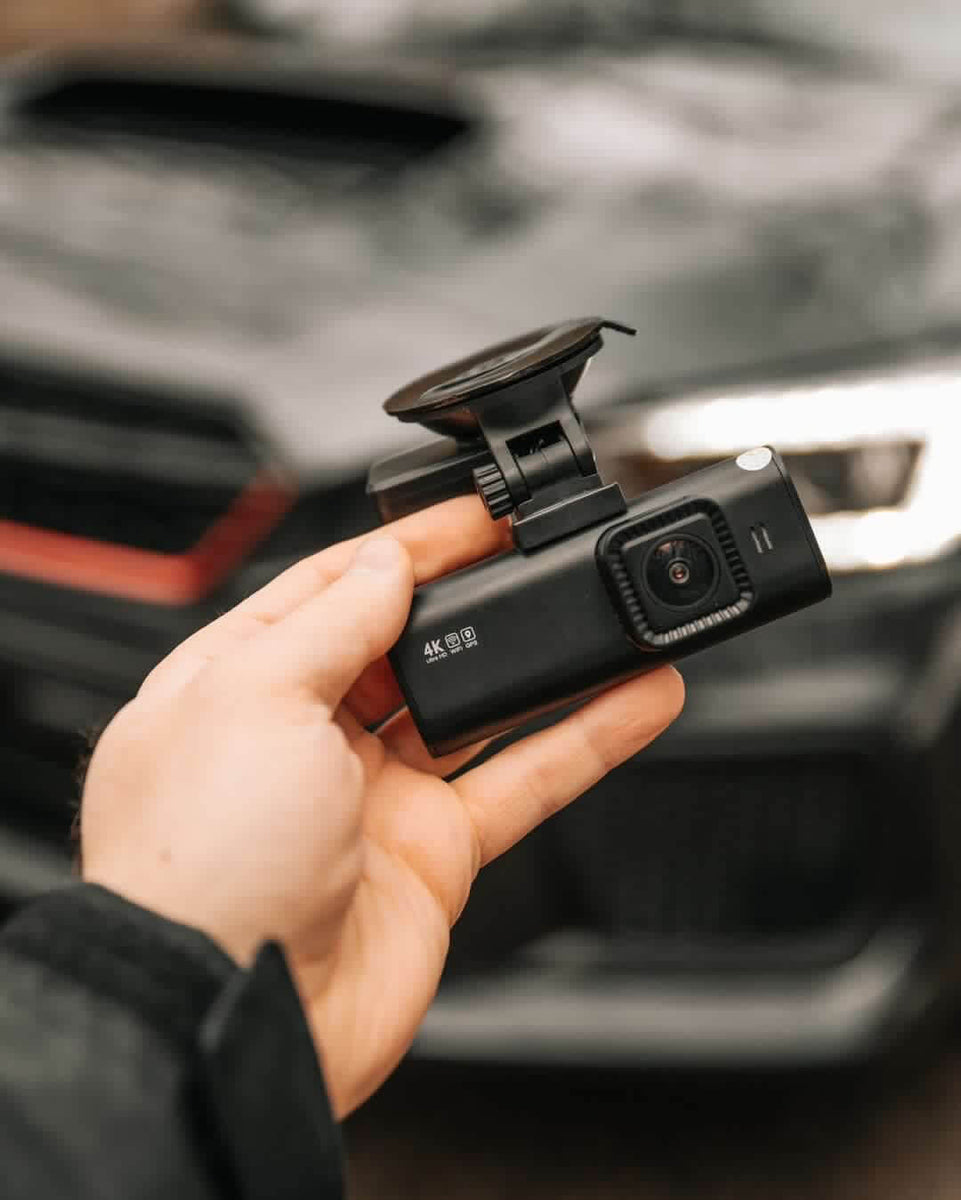
3. Mount The Dash Cam
- Attach the bracket: suction cup or adhesive pad.
- Press firmly for 30–60 seconds.
- Wait 15 minutes before attaching the camera to adhesive mounts.
If using a suction mount, clean the cup and the glass. For adhesive pads, warm them slightly with your hand for a better bond. If your mount swivels, lock it in place once you’ve set the angle.
4. Connect The Power Cable
- Plug the cable into the camera.
- Route along the windshield edge and tuck it under the headliner using a trim tool.
- Run down the A-pillar, behind trim, and under the dash.
- Plug into the cigarette lighter socket or a USB port.
When tucking under trim, be gentle. Pulling too hard can break clips. I always leave a little slack near the mount so the cable doesn’t pull the camera down in hot weather.
5. Hide The Wires
- Use cable ties and clips to secure the wire.
- Avoid loose wires near pedals or airbags.
- Tuck wires under trim panels for a clean look.
Neat wiring looks professional and cuts down on rattles. If you drive a leased or rental car, use removable cable clips or adhesive that won’t mark the trim.
6. Install Rear Camera (if Applicable)
- Mount the rear camera on the inside of the rear window, centered if possible.
- Run the cable along the roof lining toward the front dash unit or power source.
- Secure the cable with clips as you go. Keep it away from airbags and moving parts.
For hatchbacks or vans, routing can be trickier. Test the rear view before finalizing the mount. Make sure the rear lens is clean and not blocked by tint lines or a defroster grid.
7. Hardwiring For Parking Mode (optional)
Parking mode keeps your camera recording while the car is off. It uses a hardwire kit. This step is optional but common for fleet cars and rideshare drivers.
- Find the fuse box — usually under the dash or in the engine bay.
- Pick a fuse that turns on/off with the ignition for camera power.
- Use a fuse tap (add-a-circuit) to connect the hardwire kit without cutting factory wires.
- Ground the kit to a metal bolt or chassis point.
- Test the camera before replacing panels.
Tip: Use a voltage protection module. It stops the camera from draining your car battery. I always test with a multimeter and note the fuse I used. That helps later if troubleshooting is needed.
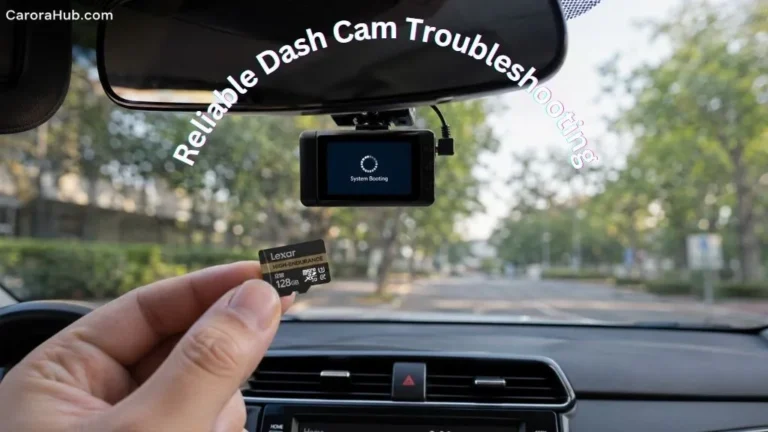
8. Insert Memory Card
- Use a high-endurance microSD card. Aim for 32GB to 128GB depending on loop time.
- Format the card in the dash cam before first use.
Cheap cards fail fast. I recommend brands made for dash cams or security cameras. Format in the camera, not in your computer, to avoid compatibility issues.
9. Test The Camera
- Start the car and confirm the camera powers on.
- Record a short clip and review it for angle and clarity.
- Adjust the angle so the horizon is level and license plates are readable at a distance.
I always test during the day and at night. Light changes can expose weak spots in setup or lens glare. Fix things now rather than after you need footage.

Credit: cansonic.com
Comparing Diy Vs Professional Installation
Should you DIY or hire a pro? Here’s a simple comparison to help you decide.
| DIY Installation | Professional Installation |
|---|---|
| Cost: Free (except tools) | Cost: $50–$200 |
| Flexible timing | Must schedule appointment |
| Personalized placement | Standard placement |
| Risk of mistakes | Expert wiring |
| Learning experience | No learning |
Pros hide cables well and handle tricky wiring. If you are unsure about car electrics or you want warranties on the install, hire a pro. For most single-camera installs, DIY is safe and fast.
Common Mistakes When Installing A Dash Cam Yourself
Watch out for these common errors I’ve fixed on installs:
- Mounting too low or high: Blocks view or misses road details.
- Loose wires: Can distract you or get tangled near pedals.
- Using cheap memory cards: Leads to data loss and errors.
- Wrong fuse selection: Hardwires must use ignition-switched fuses unless you want constant power.
- Poor cable routing: Damages trim or causes rattles and noise.
- Forgetting to format the card: Old data can corrupt recordings.
Extra note: Some dash cams have a small internal battery. It’s only for brief saves or safe shutdowns. Do not rely on it for long parking monitoring.
Dash Cam Laws And Regulations
Before installing, check local laws and rules:
- Placement: Some states limit how much of the windshield you can cover (e.g., California rules on obstruction).
- Privacy and audio: Recording audio may be restricted. In some places, consent rules apply.
- Insurance: Some insurers ask for proof of correct installation to offer discounts.
If you work for Uber or Lyft, check their rules on interior cameras and audio. Also check local privacy regulations (some countries have strict rules on recording people). When in doubt, turn off interior audio or use privacy modes.
Choosing The Right Dash Cam For Diy Installation
To pick the right dash cam, consider these factors:
- Ease of installation: Plug-and-play models are easiest.
- Video quality: Aim for at least 1080p HD. Many use 2K or 4K now.
- Memory card support: 32GB minimum. 64GB–128GB for longer loops.
- Night vision: Important for low-light recording.
- Parking mode: If you want it, plan for a hardwire kit and voltage protection.
- Warranty: Look for at least one year.
- App/Wi‑Fi: Built-in Wi‑Fi or an app makes clip downloads easy.
Tip: Built-in GPS adds speed and location stamps. Cloud backup gives off-site copies but often needs a subscription. For most drivers, loop recording and a G-sensor are the key features to start with.
Example: Installing A Popular Dash Cam Model
Here’s a real example I use when teaching others. The Viofo A119 V3 is a common DIY pick.
- Mount: Adhesive pad behind the rearview mirror.
- Power: USB cable routed along the windshield edge.
- Memory card: 64GB microSD, formatted in the camera.
- Settings: Adjusted on the small menu screen.
- Test: Short video checked for angle and clarity.
Most users install this model in under 20 minutes. Adding a rear camera usually takes another 20–30 minutes, mostly spent routing the cable along the headliner and down the side panels.
Troubleshooting Installation Problems
Common issues and quick fixes:
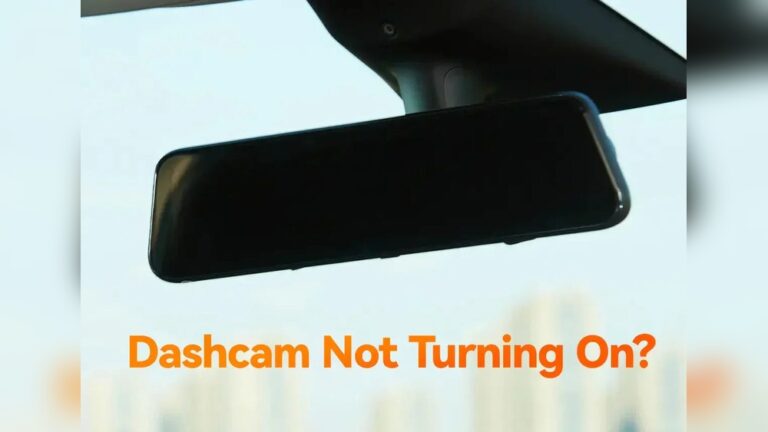
Dash Cam Won’t Turn On
- Check the power cable and connector for damage.
- Test the cigarette lighter with another device to confirm power.
- Try another cable or USB adapter.
No Video Recording
- Format the memory card inside the camera.
- Replace the card with a high-endurance microSD.
Blurry Video
- Clean the lens with a microfiber cloth.
- Avoid angles that point directly into the sun or bright lights.
Poor Audio Quality
- Move the camera away from air vents and HVAC outlets.
- Adjust audio gain or turn off audio in the settings if needed.
Advanced Tips For A Professional-looking Installation
Want the install to look factory-made? Try these pro tips I use on client cars:
- Use trim tools to lift panels and tuck cables behind them.
- Hardwire with a fuse tap and a voltage protection module for safe parking mode.
- Secure wires with cable clips and adhesive mounts under the dash.
- Label each cable so you can trace it later during troubleshooting.
- For leased cars, avoid drilling. Use removable clips and suction mounts instead.
A neat install avoids rattles and keeps airbags and sensors safe. Always follow the car maker’s warnings when working near airbag covers or A-pillars.
Dash Cam Features Worth Considering
Useful features to know about:
- Loop recording: Overwrites old clips so you never run out of space.
- G-sensor: Detects impacts and locks key clips from being overwritten.
- GPS: Records speed and route data for evidence.
- Wi-Fi: Transfer clips to your phone without removing the card.
- Cloud backup: Off-site storage for critical clips (usually subscription).
- Voice control: Hands-free commands for recording or saving clips.
Choose features that match your use. Fleet owners often need GPS and cloud. Everyday drivers will find loop recording and a G-sensor most helpful.

Credit: redtigercam.com
Dash Cam Installation And Vehicle_Types
Installation differs by vehicle type. Consider these notes:
| Vehicle Type | Installation Notes | Difficulty |
|---|---|---|
| Sedan | Easy cable routing, standard windshield | Easy |
| SUV | Longer cables needed for rear camera | Moderate |
| Truck | May require special mounts, longer cables | Moderate |
| Van | Complex cable routing, larger windows | Challenging |
| Motorcycle | Special waterproof dash cams required | Difficult |
For large vehicles, check cable length before you buy. Some manufacturers sell extension cables that match camera models. If you ride a motorbike, use mount kits made for vibration and weather.
Real-world Data: Dash Cam Impact
Dash cams do more than record. They help resolve claims and improve safety.
- AAA says dash cam footage can speed up insurance claims by as much as 50%.
- In the UK, police use dash cam clips in over 10,000 cases a year.
- Rideshare drivers report fewer false claims when they use dash cams.
If privacy is a concern, many cameras let you turn off audio or interior recording. That keeps footage but reduces privacy risks.
How To Maintain Your Dash Cam
Care keeps your camera reliable. Do these checks:
- Clean the lens monthly with a soft cloth.
- Check cables for wear every few months.
- Format the memory card every 1–2 months to avoid file corruption.
- Update firmware when the maker issues updates.
- Review sample footage regularly to confirm image quality.
A well-maintained dash cam lasts longer and gives reliable evidence if needed. I keep a short checklist in my glove box after each install.
When To Consider Professional Help
Consider a pro if any of these apply:
- You’re hardwiring and don’t understand car electrical systems.
- Your vehicle has complex safety systems or airbag wiring in the A-pillar.
- You want a multi-camera setup with cloud backup and fleet features.
- You drive a luxury or leased vehicle and want zero risk of damage.
Professionals offer a warranty on the install. For complex jobs, paying for expertise is worth it.
How Dash Cam Installation Affects Car Warranty
Does a dash cam void your warranty? Not usually.
- Plug-in cameras do not affect warranty.
- Hardwiring can affect warranty if you cut wires or damage fuse boxes.
- Use fuse taps and avoid altering factory wiring to stay safe.
If unsure, ask your dealer. Keep installs reversible. That protects your warranty and resale value.
Dash Cam Installation In Rental Cars
Renting a car for a trip? You can use a dash cam, but follow these tips:
- Use suction mounts, not adhesive pads.
- Avoid hardwiring. Use the cigarette lighter or a USB socket.
- Remove the dash cam before returning the car and clean the glass.
- Ensure no marks are left on trim or glass.
Most rental companies allow non-permanent mounts. Still, check the rental agreement if you’re unsure.
Credit: in.redtigercam.com
Dash Cam Installation And Insurance Benefits
Some Insurance Companies Offer Discounts For Dash Cam Users. Why?
- Dash cams reduce fraud and false claims.
- Footage speeds up crash investigations.
- Some insurers require proof of correct installation before giving discounts.
Ask your insurer about discounts and whether they accept dash cam evidence. It can save money and speed up claims. For more details about dash cams and insurance, visit Insurance Information Institute.
How To Remove Or Reinstall A Dash Cam
Need to remove or move your dash cam? Do this:
- Unplug power and data cables.
- Remove the mount gently. Use dental floss or a plastic card to lift adhesive pads.
- Clean residual adhesive with rubbing alcohol.
- Remove cables carefully to avoid breaking trim clips.
- Store the camera and parts safely for your next install.
If reinstalling, use new adhesive pads if the old ones are weak. Keep a small kit with spare zip ties and a cleaning cloth in your glove box.
Frequently Asked Questions
How Long Does It Take To Install A Dash Cam?
Most single dash cams take 20–30 minutes. Dual or hardwired installs may take 1–2 hours, depending on vehicle complexity.
Do I Need Special_Tools_For_Installation?
Basic tools like a screwdriver and a trim tool help a lot. Many kits include adapter cables and mounting gear. Fuse taps, a multimeter, and voltage protection are needed for safe hardwiring.
Can I Use My Dash Cam At Night?
Yes. Pick a dash cam with good low-light performance or night vision. Newer sensors and wide dynamic range (WDR) help record clear night footage.
Will A Dash Cam Drain My Car Battery?
Cigarette-lighter cameras stop when the car is off. Hardwired cameras with parking mode can draw power when the car is parked. Use a voltage protection unit or set a low-voltage cutoff to protect your battery.
Is Dash Cam Footage Accepted By Insurance Companies?
Most insurers accept dash cam footage as evidence. Rules vary by company and region. Keep clear, time-stamped clips and the original file if possible.
Final Thoughts
Installing a dash cam yourself saves money and gives you control. Most drivers can install a front-facing dash cam in under 30 minutes. Hardwiring and multi-camera setups take more time and care. Follow the steps here, avoid the common mistakes, and keep local laws and insurance rules in mind. With the right parts and a tidy install, your dash cam will give reliable evidence and peace of mind.
If you want, I can walk you through the install for your exact car and model. Tell me the make, model, year, and the dash cam you bought. I’ll give a tailored wiring plan and a short checklist you can use while you work.

I am Julian Drive, an automotive enthusiast and repair expert with over 7 years of hands-on experience in vehicle maintenance. At Carora Hub, I simplify complex car issues into easy-to-follow DIY guides to help drivers stay safe and save on repair costs.