Installing a rear dash cam is one of the smartest upgrades you can make for your vehicle. These cameras record what happens behind your car. They give clear evidence after accidents, deter theft, and help resolve disputes. If you already have a front dash cam, adding a rear camera completes your coverage and raises your peace of mind on every drive.
Many drivers assume installation is hard. I used to think that too. In my experience, with the right tools and a simple plan, most people can install a rear dash cam in a single afternoon. You don’t need advanced technical skills just patience and a steady hand.
This guide shows a clear, step-by-step process to install a rear dash cam. I’ll walk you through choosing the right camera, preparing the car, hiding cables safely, wiring power, and avoiding common mistakes. I also share practical tips I learned on the job to get a neat, reliable result.
Whether you drive every day or only sometimes, a rear dash cam is a practical upgrade. It can save you time, hassle, and money when the unexpected happens.
Why Install A Rear Dash Cam?
A rear dash cam records everything happening behind your vehicle. This footage can be vital in many situations:
- Accidents: If you’re hit from behind, the camera gives clear evidence.
- Parking incidents: It catches hit-and-runs or vandalism while parked.
- Disputes: It helps resolve insurance claims and traffic disagreements.
- Safety: It increases awareness and can discourage reckless drivers.
From my work helping friends and family install dash cams, I’ve seen how useful footage can be. Recent insurance data shows that video evidence can cut claim processing time by up to 60%. In cities, a rear camera can help expose staged accidents—an organized scam where someone deliberately causes a collision. For parents, a rear cam also helps monitor young drivers and coach better habits.
A rear dash cam is more than a gadget. Think of it as a reliable witness. It collects objective, time-stamped evidence. That alone makes it worth the small effort to install.
Choosing The Right Rear Dash Cam
Pick a camera that matches your car, budget, and the features you want. Not all dash cams are the same. I’ll point out the key features that matter and explain trade-offs so you can decide quickly and confidently.
Key Features To Consider
- Video Quality: Aim for at least 1080p. If you want clearer license-plate detail at distance, consider 2K or 4K. Higher resolution needs more storage but gives better evidence.
- Wide Angle Lens: A lens between 120° and 170° captures more of the road and nearby lanes. Wider fields reduce blind spots.
- Night Vision / Low-Light Performance: Good low-light recording matters for night driving and dim parking lots. Look for cameras with large sensors or good night algorithms.
- Parking Mode: This records while parked and can either trigger on motion or impacts (G-sensor). It’s essential if you want protection in parking lots.
- Connectivity: Wi-Fi or Bluetooth makes it faster to download clips to your phone. App control also simplifies setup and firmware updates.
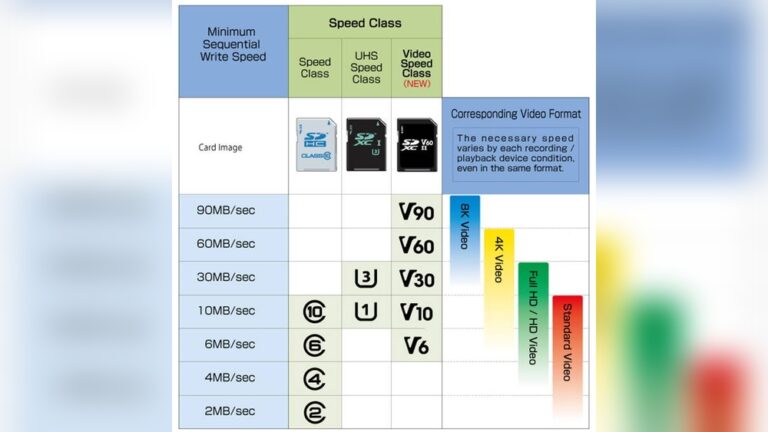
- Storage: Check SD card support. Many cameras work with 32GB–256GB cards. Some models offer cloud backup for extra security.
Types Of Rear Dash Cams
- Single rear cameras: Only record the back. They mount on the rear windshield. Good if you already have a front cam or only want rear coverage.
- Dual-channel dash cams: Include both front and rear cameras in one system. They sync recordings and often share settings in a single app.
- Wireless rear cameras: These use Wi‑Fi or proprietary transmitters. They are easier to install because you avoid long wire runs. Note: wireless models can have compression or signal lag.
Here’s a quick comparison of popular types:
| Camera Type | Installation Complexity | Video Quality | Cost Range |
|---|---|---|---|
| Single Rear Camera | Low | Standard (1080p+) | $40–$120 |
| Dual Channel | Medium | High (2K/4K) | $120–$350 |
| Wireless Rear Camera | Very Low | Medium (720p–1080p) | $60–$180 |
What Beginners Often Miss
Beginners often skip a few checks that matter. I build these checks into every install now to avoid returns and bad footage.
First, check vehicle compatibility. Some cars have heavily tinted rear windows or rear defroster lines. Tint reduces image clarity, and defroster lines can obscure the view. Make sure the mount can sit at the right height and angle. Second, confirm the power needs. Some cameras plug into USB or a cigarette lighter. Others need hardwiring to the fuse box to enable parking mode.
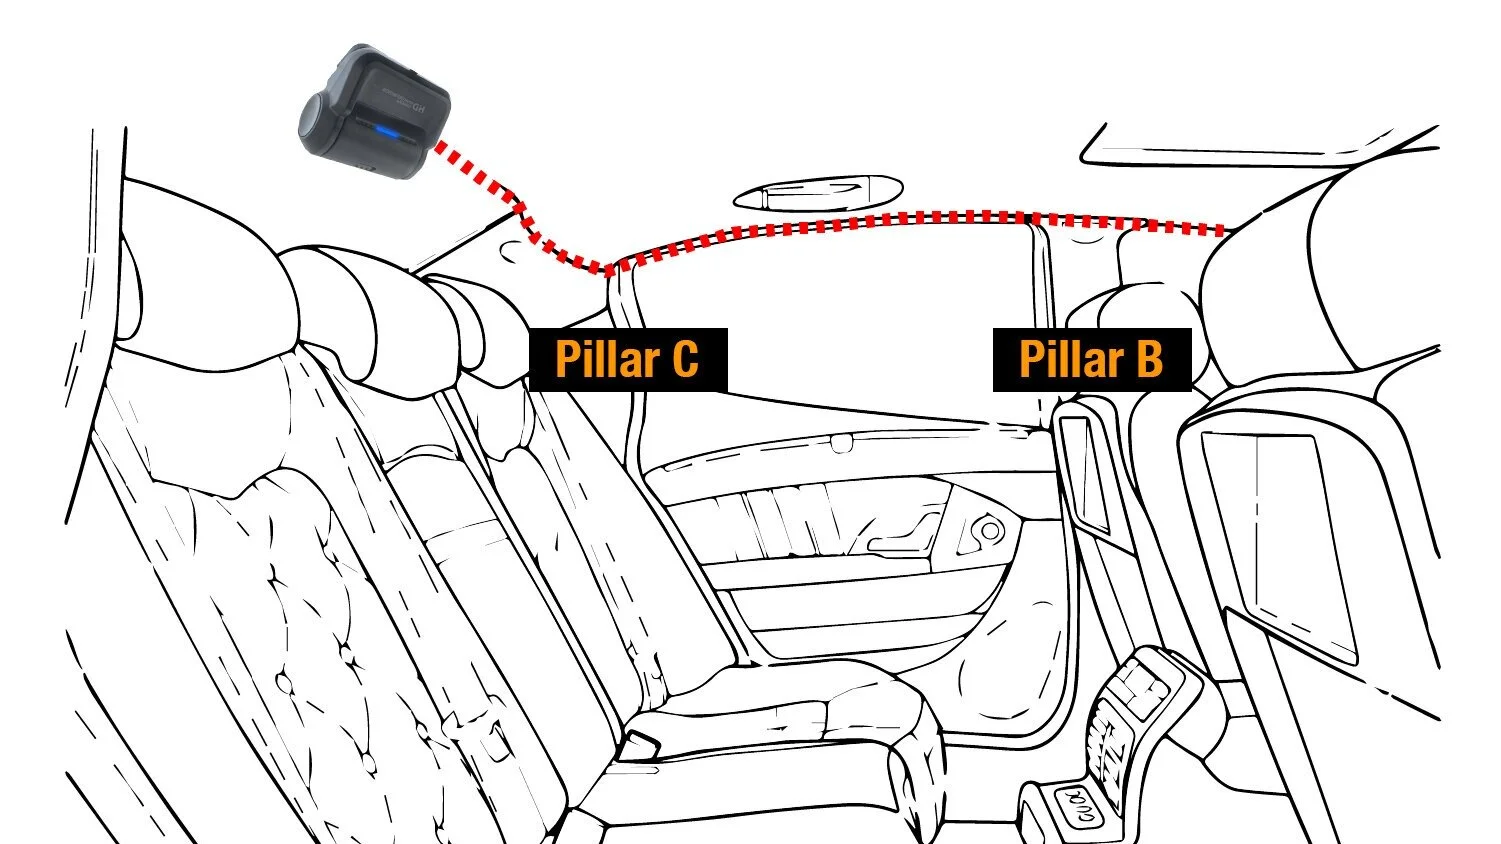
Credit: igrs.itu.edu.tr
Preparing For Installation
Good installs start before you touch a tool. Gather materials, inspect the rear area, and plan cable routes. A small pre-check saves time and keeps the result neat.
Tools And Materials You’ll Need
- Rear dash cam (with power cable and mounting kit)
- Cable clips or adhesive tape for cable management
- Trim removal tool (plastic, to avoid scratches)
- Microfiber cloth for cleaning the glass
- Screwdriver (if needed for mounting)
- Zip ties (for neat cable routing)
- SD card (if not included)
- User manual for your camera
Optional but helpful:
- Multimeter (for checking power connections)
- Fuse tap (if hardwiring)
Checking Your Car’s Rear Area
Look at the rear windshield. Can you mount the camera in the center, high enough to see the road and the car’s bumper? Avoid spots blocked by the rear wiper, defroster lines, or heavy tint. If your car is a hatchback or SUV, the cable path may cross the trunk hinge. Note that now—plan a small slack loop to avoid stress on the cable.
Also check the headliner and side pillars for airbags or sensors. Never route wires through airbag zones—these are marked with “AIRBAG” tags or labels in many cars.
Cleaning And Preparing
Clean the inside of the rear windshield with a microfiber cloth. Remove dust, fingerprints, and grease. Adhesive mounts stick best to dry, clean glass. If you plan to use a suction cup, clean both the cup and the glass for a solid seal.
Step-by-step Installation Guide
Follow these steps for a safe and tidy installation. I recommend testing at each stage before finalizing everything.
Step 1: Mounting The Rear Dash Cam
- Choose the mounting spot: Place the camera in the center of the rear windshield, as high as possible. This gives the best view and avoids blind spots.
- Attach the mount: Use the adhesive pad or suction cup (depending on your model). Hold it firmly for 30–60 seconds. Avoid mounting on heated lines or tinted areas.
- Connect the camera: Attach the camera to the mount. Adjust the angle so it points slightly downward, covering the road and bumper.
Non-obvious tip: In cold garages, adhesive can be stiff. Warm the pad for a few seconds with a hair dryer to improve bonding. I do this on cold days and it helps the mount stay put.
Step 2: Routing The Cable
Running the cable neatly is the hardest part. Plan the path first. A tidy run looks professional and avoids rattles or damage.
- Plan your route: Decide if you’ll run the cable along the roof liner, side panels, or under the floor mats. Roof liner is easiest for sedans; side panels work well for hatchbacks.
- Hide the cable: Use a trim removal tool to gently lift the headliner or panels. Slide the cable underneath, securing it with cable clips or zip ties every few feet.
- Avoid airbags: Never run cables through areas with curtain airbags. These are usually marked with “AIRBAG” tags.
- Reach the front: Continue routing the cable to the dashboard or fuse box, depending on the power method.
Here’s a table showing cable routing options for different car types:
| Car Type | Best Routing Path | Difficulty Level |
|---|---|---|
| Sedan | Roof liner | Easy |
| Hatchback | Side panels | Medium |
| SUV | Under floor mats | Medium |
| Van | Combination (roof + side) | Hard |
Hidden insight: Leave slack at the trunk hinge. I always form a small loop near the hinge so the cable won’t pull when the trunk opens. That small loop reduces stress and avoids future wire failure.
Step 3: Connecting Power
Rear dash cams need power. How you connect depends on your camera and whether you want parking mode.
- USB power: Some cameras plug into a USB port in the dashboard. Route the cable to the front, plug it in, and you’re done.
- Cigarette lighter adapter: Plug the cable into the car’s 12V socket. This is easy but may block your lighter for other uses.
- Hardwiring: For parking mode or a permanent install, connect to the fuse box. Use a fuse tap and follow your car’s wiring diagram.
Expert tip: Use a multimeter to test the fuse or power line before you tap it. That verifies voltage and prevents accidental battery drain. If you’re unsure about the fuse layout, consult the car manual or a mechanic.
Step 4: Setting Up The Camera
With hardware in place, configure the camera. Good settings make footage useful and easy to find.
- Insert SD card: Make sure it’s formatted for your camera. Most cams use FAT32 or exFAT.
- Adjust settings: Set date and time, video resolution, and loop recording length. Turn on parking mode and set motion or impact sensitivity if available.
- Connect to phone/app: If your camera has Wi-Fi, install the app and link your phone. This makes it simple to download clips and update firmware.
- Test recording: Start the car, record a short clip, and review footage. Check angle, clarity, and exposure.
Beginner mistake: Glare and reflections can ruin a clip. If you see reflections, try a slight angle change. A small anti-glare film or moving the camera a few inches can fix it.
Common Installation Mistakes And How To Avoid Them
A careful install avoids common errors. I list the usual mistakes and how to fix them. Use this as a quick checklist while you work.
Mistakes To Watch For
- Mounting too low or off-center: Limits the view and misses key events.
- Loose cables: Rattles, pinched wires, or interference with airbags can result from poor routing.
- Ignoring window tint: Heavy tint or shaded areas reduce image quality.
- Wrong power source: Tapping the wrong fuse can cause battery drain or electrical issues.
- Skipping test recording: Always check footage before calling the job done.
Solutions
- Use cable clips and zip ties for neat routing and to prevent movement.
- Test placement before mounting permanently—use tape to hold the camera temporarily while you record a test clip.
- Check your car’s manual for safe areas to run cables and for fuse box diagrams.
- Use a fuse tap designed for dash cams to protect the car’s electrical system.
- Review footage in different lighting conditions—day, night, and rain—to ensure consistent performance.
Practical Tips For A Professional Result
Small details make a big difference. These tips will get your install looking and working like it was done by a pro.
Cable Management
- Route cables along natural lines—window edges, under rubber seals, and behind trim pieces.
- Hide excess cable behind panels or under seats. Coil spare length and secure it with a zip tie.
- Use zip ties to bundle cables, but don’t overtighten them. Leave a little flex to avoid pinching wires.
Mounting Tricks
- Mark the mounting spot with a small piece of tape before attaching. This gives you a visual reference and avoids repositioning adhesive mounts.
- If using a suction cup, clean the glass and apply a tiny bit of water for a better seal. Press firmly and test the hold.
- For adhesive mounts, press firmly and allow at least 1 hour for the adhesive to set before driving. I often wait overnight when possible for a permanent bond.
Safety Steps
- Disconnect the car battery if you’re hardwiring to avoid accidental shorts when working on the fuse box.
- Avoid routing cables through moving parts like door or trunk hinges.
- After installation, watch for warning lights. Some cars detect when panels are removed. Reconnect anything you unplugged carefully.
Hidden insight: Some cameras record mirrored footage by default. If your clips look reversed, enable “mirror” mode in settings to fix orientation.
Testing Your Rear Dash Cam
Testing is crucial. I test every install in varied conditions to confirm reliability and clarity.
How To Test
- Drive in different conditions: Record in daylight, at night, and during rain. Check clarity and exposure.
- Review playback: Watch clips on your phone or computer. Look for blind spots, glare, or shaky footage.
- Check parking mode: Park your car and trigger motion or impact to see if the camera records while off.
- Test emergency recording: Use any manual “lock” button to save clips and confirm they can’t be overwritten.
If you find problems, adjust the angle or change settings. Also check if firmware updates are available—updates often improve stability and image processing.
Maintaining Your Rear Dash Cam
A dash cam is useful only if it works. Regular maintenance keeps the system ready when you need it most.
Maintenance Steps
- Clean the camera lens and rear glass monthly to avoid dust or smudges that blur footage.
- Check cable connections every few months. Look for pinched or loose plugs.
- Replace the SD card annually. SD cards wear out and old cards can corrupt files.
- Update firmware when the manufacturer releases a stable update. Firmware fixes bugs and improves performance.
Expert advice: Save important clips to your computer or cloud. SD cards can fail without warning. I copy key clips after any incident and keep backups for insurance purposes.
Comparing Popular Rear Dash Cam Models
With many options on the market, pick a model that fits your needs. Below are three well-known choices based on resolution, night performance, parking mode, and price.
| Model | Resolution | Night Vision | Parking Mode | Price |
|---|---|---|---|---|
| Vantrue N2 Pro | 1080p | Excellent | Yes | $170 |
| Viofo A129 Duo | 2K | Good | Yes | $140 |
| Garmin Dash Cam Mini 2 | 1080p | Fair | No | $120 |
Non-obvious insight: Some models offer cloud backup. If your SD card is stolen or damaged, cloud backup keeps footage safe. Consider a model with cloud options if you frequently park in public areas.
Legal Considerations For Dash Cam Use
Dash cams are legal in most places. Still, laws vary by region. Know the rules for recording and mounting in your area.
- Privacy: Avoid recording private conversations or spaces where people expect privacy. Laws on consent differ between regions.
- Windshield placement: Some states limit where cameras can be mounted on the glass. Follow local regulations to avoid fines.
- Footage use: Video can be used as evidence in disputes, but it should be unedited and time-stamped to be most effective.
Check your local laws before installing. For US regulations and general background, see the Wikipedia dash cam page.

Credit: redtigercam.com
Troubleshooting Common Issues
Even careful installs can run into problems. Below are common issues and quick fixes I use regularly.
Camera Not Powering On
- Check the connection and the fuse.
- Try a different power source (USB or cigarette lighter).
- Test the cable with a multimeter to verify voltage and continuity.
Blurry Or Dark Footage
- Clean the lens and the glass.
- Adjust the camera angle slightly to reduce glare.
- Change exposure settings or enable better night mode if your camera supports it.
Recording Stops Suddenly
- Replace the SD card—some cards degrade faster than others.
- Update camera firmware to fix known recording bugs.
- Check for overheating. If the camera runs hot, move it slightly or provide airflow.
No Parking Mode Recording
- Verify the camera is hardwired if parking mode requires constant power.
- Enable parking mode in the camera settings and set sensitivity levels.
- Test motion sensitivity and adjust to reduce false triggers or missed events.
FAQs Of How to Install a Rear Dash Cam
How Long Does It Take To Install A Rear Dash Cam?
Most installs take 1 to 2 hours for beginners. Hardwiring or routing cables through complicated trims can add time. Gathering tools and planning cable paths are the most time-consuming parts. I usually budget 2 hours the first time to avoid rushing.
Can I Install A Rear Dash Cam Myself Without Professional Help?
Yes. Most people can install a rear dash cam. Read the manual and follow this guide. If you’re unsure about hardwiring, ask a mechanic for that step or buy a hardwire kit with clear instructions.
Will A Rear Dash Cam Drain My Car Battery?
If hardwired, parking mode can use some power. Modern dash cams use low energy when idle. Choose a low-power model and set parking mode to only record impacts or significant motion to reduce battery drain. If you want extra protection, use a battery discharge prevention device or a dedicated dash cam battery pack.
More on fuses and diagrams at this link: fuse box.
What’s The Best Place To Mount A Rear Dash Cam?
Mount the camera in the center of the rear windshield, as high as possible. Avoid heavy tint, heated lines, or places a wiper will cross. The camera should see the road and your bumper. That view helps with parking incidents and rear collisions.
How Do I Access Footage From My Rear Dash Cam?
Most dash cams store footage on an SD card. Remove the card and use a computer or phone adapter to view files. If your camera supports Wi-Fi or Bluetooth, you can access clips through the manufacturer’s app. I prefer copying important files to a computer for safekeeping and insurance claims.
Installing a rear dash cam is a practical, useful project. With a good plan, the right tools, and careful routing, you can produce a clean, reliable installation. Take your time, follow each step, and you’ll gain useful protection every time you drive. If you need help choosing a model or wiring options, I’m happy to answer specific questions based on your car make and model.

I am Julian Drive, an automotive enthusiast and repair expert with over 7 years of hands-on experience in vehicle maintenance. At Carora Hub, I simplify complex car issues into easy-to-follow DIY guides to help drivers stay safe and save on repair costs.