Are your leather car seats looking dry, cracked, or worn out? If so, you’re not alone—and the good news is, you don’t have to replace them just yet.
I’ve worked on many cars and fixed a lot of tired leather seats. With a few simple steps, you can bring back that smooth, rich feel. Picture sliding into your car and feeling soft, well-maintained leather every time. This guide shows easy, effective ways to repair dry or cracked leather seats. You’ll save money and keep your car’s interior looking sharp.
Ready to restore your leather seats to their former glory? Let’s dive in—step by step, in plain language, with tips from my hands-on experience.
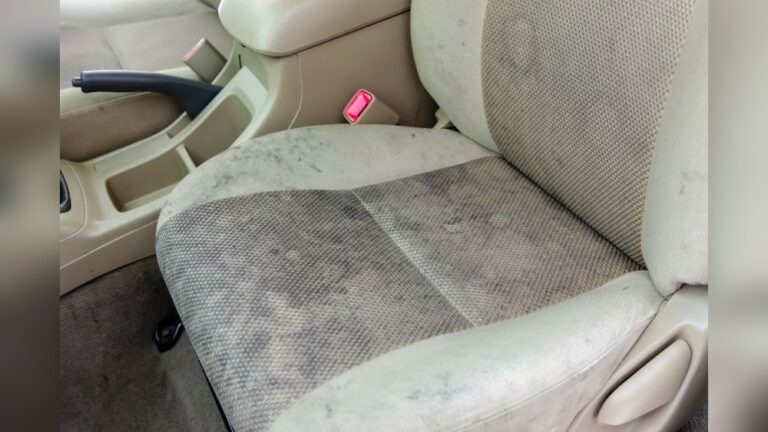
Credit: www.reddit.com
Causes Of Dry And Cracked Leather Seats
Leather car seats add luxury and comfort. Over time, they can dry out and crack. Knowing the causes helps you stop more damage and keep leather soft. Below I list the main reasons leather fails and what to watch for.
Effects Of Sun Exposure
Sunlight is hard on leather. UV rays break down leather fibers and fade color. Strong sun dries the leather and strips natural oils. Cracks often start where the leather gets the most sun. If you park in the sun a lot, expect faster wear.
Impact Of Temperature Changes
Heat and cold both harm leather. Heat dries and shrinks the hide. Cold makes it stiff and brittle. Repeated swings in temperature weaken the leather’s structure over time. That makes small cracks grow into deeper splits.
Role Of Lack Of Maintenance
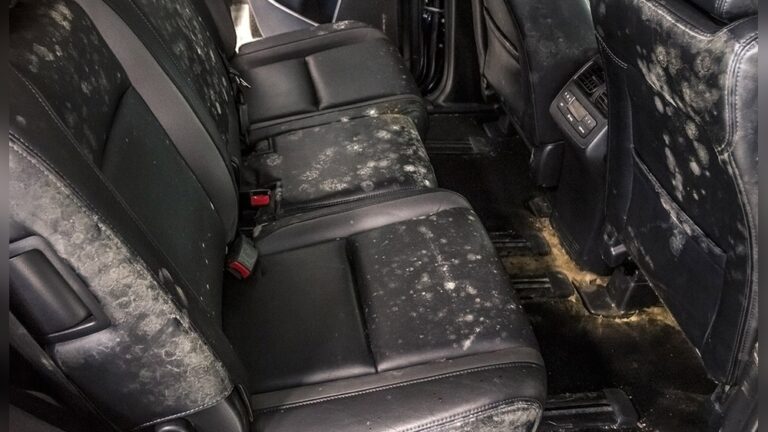
Leather needs regular care. Dirt, body oils, and food residues sit on the surface and wear it down. Without cleaning, conditioners and oils can’t penetrate properly. Skipping maintenance lets the leather dry, which speeds up cracking.
Leather types and why some age faster
Not all leather reacts the same. Aniline and semi-aniline leather are softer but more prone to stains and fading. Pigmented or coated leather resists stains but can crack if the top layer is damaged. Knowing your seat type helps you pick the right cleaner and repair method.
Credit: www.youtube.com
Tools And Materials Needed
Fixing dry or cracked leather car seats takes the right tools. The right products clean, repair, and protect. I always prepare a small kit before I start. That saves time and gives better results.
Leather Cleaner And Conditioner
Use a pH-balanced leather cleaner to remove dirt and oils. Avoid household cleaners with solvents. A leather conditioner restores oils and keeps the hide supple. Look for products labeled for automotive leather. They are made for seat finishes and topcoats.
Repair Kits And Fillers
Leather repair kits include filler compounds, colorants, and sometimes a grain paper. Fillers build up low cracks and make surfaces smooth. Colorants help you match the seat color. Choose a kit matched to your leather type and color family.
Application Tools
Soft microfiber cloths, foam applicators, small spatulas, fine-grit sandpaper, and small brushes or airbrush tools are handy. I also keep nitrile gloves and masking tape to protect surrounding trim. Good tools make the work neat and fast.
Quick tools checklist
- pH-balanced leather cleaner
- Leather conditioner / restorer
- Leather repair filler and flexible adhesive
- Leather dye or colorant (match sample first)
- Soft cloths, sponges, spatulas, and fine sandpaper (400–600 grit)
- Nitrile gloves and masking tape
Safety and prep notes
Work in a well-ventilated area. Test any product on a hidden patch first. Keep solvents and dyes away from children and pets. Read product directions—drying times and layering make a big difference.
Preparing Leather Seats For Repair
Preparation is the most important step. Clean, dry leather accepts repair materials much better. If you skip prep, fillers won’t stick and dyes won’t blend. Take your time here for lasting results.
Below I share my simple prep routine that I use every time.
Cleaning The Surface
Wipe seats with a soft cloth first. Apply the leather cleaner in small areas. Work gently, using circular motions. Remove grime, sweat residue, and old conditioners. Repeat until the cloth comes away clean.
Removing Dirt And Oils
Oils can stop repair creams from bonding. Use a leather-safe degreaser or an alcohol-based prep wipe designed for leather. Apply softly, let it sit a minute, then wipe off. This helps fillers and dyes stick evenly.
Drying Techniques
Let the leather dry naturally in shade. Do not use heat like hair dryers—heat can shrink the leather and make cracks worse. Pat excess moisture away with a clean cloth. Wait until the leather is fully dry before applying filler or dye.
Test on a hidden area
Always test cleaner and dye on a hidden seam or under the seat. This confirms color match and checks that the product won’t strip the top finish.
Repairing Small Cracks And Dry Spots
Small cracks and dry spots are easy to fix early. I repair these first, because they can grow. With the right steps, you can smooth the area and restore color without replacing upholstery.
Applying Leather Conditioner
Start with clean leather. Apply a conditioner with a soft cloth. Work it into small cracks. Let it sit 15–20 minutes so oils penetrate. Wipe off excess and check the area. Repeat monthly or every 3 months for light use.
Using Leather Repair Filler
For deeper surface cracks, use a leather repair filler. Use a small spatula to press filler into cracks. Fill in layers for deeper gaps. Let each layer dry fully. This seals the crack and creates a flat surface for dye or finish.
Sanding And Smoothing
When the filler cures, sand gently with fine-grit sandpaper. Use light, circular strokes. The goal is a smooth, even surface—not to remove leather. Clean dust away with a dry microfiber cloth before dyeing or conditioning again.
How many treatment rounds do I need?
Often one cycle of cleaning, filler, sanding, dye, and conditioner is enough for small cracks. For worse cases, repeat until the surface looks even and the color blends. Patience pays off—rushed layers can fail.
Fixing Deep Cracks And Tears
Deep cracks and tears need more work. These repairs can restore function and look. Expect more steps and longer dry times. If you follow the process, results can be very durable.
Patch Application
Clean the damaged area and let it dry. Cut a backing patch a little bigger than the tear. Use a strong leather adhesive to attach the patch under the tear. Smooth the tear down onto the patch and remove air pockets. The patch supports the repair from underneath.
Color Matching Tips
Match the dye to your seat color. Test on a hidden area. Apply dye in thin coats and let each dry. Use a small brush or airbrush for a natural finish. Blend edges carefully so the repair fades into the surrounding leather.
Sealing The Repair
Finish with a clear leather sealer or topcoat. This protects dye and filler from wear and UV. Apply evenly and allow full cure time. After sealing, condition the seat regularly to keep the leather flexible.
When to use professional-grade backing
For very large tears or heavy-use seats, use a woven backing fabric and heavy-duty adhesive. This gives long-term support and prevents the tear from reopening. Professionals use heat-setting adhesives and stitching when needed.
Preventing Future Damage
After repair, prevention stops the problem from coming back. Simple habits keep leather soft and delay new cracks. I follow a few easy rules and share them here.
Regular Cleaning Routines
Clean seats regularly to remove dirt and oils. Use a soft cloth and a leather cleaner. Avoid harsh chemicals that strip oils. A light clean every 2–4 weeks and a conditioner every 3–6 months works for most cars.
Using Protective Covers
Seat covers protect from spills and heavy wear. Choose breathable covers. They cut down direct sweat and friction. For daily driving, a cover is an easy, low-cost barrier.
Parking In Shade
Park in shade or use a sunshade. Sunlight dries leather and fades color. Shade keeps interiors cooler and preserves natural oils. Over time, this simple step makes a big difference.
Use UV protectant sprays
There are leather-safe UV protectants that help block sun damage. Use them after cleaning and conditioning for added protection, especially in hot climates.
When To Seek Professional Help
Some jobs need a pro. If you’re not getting good results, it’s smart to consult a leather repair specialist. Professionals have tools and techniques that DIY kits don’t offer.
Signs Repairs Are Beyond Diy
Look for deep cracks that keep reopening, large tears, peeling or flaking topcoat, and severe color loss. If the leather structure is breaking down, DIY fixes won’t last long. That’s when pro help pays off.
Choosing A Reputable Service
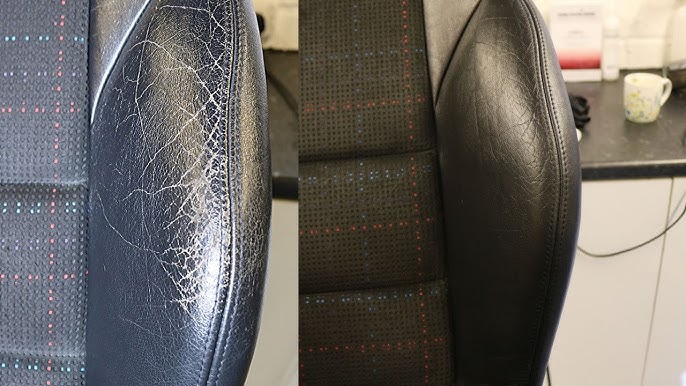
Pick a shop with good reviews and samples of past work. Ask if they specialize in automotive leather. Ask what products and processes they use. A good shop shows before-and-after photos and explains their warranty.
Cost Considerations
Professional repair costs more than a DIY kit but usually lasts longer. Prices vary by damage size, leather type, and labor. Get multiple quotes and ask what’s included. Often a solid repair increases comfort and resale value.
Credit: www.theleathercolourdoctor.co.uk
Frequently Asked Questions
How Do I Repair Cracked Leather Car Seats?
Start by cleaning the surface well. Use a leather filler to fill cracks, then sand the filler smooth when dry. Apply leather dye or colorant to match the seat. Finish with a leather conditioner and a clear topcoat. For best results, test products on a hidden area first.
What Causes Leather Car Seats To Dry Out?
Leather dries from sun exposure, high heat, and lack of conditioning. Dirt and body oils also damage the surface over time. Regular cleaning and conditioning keep leather supple and reduce cracking.
Can I Fix Leather Seats Without_Professional_Help?
Yes, you can fix minor cracks and dryness at home. A good leather repair kit with cleaner, filler, dye, and conditioner works well for small damage. For big tears, severe color loss, or structural issues, professional help is recommended.
How Often Should I Condition Leather Car Seats?
Condition leather every 3–6 months. If your car sits in sun often or gets heavy use, condition more often. Frequent conditioning replenishes oils and keeps leather flexible and less likely to crack.
Conclusion
Dry or cracked leather car seats will last longer with simple care. Clean gently, use a pH-balanced cleaner, and apply a good leather conditioner regularly. Repair small cracks early with filler and dye to avoid bigger jobs later. For deep damage, a professional repair gives the best long-term result.
Treat your leather seats well, and they will stay comfortable and look great for years. Start with a careful inspection, follow the steps above, and don’t be afraid to seek expert help when needed. Your car’s interior is worth the time—enjoy a nicer ride tomorrow.

I am Julian Drive, an automotive enthusiast and repair expert with over 7 years of hands-on experience in vehicle maintenance. At Carora Hub, I simplify complex car issues into easy-to-follow DIY guides to help drivers stay safe and save on repair costs.