Every day, more drivers choose to install dash cams in their vehicles. These small cameras record what happens on the road. They protect you from fraud. They help in accident disputes. They also capture unexpected moments. As dash cams become more common, one big question keeps coming up: Do dash cams need professional installation?
I’ve installed several dash cams myself and I’ve watched many professionals work. So I’ll share what I’ve learned. Some dash cams really are plug-and-play. Others need careful wiring, hidden routing, or calibration. The right choice depends on the camera, the car, and what you want the camera to do.
Deciding whether to pay for professional installation is not only about saving money. It’s about safety, camera performance, and long-term reliability. In this article, I break down dash cam types, explain what installation involves, and help you decide the best path for your situation.
I’ll also cover common mistakes I’ve seen, real examples, and myths that confuse many drivers. If you’re buying a dash cam—or you already have one and aren’t sure how to install it—this guide will help you make a confident choice.
What Is A Dash Cam And Why Does Installation Matter?
A dash cam is a small camera mounted in your car. It records video of the road ahead, and sometimes behind or inside the car. Dash cams are used for:
- Evidence in accidents: They help prove what happened and when.
- Protection against fraud: They reduce the risk of staged claims and fraudulent reports.
- Capturing events: They record scenery, traffic incidents, or unexpected moments worth saving.
How a dash cam is installed affects how well it works. Poor installation can cause:
- Loose wires that block your view or distract you.
- Mounts that vibrate, move, or fall off.
- Power problems that stop recording—especially important for parking mode.
A well-installed dash cam is unobtrusive, reliable, and safe. That’s why installation matters for both daily drivers and fleet vehicles.
Types Of Dash Cams And Their Installation Needs
Dash cams come in several styles. Each has different installation needs and wiring requirements. Below I break down the main types and what to expect during installation.
1. Simple Plug-and-play Dash Cams
These are the most basic models. They:
- Plug into the cigarette lighter socket or a 12V/USB port.
- Mount with a suction cup or adhesive mount on the windshield.
- Require no permanent wiring inside the car.
Installation steps (easy):
- Stick the camera to the windshield.
- Plug the power cable into the socket.
- Adjust the camera angle and start recording.
Most people can install these in under 10 minutes. No special tools or electrical knowledge are needed. Plug-and-play is great for renters or if you want to move the camera between cars.
2. Hardwired Dash Cams
Hardwired dash cams connect directly to the car’s fuse box or battery. They:
- Enable parking mode (recording while the car is off).
- Hide wires for a cleaner, factory look.
- Need more technical skill or a professional installer.
Installation steps (complex):
- Identify the correct fuse for constant power, accessory (ACC), and ground.
- Use a hardwire kit or fuse tap to connect without cutting stock wiring.
- Route wires behind panels and secure them with trim tools and clips.
- Mount the camera in the right place and test parking mode settings.
Hardwiring gives the best results for long-term use. But mistakes—like choosing the wrong fuse—can lead to battery drain or disabled systems. I’ve seen battery drains from wrong fuse choices. That’s why many drivers choose professional hardwiring.
3. Dual-channel Dash Cams
Dual-channel models include a front camera and a rear camera. They record both directions simultaneously. Installation requires:
- Mounting both front and rear cameras securely.
- Routing a cable from the front to the rear—often under trim, along door sills, or through the headliner.
- Powering the unit (usually via hardwire or the lighter socket for front only).
Running the rear cable can be tricky, especially in larger vehicles. It helps to know panel removal techniques or hire a pro to avoid ripping clips or scratching paint.
4. Advanced Dash Cams With Gps And Cloud Features
Advanced dash cams add features like:
- GPS for location and speed logging.
- Wi‑Fi, Bluetooth, or cloud upload for remote video access.
- ADAS (Advanced Driver Assistance Systems) and lane/forward-collision warnings.
Installation steps:
- Place antennas or GPS modules where they have a clear sky view.
- Connect GPS and ADAS cables and calibrate sensors if needed.
- Set up apps, cloud accounts, and firmware updates.
These features sometimes need special placement or calibration. For example, ADAS may require precise mounting angles. I recommend professionals for ADAS setup to ensure accuracy.
Comparing Dash Cam Types And Installation Difficulty
Here’s a quick comparison of the main types and how hard they are to install:
| Dash Cam Type | Installation Time | Tools Needed | Skill Level |
|---|---|---|---|
| Plug-and-Play | 5-15 minutes | None | Beginner |
| Hardwired | 30-90 minutes | Basic tools | Intermediate |
| Dual-Channel | 60-120 minutes | Basic tools | Intermediate/Advanced |
| Advanced (GPS/Cloud) | 45-120 minutes | Special tools | Advanced |
In short: the more features you want—parking mode, GPS, ADAS, rear cameras—the harder the installation. If you value a clean look and full function, consider professional help.
What Does Professional Installation Involve?
Professional dash cam installation is more than just sticking a camera on the windshield. Here’s what a good installer usually does:
- Assess your vehicle: They find the best camera location and safe wire routes specific to your vehicle model.
- Hide wires: Cables are routed behind A-pillars, under headliners, and behind kick panels for a near-factory look.
- Connect power safely: They use a fuse tap or hardwire kit and choose the right fuses (ACC, ignition, or constant) to avoid battery drain.
- Test features: Parking mode, GPS, loop recording, G-sensor sensitivity, and Wi‑Fi/cloud links are all tested.
- Calibrate cameras: Angles and ADAS sensors are adjusted and calibrated for best accuracy.
- Provide warranty: Many installers include a warranty for the installation work.
A typical professional install takes 1–2 hours depending on car and camera complexity. For luxury models or complex dual-channel setups it can take longer.
Diy Dash Cam Installation: Pros And Cons
Many drivers install dash cams themselves. Below are the main pros and cons based on my experience and common installer feedback.
Pros
- Save money: Avoid installation fees.
- Learn about your car: You’ll understand dash cam features, wiring, and settings.
- Flexible timing: Install when it suits you, without scheduling a shop visit.
Cons
- Risk of mistakes: Wrong wiring can cause battery drain or electrical faults.
- Visible wires: Harder to hide cables cleanly without trim tools.
- Limited features: Parking mode or ADAS may not work correctly unless installed and calibrated.
- Potential warranty issues: Some manufacturers may not cover damage from DIY hardwiring.
Common Diy Mistakes
Two common errors I see:
- Using the wrong fuse: Choosing a fuse that looks right but actually controls other systems. This can drain the battery or disable features.
- Poor cable routing: Wires left loose can snag, block airbags, or create noise when driving.
Professional Installation: Pros And Cons
Professional installation has clear benefits and trade-offs. Here’s my summary from hands-on installs and customer feedback.
Pros
- Clean finish: Wires hidden, camera placed neatly behind the rearview mirror.
- Safe wiring: Correct fuse selection and secure grounding reduce battery and electrical risks.
- Full features enabled: Parking mode, GPS, ADAS, and cloud upload configured and tested.
- Peace of mind: Installer warranty and easier troubleshooting if something goes wrong.
Cons
- Cost: Professional install can cost $50–$200 depending on complexity and car model.
- Time: You may need to schedule an appointment and wait for service.
- Less flexibility: Minor adjustments require another shop visit or call.
When Is Professional Installation Needed?
Consider pro installation when:
- You want reliable parking mode without battery risk.
- You own a dual-channel or advanced dash cam with GPS/ADAS.
- Your car has complex panels (luxury models, trucks, or SUVs).
- You are not comfortable with car electronics or removing trim safely.
If any of these apply, the cost of professional work can be worth it for safety and reliability.
Real-world Examples And Case Studies
Here are some real stories that show the difference between DIY and professional installs.
Example 1: Plug-and-play Success
Sarah drives a Toyota Corolla. She bought a simple dash cam that plugs into the lighter socket. She installed it herself in 10 minutes. The camera works well, but the cable hangs down and sometimes gets in the way. For her needs—basic recording—DIY was fine.
Example 2: Hardwiring Trouble
John wanted parking mode for his Subaru. He tried to hardwire his dash cam, but connected the wire to the wrong fuse. His battery drained overnight, and the car wouldn’t start. He had to pay for roadside assistance and a shop visit. A pro would have avoided that fuse mistake.
Example 3: Professional Installation Pays Off
Linda drives a BMW. She bought a dual-channel dash cam with GPS. She chose professional installation. The cameras were mounted perfectly, wires were hidden, and parking mode worked from day one. Later, a minor accident happened and the dash cam footage helped her insurance claim. The installer also provided troubleshooting support—very valuable.
Example 4: Diy With Advanced_Features
Tom installed a dash cam with Wi-Fi and GPS in his Honda. He mounted the camera and connected power, but couldn’t set up the GPS correctly. The location feature never worked. He had to visit a shop for help. Lesson: DIY is fine until you need app/cloud/GPS setup and calibration.

Credit: dnhdashcamsolutions.com
Comparing Diy And Professional Installation: Cost, Time, And Quality
Here’s a side-by-side view to help you decide:
| Aspect | DIY Installation | Professional Installation |
|---|---|---|
| Cost | $0 (except tools) | $50-$200 |
| Time | 15-120 minutes | 60-120 minutes |
| Quality | Varies (visible wires, possible errors) | High (hidden wires, optimal setup) |
| Features Enabled | Basic; may miss advanced functions | All functions enabled |
| Warranty | Usually none | Often included |
How To Decide: Do You Need Professional Installation?
Answering a few quick questions will make the choice clear.
1. Dash Cam Type
If you have a simple plug-and-play dash cam, professional installation is not needed. If you want parking mode, dual-channel recording, ADAS, or cloud features, pro installation is helpful.
2. Vehicle Type
Compact cars are easier for DIY installs. Luxury cars, trucks, and SUVs often have tighter trim and hidden wiring that make DIY harder and riskier.
3. Your Skills And Tools
If you have experience with car electronics and a trim removal kit, you may handle hardwiring. If not, consider a pro to avoid mistakes.
4. Your Goals
If you want a clean look, hidden wires, and full features, go professional. If you only want basic recording and portability, DIY is fine.
5. Budget
Professional installation costs more upfront, but it may save money by avoiding damage, battery problems, or rework. Think of it as insurance for proper setup.
Credit: www.soundzgood2me.com
Step-by-step Guide: Diy Dash Cam Installation
If you choose to install yourself, follow these steps for a safe, clean setup.
Step 1: Read The Manual
Every dash cam model is different. Read the manual before you start. Manuals include wiring diagrams, fuse suggestions, and mounting guidance.
Step 2: Choose The Mounting Location
Pick a spot that:
- Gives a clear view of the road.
- Doesn’t block your line of sight.
- Is near a power source or routing path.
Behind the rearview mirror is usually best: unobtrusive and central.
Step 3: Clean The Windshield
Use glass cleaner to remove dust and oil. This helps the suction cup or adhesive stick better. Allow the adhesive to bond for several minutes before driving.
Step 4: Mount The Dash Cam
Attach the mount securely. Make minor angle adjustments while parked. Ensure the lens is level with the horizon to avoid recording too much sky or too much dash.
Step 5: Route The Power Cable
For lighter-socket power, run the cable along the headliner and tuck it into the A-pillar gap. Use trim tools to avoid damaging clips. For hardwiring, find the fuse box and use a hardwire kit or fuse tap. Connect to the right fuse: ACC for switched power or constant for parking mode.
Step 6: Hide Wires
Push cables behind panels using a plastic trim tool. Secure cables with zip ties or adhesive clips. Avoid blocking airbags or sensors, and keep wires away from moving parts.
Step 7: Connect Power
Plug into the lighter socket or connect the hardwire kit to the fuse box and ground. Turn on the car to check the camera powers up and starts recording.
Step 8: Adjust Camera Angle
Record a short test clip while parked. Review the footage to confirm the horizon is level and the road ahead is framed correctly.
Step 9: Test Features
Test loop recording, G-sensor impact detection, parking mode (if applicable), GPS logging, and Wi‑Fi pairing with the app. Update firmware if available.
Step 10: Review Footage
Play back the recorded video to check image quality, sound (if needed), and timestamps. Check that GPS metadata is present if you expected it.
Tips For A Safe And Effective Installation
- Use a plastic trim tool to avoid damaging panels.
- Don’t block airbags or sensors when routing cables.
- Avoid placing the camera where it can distract your view.
- If hardwiring, use a fuse tap instead of cutting factory wires.
- Consider a dedicated parking mode battery pack or battery protection device for long-term parking recording.
- Always check local laws about dash cam placement and windshield obstructions.
- If unsure, ask for help or watch step-by-step video tutorials for your vehicle model.
Common Dash Cam Installation Myths
Let’s clear up common myths I hear from drivers and friends:
Myth 1: All Dash Cams Need Professional Installation
False. Many dash cams are designed for easy DIY setup. Plug-and-play units are meant to be user friendly.
Myth 2: Professional Installation Is Always Expensive
Not always. Some shops offer bundle deals or lower rates for basic installs. Compare quotes and ask about warranties.
Myth 3: Diy Installation Voids Your Car Warranty
Usually false. If you don’t damage the car or modify factory systems, your warranty remains intact. Still, check with your dealer before hardwiring or altering electrical components.
Myth 4: Hardwiring Is Dangerous
Not if done correctly. Use the right fuse, a quality hardwire kit, and a proper ground. If you are not confident, get a pro to avoid problems.
Myth 5: All Dash Cams Have Parking Mode
No. Only dash cams hardwired to the fuse box or battery support true parking mode. Plug-and-play cameras usually stop recording when the ignition is off unless paired with an external battery or hardwire kit.
Advanced Features: Do They Require Professional Installation?
Some features are simple to enable. Others benefit from expert setup. Below I explain the ones that most often cause confusion.
Parking Mode
Parking mode records while the car is off. It needs a reliable power source that won’t drain your battery. Hardwiring to the correct fuse or using a dedicated parking mode battery pack are the usual solutions. Professional installers can configure low-voltage cutoff to protect the battery.
Gps And Adas
GPS antennas need a clear sky view. ADAS features rely on precise camera angle and firmware calibration. Professionals know the mounting zones to avoid false lane warnings and ensure accurate speed/location data.
Rear Cameras
Running a cable to the rear can require removing trim panels and threading the wire through doors or under the headliner. A pro can do this cleanly and avoid broken clips or interior damage.
Credit: safedrivesolutions.com
Dash Cam Installation And Insurance
Insurance providers sometimes offer discounts for dash cam users. They may require professional installation to ensure the system is reliable and tamper-proof. According to a recent survey, 22% of drivers who had dash cams installed professionally received better insurance rates. Only 9% of DIY installers got similar benefits. If you’re seeking insurance savings, ask your insurer what they require.
Dash Cam Installation And Local_Laws
Placement and visibility rules vary by region. Some general rules:
- Don’t block your view of the road.
- Don’t cover airbags or sensors with wires or mounts.
- Follow local rules about windshield mounts and data recording.
Professional installers usually know local rules and can recommend compliant mounting locations. For official rules, check NHTSA or your local DMV.
Data: How Many Drivers Choose Professional Installation?
Recent statistics show:
- About 35% of dash cam buyers use professional installation.
- 65% install their dash cams themselves.
- Among hardwired dash cams, 70% are installed by professionals.
So while most people try DIY, advanced systems are more likely to be installed by experts. That aligns with my experience—most plug-and-play buyers go DIY; hardwired and ADAS buyers prefer pros.
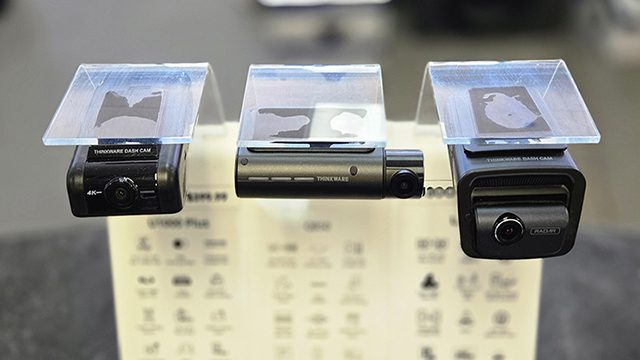
Comparing Dash Cam Brands: Installation Difficulty
Some brands are easier to install than others. Here’s a quick comparison:
| Brand | DIY Friendly | Hardwiring Needed | Rear Camera Support |
|---|---|---|---|
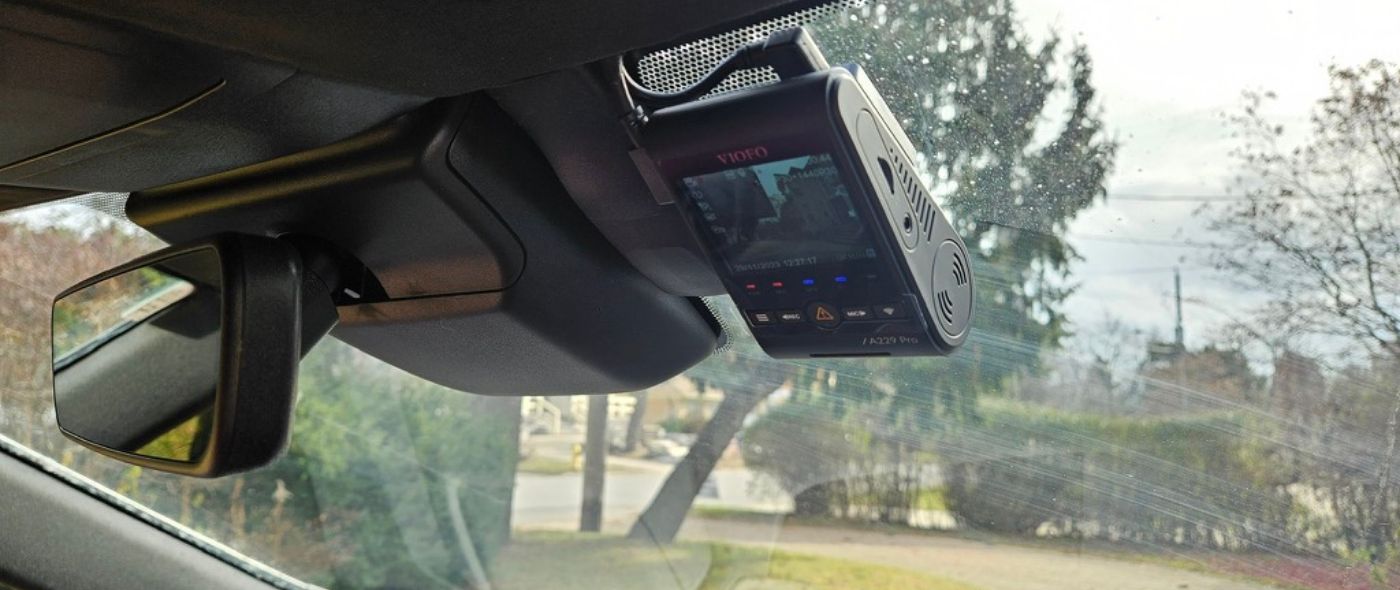
| Viofo | Yes (plug-and-play models) | Optional | Yes |
| BlackVue | No (complex features) | Yes | Yes |
| Garmin | Yes | Optional | Limited |
| Thinkware | No (advanced functions) | Yes | Yes |
| Nextbase | Yes | Optional | Yes |
If easy installation matters, choose brands with plug-and-play models and clear manuals.
Non-obvious Insights For Beginners
- Not all power sources act the same. The cigarette lighter socket often turns off with the car. For parking mode, use a constant or switched fuse or add a battery pack.
- Cable length matters. Check if the supplied cables reach the rear of your vehicle, especially for dual-channel systems.
- Choose the right microSD card class and capacity. Use high-endurance cards rated for continuous loop recording and frequent write cycles.
- Consider a capacitor-based dash cam in very hot climates. Capacitors handle heat better than internal lithium batteries and extend lifespan.
- Professional installers can troubleshoot firmware, Wi‑Fi pairing, or cloud upload issues faster than most DIYers.
Should You Install A Dash Cam Yourself Or Go Professional?
Ask yourself:
- How complex is your dash cam?
- Are you comfortable with car electronics and trim removal?
- Do you want hidden wires and parking mode?
- What is your budget and tolerance for risk?
If you want basic recording and portability, DIY is good. If you want full features, a tidy install, and long-term reliability, professional installation is worth the cost. Personally, for dual-channel or ADAS systems I always choose a pro. For single front plug‑and‑play units I install them myself.
FAQs On Do Dash Cams Need Professional Installation
What Is The Average Cost Of Professional Dash Cam Installation?
The average cost is between $50 and $200. Price depends on the car, dash cam type, and installer. Luxury cars and dual-channel installs usually cost more due to extra labor and time.
Can Installing A Dash Cam Affect My Car’s Warranty?
If you install a dash cam without damaging factory wiring, it usually won’t void your warranty. However, always check with your dealer before hardwiring or modifying electrical systems.
Is It Safe To Install A Dash Cam Myself?
Yes, for basic plug-and-play models. For hardwired systems, it’s safe if you use the right tools, a quality hardwire kit, and follow instructions. If unsure, ask a professional.
Do All Dash Cams Support Parking Mode?
No. Only dash cams that are hardwired to a constant power source or paired with an external battery/pack support reliable parking mode. Plug-and-play models typically don’t record when the ignition is off.
Can I Move My Dash Cam To A New Car?
Yes. Plug-and-play models are easy to transfer. For hardwired systems you must remove the wiring and reinstall—this can be time-consuming and may require professional help. See how to hide dash cam wires without removing trim for tips on easier transfers.
Choosing the right installation method matters. If you want simple recording and portability, DIY works. If you want hidden wires, parking mode, and advanced features, professional installation is often worth the investment. A dash cam is only useful if it’s installed safely and set up to record reliably.
Make your decision based on your needs, skills, and budget. Do it right once, and you’ll enjoy the peace of mind that comes from clear, reliable footage when you need it most.

I am Julian Drive, an automotive enthusiast and repair expert with over 7 years of hands-on experience in vehicle maintenance. At Carora Hub, I simplify complex car issues into easy-to-follow DIY guides to help drivers stay safe and save on repair costs.