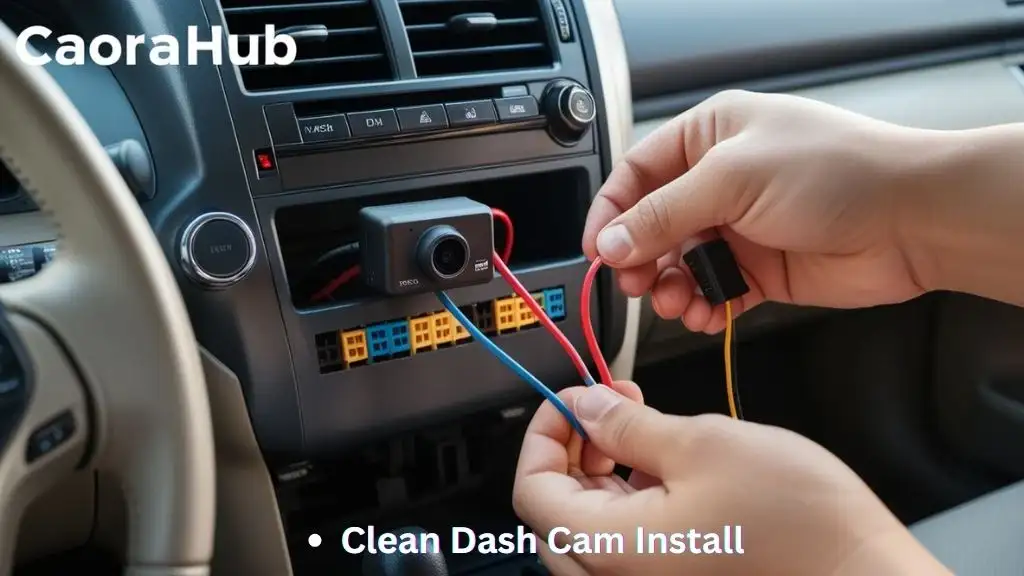
If you own a Toyota Sienna and want to keep your drives safer, installing a dash cam is a smart move. But powering your dash cam without relying on the cigarette lighter can be tricky.
That’s where hardwiring comes in. In this guide, you’ll discover exactly how to hardwire your dash cam in your Toyota Sienna, so it stays powered all the time—without messy cables or dead batteries. Keep reading, and you’ll learn simple, step-by-step tips to get your dash cam set up like a pro.
Choosing The Right Dash Cam
Choosing the right dash cam for your Toyota Sienna is important. It helps you capture clear videos of the road. A good dash cam can protect you in case of accidents. It also records unexpected events and keeps your vehicle safe. Picking the best model means understanding your needs and the camera’s features.
Features To Consider
Look for video quality first. A camera with 1080p or higher resolution shows clear details. Check the field of view. A wider angle covers more area around your car. Night vision is useful for low light conditions. Motion detection helps save storage by recording only when something moves. Consider GPS tracking to log your driving routes. Some dash cams have parking mode to watch your car when parked. Easy installation and a simple interface make the device user-friendly.
Compatible Models For Toyota Sienna
Not all dash cams fit every vehicle perfectly. Choose models designed to fit inside the Toyota Sienna windshield. Hardwire kits that match the Sienna’s fuse box make installation clean. This avoids messy wires hanging around. Some popular models offer special mounts for the Sienna. Check if the dash cam supports your vehicle’s power system. Compatibility ensures smooth operation and avoids electrical issues.
Tools And Materials Needed
Installing a dash cam in your Toyota Sienna needs the right tools and materials. These items help you hardwire your dash cam safely and neatly. Having everything ready before you start will save time and effort.
Essential Tools
- Wire stripper and cutter for clean wire ends
- Multimeter to check voltage and connections
- Trim removal tools to access panels without damage
- Electrical tape for securing wires
- Crimp connectors or soldering kit for strong wire joints
- Fuse tap to connect the dash cam to the fuse box
- Zip ties to keep wires organized and tight
Recommended Accessories
- Hardwire kit designed for Toyota Sienna models
- Extra fuses to replace blown ones if needed
- Velcro strips for mounting the dash cam or cables
- Heat shrink tubing for extra wire protection
- Label maker or markers to tag wires
- Flashlight or headlamp for better visibility inside the car
- Small mirror to see hidden fuse box areas
Locating The Fuse Box
Finding the fuse box is the first step to hardwiring a dash cam in your Toyota Sienna. The fuse box holds all the fuses that control power to different parts of your vehicle. Knowing its exact location saves time and effort during installation. It also helps avoid damage to your car’s electrical system.
Fuse Box Placement In Toyota Sienna
The Toyota Sienna has more than one fuse box. The main fuse box is usually under the dashboard on the driver’s side. You can access it by opening a small panel near the pedals. Another fuse box is found in the engine compartment. This one controls major electrical parts like headlights and the engine.
Identifying The Correct Fuse
Each fuse in the box controls a specific circuit. The fuse box cover has a diagram that shows which fuse controls what. Look for a fuse labeled “ACC” or “Accessory.” This fuse powers parts like the radio and dash cam. Use a fuse tester or remove the fuse to check if it works. Pick the right fuse to avoid electrical problems.

Credit: www.mangoaltech.com
Selecting A Power Source
Selecting the right power source is key to installing a dash cam in your Toyota Sienna. The power source controls when your dash cam turns on and off. It also affects how the camera records and saves footage. Choosing the correct power source ensures your dash cam works properly without draining your car battery.
Choosing a power source depends on your needs and how you use the dash cam. Some power sources provide constant power, while others only supply power when the car is on. Understanding these options helps you decide the best setup for your dash cam.
Constant Vs Switched Power
Constant power means the dash cam gets power all the time. It works even when the car is off. This option keeps your camera recording in parking mode. It helps capture events when you are away from the vehicle.
Switched power means the dash cam only gets power when the car is on. It turns off when you turn off the engine. This prevents battery drain but stops parking mode recording.
Choose constant power for full-time protection. Choose switched power to save battery life.
Choosing The Best Fuse Tap
A fuse tap connects your dash cam to the car’s fuse box. It draws power safely without cutting wires. Choosing the right fuse tap is important for a secure installation.
Pick a fuse tap that matches your Toyota Sienna’s fuse size. It should fit firmly and avoid loose connections. Use a fuse tap that supports the dash cam’s power needs.
Test the fuse tap with a multimeter before installation. This ensures it delivers constant or switched power as needed. A good fuse tap protects your car’s electrical system.
Preparing The Wiring
Preparing the wiring is the first step in hardwiring a dash cam in your Toyota Sienna. This process ensures a clean and safe connection to the vehicle’s electrical system. Proper preparation helps avoid electrical problems and keeps your dash cam powered reliably. Take your time and follow each step carefully for the best results.
Stripping And Connecting Wires
Start by stripping a small section of the wire insulation. Use a wire stripper tool for a clean cut. Expose about half an inch of copper wire. Avoid cutting the wire strands to keep a strong connection.
Connect the dash cam’s power wire to the vehicle’s fuse box wire. Twist the exposed wires together tightly. Use a crimp connector or electrical tape to secure the connection. Ensure no bare wire is visible to prevent shorts.
Using A Multimeter For Testing
A multimeter checks if you have the right wires and power. Set the multimeter to DC voltage mode. Touch the black probe to a ground point on the car. Touch the red probe to the wire you want to test.
The multimeter screen will show the voltage level. A reading of 12 volts means the wire is live and good for power. Test all wires before making final connections. This step avoids mistakes and protects your vehicle’s electrical system.
Credit: fitcamx.com
Routing The Dash Cam Cable
Routing the dash cam cable in your Toyota Sienna is a key step for a clean install. Proper cable routing keeps wires out of sight. It also prevents damage and interference with vehicle controls. A neat setup improves both safety and dash cam performance.
Careful planning before you start helps find the best path. Use existing gaps and panels to hide the cable. Avoid sharp edges and moving parts that could wear the wire. Taking your time here ensures a long-lasting and tidy install.
Hiding Wires Along The Trim
Start by tucking the cable under the headliner near the windshield. Use the trim edges to hide the wire along the roofline. Gently pry the trim with a plastic tool to avoid damage. Run the cable down the A-pillar, keeping it behind the weather stripping.
Continue routing the wire along the side trim panels toward the fuse box or power source. Press the cable firmly to keep it flat and hidden. This approach keeps wires invisible and protects them from wear.
Securing The Cable Safely
Use small cable clips or zip ties to secure the wire every few inches. Avoid tight bends that can damage the cable inside. Keep wires away from airbags and moving parts to prevent hazards.
Check that the cable does not interfere with pedals, steering, or seat adjustments. Leave some slack near connectors to avoid strain. A well-secured cable reduces the risk of disconnection or damage over time.
Connecting To The Fuse Box
Connecting your Toyota Sienna dash cam to the fuse box is the best way to get a steady power supply. This method ensures the dash cam turns on and off with the car. It also hides the wires neatly for a clean look. Follow the right steps to connect safely and avoid damage to your vehicle’s electrical system.
Installing The Fuse Tap
Start by choosing the correct fuse for your dash cam. Look for a fuse that powers on with the ignition. Remove the fuse carefully using a fuse puller or pliers. Attach the fuse tap by placing the original fuse and a new fuse for the dash cam into the tap. Push the tap into the fuse slot firmly. This lets you tap into the power without cutting wires.
Connecting The Ground Wire
The ground wire completes the electrical circuit. Find a metal bolt or screw near the fuse box for grounding. Clean the area to remove paint or dirt for a good connection. Attach the ground wire’s ring terminal securely under the bolt or screw. Tighten it well to prevent any loose contact. This step keeps the dash cam safe and working properly.
Testing The Setup
Testing the dash cam setup in your Toyota Sienna is a crucial step. It ensures the device powers correctly and records as expected. This process helps spot any wiring or connection issues early. A proper test makes sure your hardwire installation is safe and reliable.
Power On And Function Check
Start by turning on your vehicle’s ignition. Check if the dash cam powers up automatically. The screen or indicator light should activate. Next, test the camera’s recording function. Confirm it saves videos without interruption. Play back a short clip to verify quality. Make sure the device responds to button presses or app controls.
Troubleshooting Common Issues
If the dash cam does not turn on, recheck the fuse connection. Ensure all wires are secure and properly connected. A loose ground wire can cause power loss. Look for blown fuses in the hardwire kit. If recordings stop unexpectedly, check the memory card. Try formatting the card or using a new one. Reset the dash cam if it freezes or acts slow. Small fixes often solve common problems fast.
Final Tips For A Clean Installation
Completing the Toyota Sienna dash cam hardwire installation neatly is important. A clean setup looks professional and keeps wires safe. Small steps make a big difference in the final look and function. Follow these tips to finish your install with ease and care.
Cable Management Tricks
Hide cables along the edges of the windshield and dashboard. Use adhesive clips or cable ties to secure wires tightly. Avoid loose cables that dangle or block your view. Tuck excess wire behind panels for a smooth finish. Keep cables away from airbags and moving parts to prevent damage. Label wires if needed for easy troubleshooting later.
Maintaining The Dash Cam System
Check connections regularly to ensure steady power and recording. Clean the camera lens with a soft cloth to keep videos clear. Update dash cam firmware when updates are available for best performance. Inspect cables for wear or damage every few months. Replace damaged wires quickly to avoid power loss. Store the installation manual and wiring diagram for future reference.
Frequently Asked Questions
How Do I Hardwire A Dash Cam In Toyota Sienna?
To hardwire, connect the dash cam’s power cable to the vehicle’s fuse box. Use a hardwire kit with a low-voltage cutoff. Locate the accessory fuse for ignition power and a ground point. This provides constant power while protecting the battery.
What Tools Are Needed For Toyota Sienna Dash Cam Hardwire?
You need a hardwire kit, fuse tap, wire stripper, and panel removal tool. Also, have a multimeter to test fuses. These tools help safely access the fuse box and secure connections without damaging your vehicle.
Can I Hardwire Dash Cam Without Draining Toyota Sienna Battery?
Yes, by using a hardwire kit with low-voltage protection. This feature cuts power when battery voltage drops. It prevents battery drain while keeping the dash cam running when the vehicle is off.
Where Is The Fuse Box In Toyota Sienna For Dash Cam Hardwire?
The main fuse box is under the dashboard on the driver’s side. There may also be one in the engine compartment. Check your owner’s manual for exact location and fuse layout.
Conclusion
Hardwiring a dash cam in your Toyota Sienna keeps it powered safely. It helps avoid messy wires and battery drain. Following this guide makes the process simple and clear. You get steady recording without worrying about charging. Protect your vehicle and capture every moment on the road.
This setup gives peace of mind while driving every day. Take your time and double-check connections for the best results. Enjoy safer and smarter driving with a hardwired dash cam.

Hello, I’m Norman. I work as a car researcher. I am the voice behind CaroraHub. I have over 15 years of experience. I give simple and useful car advice. I help with car care, cleaning, and small repairs. My goal is to help you keep your car healthy. I want car care to be easy and cheap for you. You can trust my tips to keep your car working well for a long time.