
Is your Toyota Prius combination meter acting up? Maybe the gauges flicker, the lights go dark, or the display shows strange readings.
You might feel stuck and unsure about what to do next. But what if you could fix it yourself, save money, and get your dashboard back to normal? In this guide, you’ll find simple, step-by-step instructions to repair your Prius combination meter on your own.
No need to wait for a costly mechanic—your solution is right here. Keep reading, and take control of your Prius repair today.
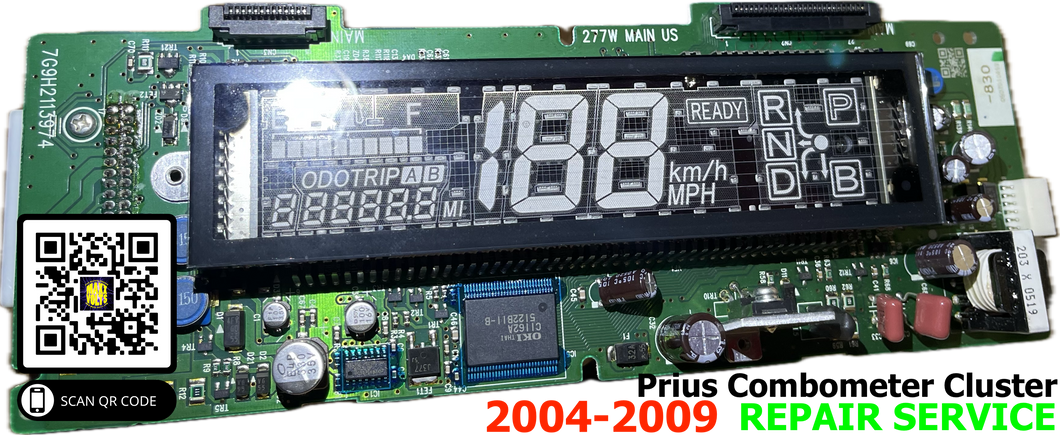
Credit: www.maxx-volts.com
Tools Needed For Repair
Before you start fixing your Toyota Prius combination meter, gathering the right tools is crucial. Having everything at hand can save you time and prevent frustration. You’ll want tools that are easy to handle and reliable, especially if this is your first DIY repair.
Basic Hand Tools
Start with a set of screwdrivers—both Phillips and flathead. These will help you remove the screws holding the meter in place. A small socket wrench set is also necessary for bolts that can’t be undone with screwdrivers.
I once tried to use a single screwdriver for every screw, only to strip a few heads and waste time. Don’t make the same mistake—having the right sizes matters.
Plastic Pry Tools
Plastic pry tools are essential to carefully open the dashboard without scratching or damaging it. Metal tools might seem stronger but can leave marks or cause cracks.
These tools let you gently pop open panels and clips, making the disassembly process smoother and safer for your car’s interior.
Multimeter
A multimeter helps you test electrical connections and check if the combination meter is getting power. It’s a handy tool for diagnosing issues beyond just visual inspection.
If you don’t have one, consider borrowing or buying a basic model—it’s an investment that pays off in many car repairs.
Replacement Parts And Cleaning Supplies
Have your replacement combination meter or necessary parts ready before starting. Also, keep some electronic-safe cleaner and microfiber cloths handy to clean contacts and surfaces.
Read More: How to Fix Toyota Prius That Won’t Start
Cleaning the contacts can sometimes fix the problem without full replacement. Have you ever thought a little cleaning could save you a part swap?
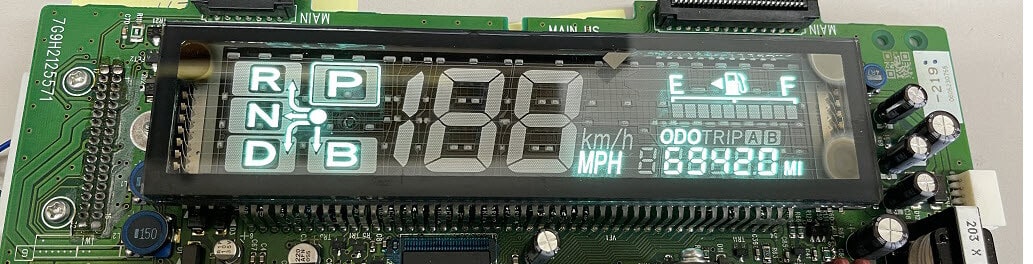
Credit: artsautomotive.com
Removing The Combination Meter
Removing the combination meter from a Toyota Prius is the first step in fixing many dashboard problems. The combination meter shows important information like speed, fuel, and warning lights. Taking it out carefully helps avoid damage and makes repairs easier.
This process needs basic tools and some patience. Follow clear steps to remove the meter safely. This guide covers each step, so the meter comes out without trouble.
Preparing Your Work Area
Park the car on a flat surface and turn off the engine. Remove the key from the ignition. Disconnect the negative battery terminal to avoid electrical shocks. Gather all tools, including screwdrivers and trim removal tools.
Removing The Dashboard Trim
Use a trim removal tool to gently pry off the dashboard cover around the combination meter. Avoid using too much force to prevent breaking clips. Remove any screws holding the trim in place. Set the trim and screws aside safely.
Disconnecting The Combination Meter
Look behind the combination meter for connectors. Press the release tabs and pull the connectors out gently. Do not pull on the wires. Keep track of each connector’s position to reconnect later.
Taking Out The Combination Meter
Remove the screws or bolts securing the combination meter to the dashboard. Hold the meter firmly and pull it out slowly. Place the meter on a soft surface to prevent scratches or damage.
Opening The Meter Housing
Opening the meter housing is the first step in fixing your Toyota Prius combination meter. The meter housing holds the speedometer, fuel gauge, and other important displays. Careful handling during this step prevents damage to these parts.
Prepare a clean workspace and gather the right tools. This will make the process smooth and safe. Take your time and follow each step closely.
Gathering Tools And Materials
Use a small screwdriver set, plastic pry tools, and a soft cloth. Avoid metal tools that can scratch the housing. Have a container ready to keep small screws safe.
Removing The Dashboard Trim
Gently pry off the dashboard trim around the meter cluster. Use plastic tools to avoid marks. Work slowly to release clips without breaking them.
Unscrewing The Meter Housing
Locate and remove the screws holding the meter housing. Keep each screw in your container. Check for hidden screws under trim pieces.
Separating The Housing From The Dashboard
Carefully pull the meter housing out from the dashboard. Do not force it. Disconnect any wiring connectors by pressing the release tabs.
Identifying Common Issues
The combination meter in a Toyota Prius shows important information. It tells you your speed, fuel level, and warning lights. Problems with this meter can cause confusion or safety issues. Identifying common issues early helps you fix them yourself. This saves money and avoids long trips to the mechanic.
Below are common problems to watch for in the Prius combination meter. Knowing these signs makes your DIY repair easier and faster.
Flickering Or Dim Display
A flickering or dim display often means a loose connection. Sometimes the backlight bulb is failing. This issue can make it hard to read the meter at night. Check the wiring and replace bulbs if needed.
Speedometer Not Working
The speedometer may stop working due to a faulty sensor or wiring issue. It can also happen if the meter’s circuit board is damaged. This problem affects your ability to track speed accurately. Test the sensor and inspect the meter for visible damage.
Warning Lights Stay On
Warning lights that stay on may signal sensor errors or electrical faults. Sometimes the meter itself is malfunctioning. This can cause false alerts or hide real problems. Reset the system and check sensors to find the cause.
Odometer Not Counting
The odometer might stop counting miles due to a broken internal gear or circuit fault. This issue impacts your vehicle’s maintenance records. Open the meter and look for worn parts or damaged circuits.
Fixing The Display And Gauges
The combination meter in a Toyota Prius shows important information like speed, fuel level, and battery charge. When these displays or gauges stop working, it can confuse or distract the driver. Fixing the display and gauges yourself saves money and time. This guide helps you understand the basic steps to repair the combination meter safely.
Before starting, make sure to disconnect the car battery to avoid electric shock. Use simple tools like screwdrivers and a soft cloth. Handle parts carefully to prevent damage. Let’s explore how to fix the display and gauges in your Prius.
First, remove the dashboard panel around the meter. Use a screwdriver to unscrew the bolts holding the panel. Gently pull the panel out without breaking clips. Next, unplug the connectors from the back of the combination meter. Keep track of each connector for easy reassembly. Carefully take out the meter from the dashboard.
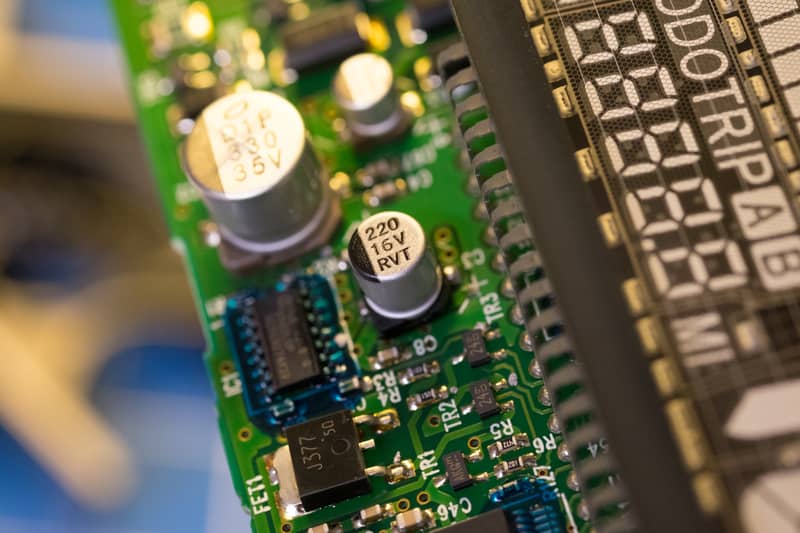
Cleaning And Inspecting The Display
Dust and dirt can cause the display to look dim or flicker. Use a soft cloth to clean the screen gently. Avoid using water or harsh chemicals. Check the circuit board for any visible damage or loose parts. Look for burnt spots or cracked components. Cleaning and inspecting helps find simple problems quickly.
Replacing Faulty Gauges Or Leds
If some gauges or lights do not work, they may need replacement. Identify the faulty gauge or LED by testing each part. Use a soldering iron to remove broken components. Insert new parts carefully and solder them in place. Test the meter before putting it back. Replacing parts can restore full function.
Reassembling And Testing The Meter
After repair, reconnect all connectors to the combination meter. Place the meter back into the dashboard carefully. Screw the panel back in place tightly. Reconnect the car battery and turn on the ignition. Check if all displays and gauges work correctly. Testing ensures the repair was successful and safe for driving.
Credit: justinribeiro.com
Reassembling And Testing
Reassembling and testing the Toyota Prius combination meter is a key step. It ensures the repair works correctly. Careful assembly prevents future problems and keeps your dashboard functional.
Take your time putting all parts back together. Check every connection. Testing confirms the meter works as it should.
Preparing The Components For Reassembly
Clean all parts before putting them back. Remove dust and dirt. Use a soft cloth or brush. Check for any broken or worn parts. Replace if needed. This helps the meter last longer.
Carefully Reassembling The Combination Meter
Follow the steps you used to take it apart. Align all parts carefully. Make sure wires connect firmly. Tighten screws but do not overtighten. Small mistakes can cause big issues.
Testing The Combination Meter Functionality
Reconnect the meter to the car’s power. Turn on the ignition. Watch all gauges and lights on the meter. They should work smoothly. Check for flickering or missing displays. This shows if the repair was successful.
Final Adjustments And Troubleshooting
If something does not work right, check connections again. Look for loose wires or parts. Repeat the test after fixing. Make small adjustments until the meter works well. This process ensures your dashboard is reliable.
Final Tone
Repairing your Toyota Prius combination meter yourself saves time and money. The steps are clear and simple to follow. You only need basic tools and patience. This guide helps you fix common issues easily. Staying calm and careful ensures a good result.
Your car’s dashboard will work like new again. DIY repairs build confidence and skills. Keep this guide handy for future needs. Taking control of your Prius maintenance feels good. Try this project and enjoy the satisfaction of fixing it yourself.
FAQs About Toyota Prius Combination Meter Repair DIY
What Is A Toyota Prius Combination Meter?
The combination meter is the dashboard instrument cluster showing speed, fuel, and warning lights. It displays critical driving data.
How To Diagnose Combination Meter Issues In Prius?
Check for flickering lights, incorrect readings, or warning signals. Use an OBD2 scanner to find error codes.
Can I Repair Prius Combination Meter Myself?
Yes, if you have basic tools and skills. Follow a DIY guide carefully to avoid damage.
What Tools Are Needed For Combination Meter Repair?
You need screwdrivers, a soldering iron, multimeter, and sometimes replacement parts specific to Prius models.

Hello, I’m Norman. I work as a car researcher. I am the voice behind CaroraHub. I have over 15 years of experience. I give simple and useful car advice. I help with car care, cleaning, and small repairs. My goal is to help you keep your car healthy. I want car care to be easy and cheap for you. You can trust my tips to keep your car working well for a long time.