How to Replace a Toyota Prius Wheel Stud Safely
A damaged Toyota Prius wheel stud should never be ignored. Wheel studs help secure the wheel to the vehicle, and damaged threads, a bent stud, or a broken fastener can prevent the wheel from being properly attached. Driving with a compromised wheel fastener can create a serious safety risk.
If you are wondering how to replace a Toyota Prius wheel stud, the first thing to understand is that the procedure depends on the model year, wheel position, and hub design. Some Prius models use conventional press-in wheel studs secured with lug nuts, while certain newer Toyota applications use a different hub-bolt arrangement.
This guide explains how to identify a damaged wheel stud, prepare for replacement, understand the general removal and installation process, and recognize when professional repair is the safer option. It covers the main Toyota Prius generations without assuming that every model uses identical hardware.
🚘 Black Friday & Cyber Monday Automotive Parts & Accessories Deals
Upgrade your ride with popular car accessories, cleaning kits, diagnostic tools, replacement parts and automotive gear. Explore Amazon offers for both shopping events. Deals change fast!
AUTOMOTIVE PARTS AND ACCESSORIES DEALS →What Is a Toyota Prius Wheel Stud?
A wheel stud is a threaded metal fastener that extends from the wheel hub. On conventional stud-and-lug-nut systems, the wheel fits over the studs, and lug nuts hold it securely against the hub.
The wheel studs are designed to withstand the clamping force created when the lug nuts are tightened to the manufacturer’s specified torque.
When a stud becomes bent, broken, stretched, or stripped, the affected wheel fastener may no longer provide the required clamping force.
It is important to distinguish a conventional wheel stud from a wheel bolt. A wheel stud remains attached to the hub, while a wheel bolt passes through the wheel and threads directly into the hub. These systems require different replacement procedures and hardware.
Which Toyota Prius Generations Have Different Wheel Fasteners?
The Toyota Prius has gone through several generations, and its wheel and hub designs have evolved. Before ordering a replacement part, identify your model year and inspect the actual wheel attachment system.
| Prius generation | Model years (US) | What to verify |
|---|---|---|
| First generation | 2001–2003 | Original hub and wheel stud configuration |
| Second generation | 2004–2009 | Front and rear hub differences |
| Third generation | 2010–2015 | Front and rear hub bolt replacement procedures |
| Fourth generation | 2016–2022 | Model-specific hub and fastener specifications |
| Fifth generation | 2023–present | Verify whether the vehicle uses hub bolts or studs and nuts |
Important: Toyota Technical Service Bulletin T-SB-0042-23 explains that certain 2023–2024 Toyota vehicles, including the Prius, use hub bolts instead of conventional studs and nuts. Check the vehicle-specific service information and parts catalog before purchasing hardware.
Do not assume that every 2023–2024 Prius has the same configuration. Verify the exact vehicle and applicable service information.
Signs That Your Toyota Prius Wheel Stud Needs Replacement
1. Damaged or Stripped Threads
Inspect the exposed threads for flattened areas, missing material, cross-threading, or visible deformation. If a lug nut cannot thread onto the stud smoothly by hand, investigate the cause before tightening it.
2. A Broken or Missing Wheel Stud
A broken stud is an obvious reason for repair. A missing wheel fastener also reduces the number of attachment points securing the wheel.
3. A Lug Nut That Will Not Tighten Properly
If a lug nut spins without tightening or repeatedly slips, the stud or nut may have damaged threads. Do not use additional force to compensate for the problem.
4. A Bent Wheel Stud
A bent stud may prevent the wheel from seating correctly. Even slight deformation can make proper fastener installation difficult.
5. Wheel Movement or Unusual Noise
A loose wheel can produce knocking, clicking, vibration, or other unusual sounds. These symptoms are not specific to damaged wheel studs, so inspect the wheel, hub, bearings, and suspension before identifying the cause.
If you suspect that a wheel is loose or a fastener is broken, stop driving and arrange a safe inspection. Do not rely on the remaining fasteners to support continued driving.
Tools and Materials Needed for Wheel Stud Replacement
The exact tools depend on the Prius generation and whether you are working on the front or rear wheel.
| Tool or material | Purpose |
|---|---|
| Floor jack | Raises the vehicle at an approved lifting point |
| Jack stands | Support the vehicle securely |
| Wheel chocks | Prevent unwanted vehicle movement |
| Lug wrench or socket set | Remove and install wheel fasteners |
| Torque wrench | Apply the specified tightening torque |
| Brake caliper hanger | Supports the caliper when removed |
| Wheel stud removal tool or Toyota SST | Remove the old stud without damaging the hub |
| Correct replacement stud | Replaces the damaged component |
| Compatible service nut and washer | Used in applicable press-in stud installation procedures |
Never work underneath a vehicle supported only by a floor jack. Use approved lifting points, suitable jack stands, and a stable, level working surface.
Recommended Tools for Toyota Prius Wheel Stud Replacement
Having the correct automotive tools can make a wheel stud repair more manageable. However, not every tool is required for every Prius generation. The vehicle’s hub design and Toyota’s repair procedure determine which equipment is appropriate.
The following products are useful categories to consider when preparing for this type of repair. Check the product specifications and compatibility before purchasing.
1. Automotive Torque Wrench
A calibrated torque wrench helps apply the manufacturer’s specified tightening torque to wheel fasteners. It is particularly important when reinstalling the wheel after a repair.
What to look for:
- A torque range that includes the vehicle’s specified fastener torque.
- Clear and readable torque markings or a digital display.
- A suitable drive size for your socket collection.
- A calibration and accuracy specification from the manufacturer.
- A locking mechanism that helps prevent accidental setting changes.
Advantages:
- Helps achieve consistent fastener tightening.
- Reduces the risk of accidental overtightening.
- Useful for many other automotive maintenance tasks.
Limitations:
- Requires correct settings and proper handling.
- Does not automatically prevent cross-threading.
- Must be maintained and calibrated according to manufacturer recommendations.
Best for: DIY mechanics and vehicle owners who perform regular wheel and suspension maintenance.
2. Wheel Stud Installer and Removal Tool
A dedicated wheel stud tool can help remove and install compatible press-in wheel studs. The correct tool supports controlled installation and helps reduce the risk of damaging the hub.
What to look for:
- Compatibility with the stud diameter and hub configuration.
- Correct adapters for the intended application.
- Durable construction suitable for automotive service.
- Clear manufacturer instructions.
- Compatibility with the applicable Toyota repair procedure.
Advantages:
- Provides more controlled stud installation than improvised methods.
- Can reduce unnecessary impact on surrounding components.
- Useful for compatible press-in stud applications.
Limitations:
- Not compatible with every hub design.
- Does not replace model-specific Toyota service tools when those are required.
- Some tools require additional adapters.
Best for: Experienced DIY mechanics and repair professionals working on compatible press-in wheel stud systems.
View Wheel Stud Removal Tools on Amazon
3. Heavy-Duty Automotive Jack Stands
Jack stands support a vehicle after it has been raised with an appropriate floor jack. They are essential safety equipment when working on wheels, brakes, or other components that require the vehicle to remain elevated.
What to look for:
- A rated capacity appropriate for the vehicle and lifting arrangement.
- A stable base and secure locking mechanism.
- Suitable height adjustment.
- Clear manufacturer safety instructions.
- Recognized safety certifications or testing information where applicable.
Advantages:
- Provide stable vehicle support when correctly positioned.
- Useful for routine automotive maintenance.
- Available in different capacities and height ranges.
Limitations:
- Must be used on a firm, level surface.
- Incorrect positioning can create serious hazards.
- Capacity ratings must be understood and applied correctly.
Best for: Vehicle owners who perform maintenance requiring the vehicle to be lifted.
Check Automotive Jack Stand Options
4. Automotive Socket Set
A quality socket set helps remove and reinstall compatible wheel and brake fasteners. Metric sockets are commonly used on Toyota vehicles, but always verify the exact sizes required for the repair.
What to look for:
- Metric socket sizes suitable for the vehicle.
- Six-point sockets for compatible fasteners.
- Impact-rated sockets if used with an impact tool.
- A durable ratchet and extension selection.
- A well-organized storage case.
Advantages:
- Useful for many automotive maintenance jobs.
- Provides several socket sizes in one set.
- Can make routine fastener removal more convenient.
Limitations:
- The wrong socket size can damage fasteners.
- Ordinary sockets should not be used with impact tools unless rated for that use.
- A socket set alone cannot replace specialized hub tools.
Best for: DIY vehicle maintenance and general automotive repairs.
View Metric Automotive Socket Sets
5. Wheel Chocks
Wheel chocks help prevent unwanted vehicle movement while another wheel is lifted. They are a simple but important part of a safe vehicle preparation setup.
What to look for:
- A size and design appropriate for the vehicle’s tires.
- Durable, slip-resistant construction.
- A shape suitable for the intended tire size.
- Clear usage instructions.
Advantages:
- Help reduce the risk of vehicle movement.
- Easy to store and use.
- Useful for several types of automotive maintenance.
Limitations:
- Do not replace jack stands.
- Must be positioned correctly.
- May require a different size for larger vehicles or tires.
Best for: Anyone performing maintenance that requires a vehicle to be lifted.
Check Wheel Chock Options on Amazon
Important buying note: These are tool categories, not verified recommendations of specific tested products. Confirm specifications, compatibility, ratings, and manufacturer instructions before purchasing. A generic wheel stud tool may not work with every Toyota Prius hub design.
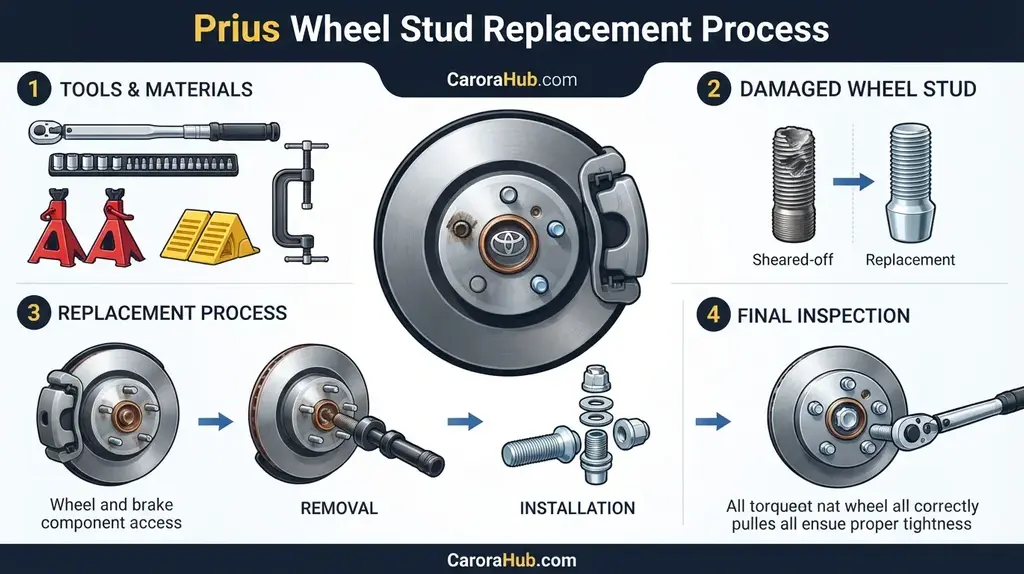
How to Replace a Toyota Prius Wheel Stud
The following is a general overview for a conventional press-in wheel stud system. It is not a substitute for the Toyota repair procedure for your exact model year and wheel position.
Step 1: Identify the Correct Replacement Stud
Before removing anything, confirm the vehicle’s year, trim, drivetrain, wheel position, and hub assembly configuration.
Use the VIN or a verified OEM parts catalog to identify the correct replacement. Compare the stud’s thread diameter, pitch, knurl dimensions, length, and seating design.
A stud that looks similar may still be incompatible with the hub. Never force an incorrect replacement into the assembly.
Step 2: Prepare the Vehicle Safely
Park the Prius on a firm, level surface. Select Park, apply the parking brake, switch the vehicle off, and keep the smart key away from the vehicle.
Chock the wheels that remain on the ground. Loosen the wheel fasteners slightly before lifting the vehicle, following the appropriate service procedure.
Raise the vehicle at the approved lifting point and support it with correctly positioned jack stands. Never place any part of your body underneath a vehicle that is supported only by a jack.
Step 3: Remove the Wheel
Once the vehicle is securely supported, remove the wheel fasteners and take off the wheel.
Inspect the wheel mounting surface, lug nuts, hub face, and exposed studs. Look for corrosion, cracks, damaged threads, and signs of incorrect previous installation.
If the vehicle uses wheel bolts rather than conventional studs, stop and follow the correct wheel-bolt service procedure instead.
Step 4: Remove the Brake Components as Required
On applicable Prius models, the brake caliper and rotor must be removed to access the wheel stud.
Remove the specified caliper mounting fasteners according to the repair manual. Support the caliper with a suitable hanger or wire. Never allow it to hang from the flexible brake hose.
Remove the brake rotor or drum as applicable to the vehicle and wheel position.
Some older hub designs require more extensive disassembly to obtain enough clearance for stud removal. Do not force the stud through the hub if surrounding components prevent proper removal.
Step 5: Remove the Damaged Wheel Stud
Use the correct Toyota special service tool or an appropriate stud removal tool to remove the damaged press-in stud.
Toyota’s documented procedures for applicable Prius models use SST 09611-12010 to remove and install certain front and rear axle hub bolts.
Follow the specified support and holding procedure for the hub. Protect the threads of neighboring fasteners and avoid damaging the hub flange.
Do not repeatedly strike the hub or surrounding bearing assembly with a heavy hammer. Uncontrolled impact can damage components that are not being replaced.
Step 6: Inspect the Hub and Stud Opening
Before installing the replacement, inspect the stud opening and the surrounding hub flange.
- Check for damaged or enlarged knurl openings.
- Look for cracks around the stud mounting area.
- Remove contamination according to the service procedure.
- Inspect the hub and bearing assembly for damage.
- Check the remaining wheel fasteners.
If the mounting hole is damaged or the replacement stud cannot achieve the correct interference fit, the hub assembly may require further repair or replacement.
Step 7: Install the New Wheel Stud
For an applicable press-in stud design, position the new stud correctly through the hub flange.
Toyota’s documented procedures use a suitable washer and service nut to draw the replacement hub bolt into position. The service nut and washer must be compatible with the fastener and the specified installation method.
Use the correct holding tool and follow the repair manual’s installation instructions. Do not assume that tightening a standard wheel nut is an acceptable substitute for the specified service tool.
Verify that the replacement stud is fully seated and that its mounting face is correctly positioned against the hub flange. Check that it is straight and that the threads have not been damaged during installation.
Step 8: Reinstall the Brake Components
After confirming that the replacement stud is correctly seated, reinstall the brake rotor or drum and the other components removed during the repair.
Follow the vehicle-specific tightening sequence and torque specifications for the brake caliper, hub, and related components.
Check that the brake hose, speed sensor wiring, and other nearby components are correctly routed and secured. Make sure nothing is twisted, pinched, or rubbing against a moving part.
Step 9: Reinstall the Wheel and Tighten the Fasteners
Position the wheel against the hub and start each fastener by hand. This helps reduce the risk of cross-threading.
Tighten the wheel fasteners evenly in the specified sequence. Use a calibrated torque wrench to apply the correct torque for the exact vehicle and wheel configuration.
Do not use an impact wrench for final torque tightening.
Step 10: Complete the Final Inspection
After the repair, verify that:
- The replacement stud is properly seated.
- The wheel sits flush against the hub.
- All wheel fasteners are compatible and correctly installed.
- The fasteners have been tightened to the specified torque.
- The brake components and wiring are properly secured.
- The wheel rotates without abnormal interference.
- The brake pedal and braking system operate normally.
If the brake system was disturbed, follow the manufacturer’s required inspection and any applicable initialization or diagnostic procedures. Do not drive until the repair has been verified as safe.
Front vs. Rear Toyota Prius Wheel Stud Replacement
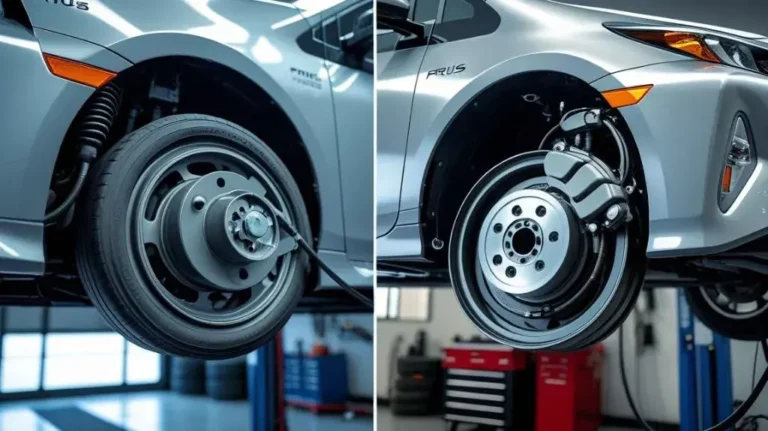
Front and rear wheel stud replacement are not necessarily identical. The braking system, hub design, access to the back of the flange, and required disassembly can differ.
| Consideration | Front wheel | Rear wheel |
|---|---|---|
| Brake components | Often requires caliper and rotor removal | May require drum or disc removal |
| Hub access | Depends on steering knuckle and axle design | Depends on rear hub and bearing design |
| Replacement method | Follow the model-specific hub bolt procedure | Follow the model-specific rear hub procedure |
| Torque requirements | Verify the front specifications | Verify the rear specifications |
Never assume that a front wheel stud replacement method will work on the rear axle. Follow the appropriate service instructions for each position.
Toyota Prius Wheel Lug Nut Torque Specifications
Correct wheel fastener torque is essential. Under-tightening can allow the wheel to loosen, while excessive tightening can stretch or damage the fasteners and affect the mounting surfaces.
Several Toyota Prius service specifications list a wheel fastener torque of 103 Nm (76 ft-lb). For example, this value appears in service information for the 2005, 2007, and 2012 Prius.
However, this should not be treated as a universal specification for every Prius generation, trim, wheel, or hub-bolt configuration.
Always check the correct Toyota repair manual for the vehicle being serviced.
How Much Does Toyota Prius Wheel Stud Replacement Cost?
The cost depends on the damaged fastener, the wheel position, the vehicle generation, labor rates, and whether additional hub or brake components require replacement.
A straightforward stud replacement may require less labor than a repair involving difficult hub access or additional suspension disassembly.
When requesting an estimate, ask the repair shop to separate the following costs:
- Replacement wheel stud or hub bolt.
- Required nuts, washers, or related hardware.
- Labor for removal and installation.
- Additional brake or hub assembly work, if needed.
- Any required diagnostic or inspection work.
Do not rely on a generic online price estimate as a guaranteed quote for your vehicle. Ask the technician to identify the exact damaged component before approving the repair.
Common Mistakes to Avoid During Wheel Stud Replacement
Using the Wrong Replacement Stud
Incorrect thread pitch, knurl diameter, or stud length can prevent proper installation. Verify the part against the vehicle’s VIN and hub configuration.
Using a Hammer Without the Correct Procedure
Excessive hammering can damage the hub or bearing assembly. Use the appropriate removal and installation tool.
Overtightening Wheel Fasteners
Using an impact wrench for final tightening can result in excessive torque. Always finish with a calibrated torque wrench.
Ignoring Additional Damaged Studs
Inspect every fastener on the affected wheel. Replacing one damaged stud does not remove the need to inspect the remaining hardware.
Mixing Different Fastener Types
Do not mix incompatible wheel bolts, studs, lug nuts, or aftermarket wheels. Toyota warns that mismatched wheel and fastener seating surfaces can create a risk of wheel detachment.
When Should You Let a Professional Replace the Wheel Stud?
Wheel fasteners are critical safety components. A professional repair is the better choice when the required hub access is complicated or the vehicle has damaged mounting surfaces.
Consider professional service if:
- The replacement stud cannot be removed without major disassembly.
- The hub or bearing assembly is damaged.
- More than one wheel fastener is broken or missing.
- The vehicle uses a hub-bolt configuration you cannot identify.
- You do not have suitable lifting equipment or the correct service tools.
- The brake or ABS system requires procedures you cannot complete safely.
If the wheel has loose or missing fasteners, do not drive the vehicle to a repair shop. Arrange appropriate roadside assistance or towing.
FAQs Of How to Replace Toyota Prius Wheel Stud
Can I replace just one Toyota Prius wheel stud?
In some cases, a single damaged wheel stud can be replaced if the hub and the remaining fasteners are in good condition. However, inspect all wheel attachment hardware and follow the vehicle manufacturer’s replacement requirements.
Can I drive my Toyota Prius with a broken wheel stud?
Driving with a broken or missing wheel fastener is unsafe. The remaining fasteners may not provide the required wheel clamping force. Arrange a safe inspection and repair instead of continuing to drive.
Do all Toyota Prius generations use the same wheel studs?
No. Wheel hardware and hub designs can vary by generation, model year, trim, and market. Verify the correct replacement part using the vehicle identification number and Toyota parts information.
Do I need to remove the brake rotor to replace a Prius wheel stud?
On applicable models, the brake caliper and rotor must be removed to access the wheel stud. The exact procedure depends on the front or rear wheel and the vehicle’s hub design.
What is the wheel lug nut torque for a Toyota Prius?
Some Prius service manuals specify 103 Nm (76 ft-lb), including examples from 2005, 2007, and 2012 models. Always confirm the correct specification for the exact model year and wheel fastener type before installation.
Can I use a regular lug nut to install a replacement wheel stud?
Do not assume that a regular lug nut is suitable for drawing a new stud into the hub. Applicable Toyota procedures specify compatible service nuts, washers, and holding tools. Follow the exact repair manual procedure to avoid damaging the new stud or hub.
Final Thoughts
Replacing a Toyota Prius wheel stud is a repair that requires careful attention to fastener compatibility, hub design, and installation procedure. Although the general process involves removing the wheel, gaining access to the hub, replacing the damaged fastener, and reinstalling the wheel, the exact steps can differ considerably between generations and wheel positions.
Before starting, identify the correct model year and wheel attachment system. Use the proper replacement hardware, follow Toyota’s service instructions, and verify all tightening specifications with a torque wrench.
If the hub is damaged or you cannot safely access the fastener, professional repair is the sensible choice. A correctly secured wheel is essential for safe driving.

Hello, I’m Norman. I work as a car researcher. I am the voice behind CaroraHub. I have over 15 years of experience. I give simple and useful car advice. I help with car care, cleaning, and small repairs. My goal is to help you keep your car healthy. I want car care to be easy and cheap for you. You can trust my tips to keep your car working well for a long time.