The best brake pads for a Toyota 4Runner depend on your specific driving habits, whether you prioritize heavy-duty towing, daily commuting, or off-road adventures. For most owners, the factory-spec ceramic pads provide the ideal balance of longevity, quiet operation, and minimal dust, though high-performance drivers often switch to semi-metallic alternatives for increased bite. Expect to pay between $45 and $185 for a complete set of front or rear pads, depending on whether you choose aftermarket economy parts or high-end performance hardware.
Key Takeaways
- Choose ceramic brake pads if you value low noise and clean wheels for daily city driving.
- Select semi-metallic pads if you frequently tow heavy trailers or drive in mountainous terrain.
- Always perform a brake pad bedding-in procedure immediately after installation to ensure optimal friction transfer.
- Check your brake rotor thickness before installing new pads, as worn rotors will cause premature pad failure.
- Use high-temperature brake grease on all sliding pins and contact points to prevent seizing and squealing.
Which Brake Pads Are Best?
Choosing the right friction material is the most critical decision for your braking system. Toyota 4Runners are heavy, truck-based vehicles that generate significant heat when stopping, making the choice between ceramic, semi-metallic, and organic materials vital. Ceramic pads are generally the most popular choice for stock 4Runner owners because they offer a consistent “pedal feel” and don’t produce the dark, sticky dust associated with other materials.
If you use your 4Runner for work or play, you might need more aggressive stopping power. Semi-metallic pads contain steel wool or copper fibers, which help dissipate heat faster during repeated stops. While these pads are more durable, they’re often louder and harsher on your rotors than ceramic alternatives. Organic pads, while quiet and inexpensive, are rarely recommended for a vehicle as heavy as the 4Runner, as they tend to fade rapidly under load.
Comparing Brake Pad Material Options
| Material Type | Stopping Power | Noise Level | Dust Production | Best Use Case |
|---|---|---|---|---|
| Ceramic | Moderate | Low | Very Low | Daily commuting |
| Semi-Metallic | High | Moderate/High | Moderate | Towing/Off-roading |
| Organic | Low | Low | Low | Light city use |
How To Choose The Best Toyota 4Runner Brake Pads
When shopping for replacement pads, the brand often dictates the quality of the friction compound and the precision of the backing plate fitment. OEM Toyota pads, often manufactured by companies like Advics or Akebono, are engineered specifically for the weight and braking bias of the 4Runner. If you opt for aftermarket brands, look for companies that provide a “shim” kit, as these metal plates are essential for reducing vibration and noise.
Top-tier brands often include:
- Akebono Ultra-Premium: Renowned for their ceramic technology and consistent performance.
- Advics: The original equipment manufacturer for many Toyota components.
- StopTech: Excellent for drivers seeking a performance upgrade with better heat resistance.
- Hawk Performance: A favorite among off-road enthusiasts who need high-friction compounds.
Warning Signs Of Worn Pads
Your 4Runner will typically provide clear indicators that the brake pads have reached the end of their service life. Most modern pads include a small metal tab known as a wear indicator that contacts the rotor when the friction material is low, creating a high-pitched squealing sound. Ignoring this sound will eventually lead to metal-on-metal contact, which destroys the rotor surface and significantly increases your stopping distance.
Other symptoms include a “spongy” brake pedal, which might indicate that your brake fluid has absorbed too much moisture or that there’s air in the lines. If you notice the vehicle pulling to one side while braking, it suggests that one pad is wearing faster than the other, often caused by a seized brake caliper slide pin. Always inspect your brake system for uneven wear patterns during every oil change.
Importance Of Rotors In Performance
You can’t discuss brake pads without considering the condition of your rotors. If you install new pads on a warped or deeply grooved rotor, the new material won’t seat correctly, leading to uneven wear and poor braking performance.
Many technicians recommend “turning” or resurfacing the rotors if they’re within the minimum thickness specifications provided by the manufacturer. If the rotors are below the minimum thickness for rotors as defined by the National Highway Traffic Safety Administration, you must replace them to ensure vehicle safety.
Pro Tip: Never use a wire brush on the friction surface of a new brake rotor, as this can embed debris into the metal and cause premature squealing. Use only approved brake cleaner and a lint-free cloth to prepare the surface.
Steps For Proper Installation
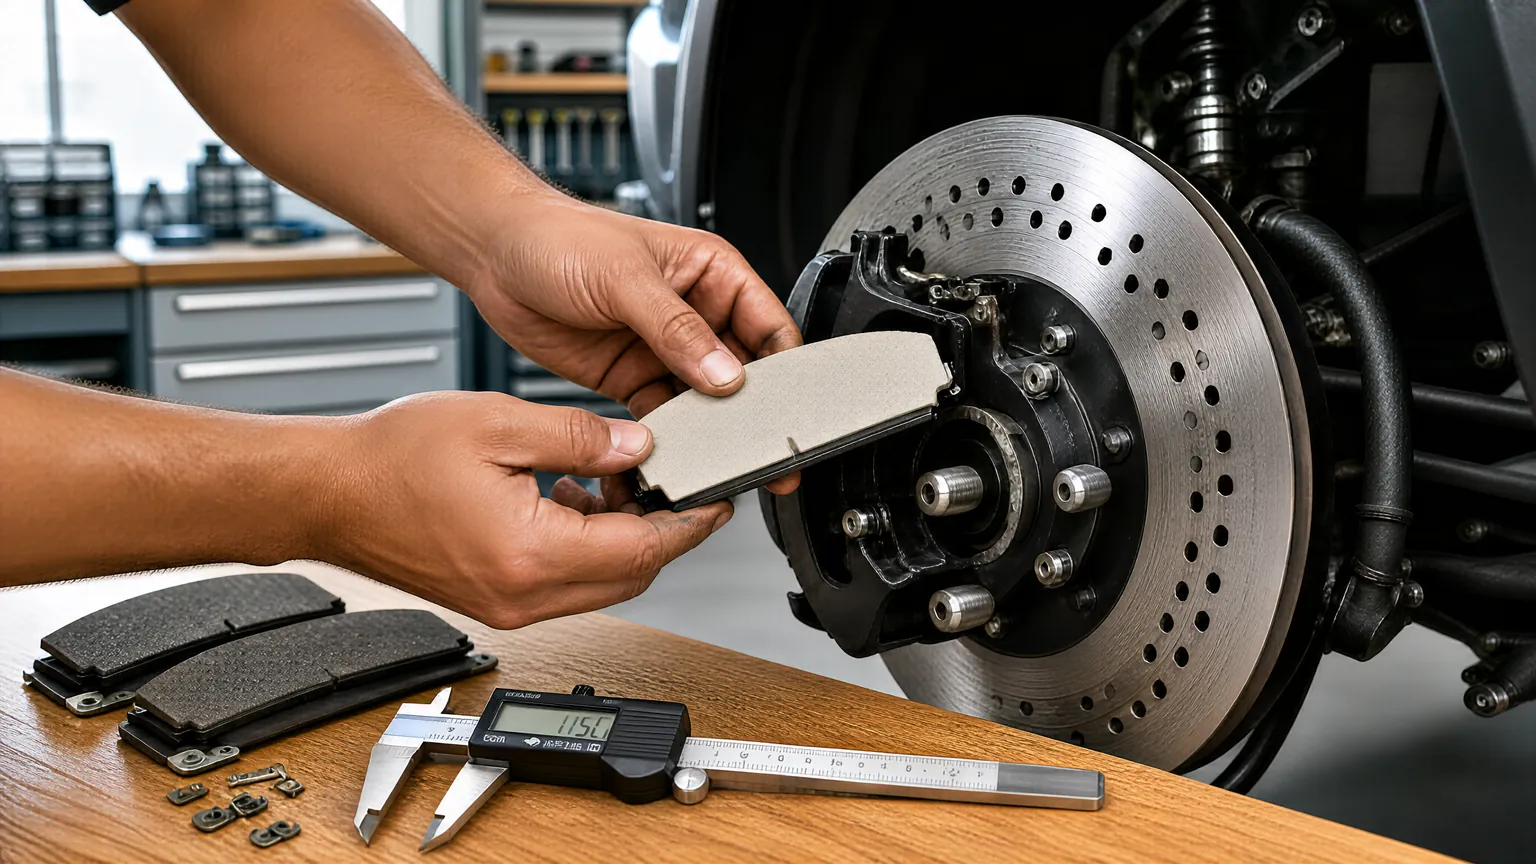
Replacing your own brake pads is a straightforward task, but it requires attention to detail. First, loosen the lug nuts while the vehicle is on the ground, then lift the 4Runner using a floor jack and secure it with heavy-duty jack stands. Remove the wheel to expose the brake assembly. Use a C-clamp or a brake piston tool to gently compress the caliper piston back into its housing to make room for the new, thicker pads.
- Remove the lower caliper mounting bolt and pivot the caliper upward.
- Slide out the old pads and remove the old anti-rattle clips.
- Clean the caliper bracket with a wire brush to remove rust and debris.
- Apply a thin layer of brake grease to the contact points of the new clips.
- Install the new pads and ensure they slide freely in the bracket.
- Reinstall the caliper and torque the mounting bolts to the manufacturer’s specification.
Troubleshooting Common Braking Issues
If you experience a persistent vibration or “chatter” after installing new pads, the issue is often related to the brake pad bedding process. Bedding is the act of heating the pads and rotors through a series of controlled stops, which transfers a thin layer of pad material onto the rotor surface.
Without this layer, the brakes may feel grabby or noisy. If the vibration persists, check that your lug nuts were tightened in a star pattern to the correct torque, as uneven wheel pressure can mimic the feeling of warped rotors.
Another common issue is a seized caliper piston. If you find it nearly impossible to compress the piston with a standard tool, the seal may have failed, allowing moisture to cause internal corrosion. In this case, you must replace the caliper entirely. Never attempt to force a seized piston, as this will damage the internal components and result in total brake failure on the road.
Common Brake Maintenance Schedule
Maintaining your braking system on a strict schedule is the best way to prevent expensive repairs down the line. While every driver’s environment differs—city driving creates more wear than highway cruising—there are general guidelines for inspection and replacement.
- Visual Inspection: Every 5,000 miles (at every tire rotation).
- Brake Fluid Flush: Every 30,000 miles or three years.
- Pad Replacement: Typically every 30,000 to 60,000 miles.
- Rotor Replacement: Every two to three pad changes.
Warning: Always use the specific brake fluid grade recommended in your 4Runner owner’s manual, such as DOT 3 or DOT 4. Mixing incompatible fluids can cause seals to swell and lead to a complete loss of braking pressure.
Related guides
- Extend Toyota Prius Brake Pad Lifespan With These Driving Tips
- How to Change Brake Pads on a Toyota Sienna: Easy Step-by-Step Guide
- Which tires are best for Toyota 4Runner off-roading
FAQs Of Which Brake Pads are Best for Toyota 4Runner
Is it necessary to replace rotors when changing pads?
It isn’t always necessary to replace rotors, but they must be inspected for thickness and surface integrity. If the rotors are smooth, show no deep grooves, and are above the minimum thickness, you can simply “scuff” them with an abrasive pad and reuse them. However, if the rotors are warped or worn thin, replacing them is essential for safety and optimal performance.
How do I know if my brakes need bleeding?
If your brake pedal feels “mushy,” sinks to the floor when held, or requires multiple pumps to feel firm, you likely have air in your lines. This occurs when the hydraulic system is opened for repairs or if the fluid has boiled due to extreme heat. Bleeding the system removes air bubbles, restoring a firm, responsive pedal feel and ensuring consistent pressure application to all four wheels.
Can I mix different brake pad brands?
You should never mix different types or brands of brake pads on the same axle. Each brand uses a unique friction compound with different heat tolerance and bite characteristics. Using mismatched pads on the front or rear will cause uneven braking forces, leading to dangerous vehicle instability, pulling during hard stops, and premature wear of suspension components. Always replace pads in complete axle sets.
What is the break-in period for new pads?
New brake pads require a “bedding-in” period of approximately 200 to 300 miles of moderate driving. During this time, avoid heavy or emergency braking, which can glaze the surface of the pads and compromise their longevity. Perform a series of gentle stops from 35 mph to 5 mph to help the pads conform to the rotor surface and establish a consistent transfer layer of friction material.
Will high-performance pads make my brakes squeal?
Aggressive, high-performance semi-metallic or metallic pads are more prone to noise than ceramic pads. Because they contain more metal, they’re inherently louder during low-speed stops. While proper lubrication of the backing plates and slide pins can mitigate this noise, some amount of brake chatter is often considered a normal trade-off for the increased stopping power and heat resistance provided by performance-oriented friction materials.
Conclusion
The best way to ensure your Toyota 4Runner remains safe and reliable is to establish a routine of inspecting your brake components during every seasonal tire rotation. By monitoring pad thickness and keeping your hardware clean, you can prevent minor issues from becoming costly repairs. Start by checking your current pad thickness with a simple gauge to determine if it’s time to order your next set.

I am Julian Drive, an automotive enthusiast and repair expert with over 7 years of hands-on experience in vehicle maintenance. At Carora Hub, I simplify complex car issues into easy-to-follow DIY guides to help drivers stay safe and save on repair costs.