If you own a Toyota Sienna, you know how versatile it can be for family trips and everyday errands. But what if you want to take it a step further?
Installing a trailer hitch opens up a whole new world of possibilities—towing bikes, trailers, or even a small camper. You might be wondering how to get it done right without hassle or costly mistakes. This guide will walk you through everything you need to know about trailer hitch installation for your Toyota Sienna, making the process simple and stress-free.
Keep reading, and soon you’ll be ready to tow with confidence.
Choosing The Right Hitch
Choosing the right trailer hitch for your Toyota Sienna is important. The correct hitch ensures safety and good performance. It fits well and supports the load you need. This guide helps you understand the options and pick the best one.
Types Of Trailer Hitches
There are several types of trailer hitches. The most common ones are Class I, II, III, IV, and V. Class I and II are for light loads like bike racks. Class III and IV handle medium to heavy loads, such as small trailers. Class V is for the heaviest loads. Choose based on what you plan to tow.
Compatibility With Toyota Sienna
Not all hitches fit every vehicle. The Toyota Sienna needs a hitch designed for its frame and size. Check the hitch’s make and model to confirm it matches your Sienna. A good fit makes installation easier and safer. Use hitches made for minivans or similar vehicles.
Weight Capacity Considerations
Know the weight your hitch can carry. This includes the trailer weight and cargo. The Toyota Sienna has towing limits you must follow. Pick a hitch with a capacity equal or higher than your towing needs. Overloading can cause damage or accidents. Safety first.

Credit: www.youtube.com
Tools And Materials Needed
Installing a trailer hitch on your Toyota Sienna requires the right tools and materials. Proper preparation saves time and avoids frustration. Gather everything before you start the installation process.
Essential Tools List
- Socket wrench set with metric sockets
- Torque wrench to tighten bolts accurately
- Flathead and Phillips screwdrivers
- Measuring tape to ensure proper alignment
- Drill with metal bits for mounting holes
- Wire cutters and strippers for electrical connections
- Safety glasses to protect your eyes
- Jack and jack stands for vehicle support
- Rubber mallet to help fit parts without damage
- Work gloves for hand protection
Optional Helpful Accessories
- Penetrating oil to loosen rusty bolts
- Magnetic tray to hold small bolts and nuts
- Flashlight or work light for better visibility
- Electrical tape for securing wiring
- Zip ties to organize cables neatly
- Panel removal tool to avoid damaging clips
- Anti-seize lubricant for bolts
- Ratcheting straps for added support
Preparing Your Vehicle
Preparing your Toyota Sienna for trailer hitch installation is the first step to a smooth process. Proper preparation ensures safety and accuracy. It also helps avoid damage to your vehicle and the hitch parts. Follow these simple steps before starting the installation.
Safety Precautions
Park your Sienna on a flat, stable surface. Engage the parking brake to prevent movement. Wear gloves to protect your hands from sharp edges. Use safety glasses to guard your eyes from debris. Keep tools organized to avoid accidents during installation.
Clearing The Installation Area
Remove any dirt or debris from the rear underside of your vehicle. Clear the bumper area for easy access to mounting points. Take off any loose parts or covers blocking the hitch area. Ensure the exhaust pipe is cool before working nearby. A clean area helps you work faster and safer.
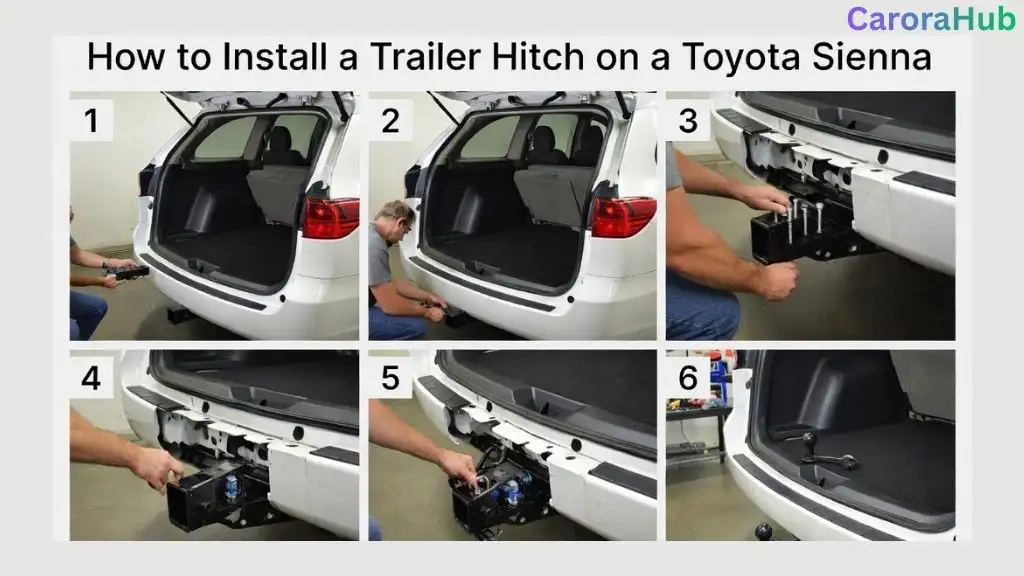
Step-by-step Installation
Installing a trailer hitch on your Toyota Sienna can seem tough. Follow clear steps to make the process easier. This guide shows each stage in detail.
Removing Existing Components
Start by removing any parts blocking the hitch area. This may include the rear bumper or covers. Use proper tools to avoid damage. Keep bolts and parts safe for reassembly.
Aligning The Hitch
Place the hitch under the vehicle frame. Line up the holes on the hitch with the vehicle’s mounting points. Make sure the hitch sits flush and straight. Correct alignment prevents problems later.
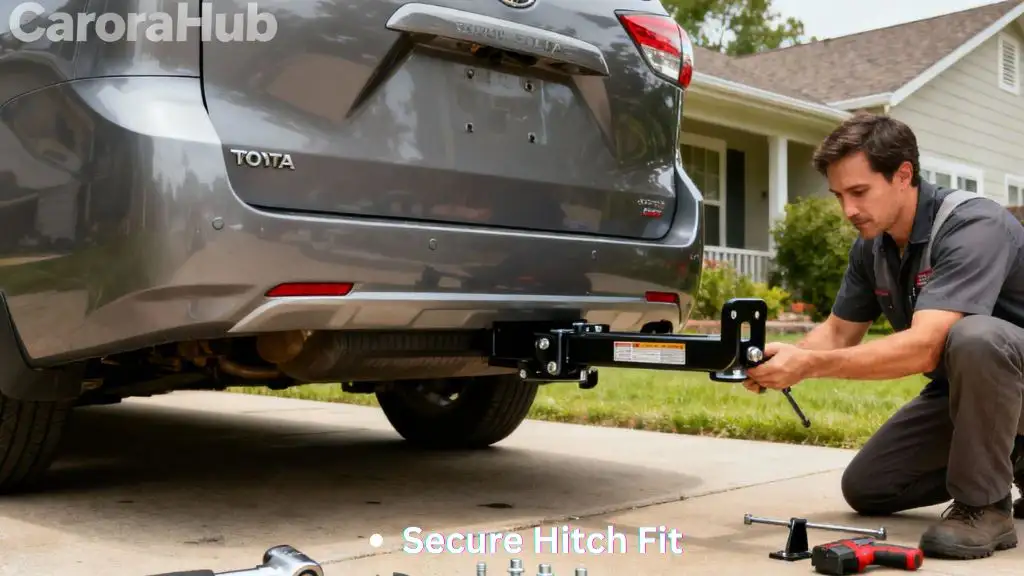
Securing Bolts And Fasteners
Insert the bolts through the hitch and frame holes. Tighten them by hand first to hold the hitch in place. Use a torque wrench to tighten bolts to the correct force. Secure all fasteners firmly but avoid overtightening.
Double-checking Connections
Check every bolt and fastener for tightness. Inspect the hitch for any movement or gaps. Ensure wiring harnesses are connected properly if included. Test the hitch by applying gentle pressure to confirm stability.
Wiring The Trailer Lights
Wiring the trailer lights is a key step in trailer hitch installation on your Toyota Sienna. It ensures your trailer’s brake lights, turn signals, and running lights work safely. Proper wiring keeps you and others safe on the road.
The process is simple but requires care. You need to find the right wiring harness, connect the electrical parts correctly, and then test the lights. This section explains each step clearly.
Locating The Wiring Harness
Start by opening the rear hatch of your Toyota Sienna. Locate the vehicle’s wiring harness near the tail lights. It usually has a plastic connector with several wires. Check the owner’s manual to find the exact location. Be gentle when handling the wires to avoid damage.
Connecting The Electrical Components
Match the trailer wiring harness to your Sienna’s connector. Most harnesses use color-coded wires for easy connection. Plug the connectors together firmly. Use electrical tape to secure loose wires. Make sure all connections are tight to prevent shorts or disconnections while driving.
Testing The Lights
After connecting, test the trailer lights before hitting the road. Turn on your vehicle’s lights and check the trailer’s brake lights, turn signals, and running lights. Have someone help by signaling while you watch the trailer lights. Fix any non-working lights by checking connections again.
Post-installation Tips
After installing a trailer hitch on your Toyota Sienna, some care is needed. These tips help keep the hitch safe and working well. Small actions can prevent big problems later. Follow these simple steps to enjoy a smooth towing experience.
Torque Specifications
Check the torque specifications in the installation manual. Tighten all bolts to the exact numbers listed. Use a torque wrench for accuracy. Too loose or too tight bolts can cause damage. Proper torque keeps the hitch secure and safe.
Regular Maintenance
Clean the hitch regularly to remove dirt and rust. Use a wire brush to clear any buildup. Lubricate moving parts with grease or oil. Inspect bolts and connections every month. Replace any worn or damaged parts right away.
Troubleshooting Common Issues
Listen for unusual noises during towing. Check for loose bolts if you hear rattling. Ensure the hitch ball and trailer coupler fit tightly. Look for rust spots or cracks on the hitch. Fix small problems before they grow bigger.

Credit: www.youtube.com
Frequently Asked Questions
How Do I Install A Trailer Hitch On A Toyota Sienna?
To install a trailer hitch on a Toyota Sienna, first gather necessary tools. Remove any obstructing parts, align the hitch, and bolt it securely. Follow the manufacturer’s instructions closely for safety and proper fit. Professional installation is recommended for best results.
What Tools Are Needed For Toyota Sienna Hitch Installation?
You need a socket set, torque wrench, screwdrivers, and possibly a drill. A vehicle jack or ramps can help access the underside. Check the hitch instructions for any specific tools required. Having all tools ready speeds up installation.
Can I Install A Trailer Hitch Myself On A Sienna?
Yes, if you have basic mechanical skills, you can install a trailer hitch yourself. Follow detailed instructions and safety precautions carefully. However, professional installation ensures proper fit and avoids damage, especially for first-time installers.
How Long Does It Take To Install A Trailer Hitch?
Installation typically takes 1 to 2 hours depending on experience. Removing factory parts and aligning the hitch can affect time. Preparation and having the right tools ready speed up the process.
Final Thoughts
Installing a trailer hitch on your Toyota Sienna adds great value. It lets you tow trailers, bikes, or cargo easily. The process is simple with the right tools and instructions. Proper installation ensures safety and reliable use. Take your time to follow each step carefully.
A well-installed hitch improves your vehicle’s function and versatility. Enjoy the freedom to carry more on your trips. This small upgrade can make a big difference. Safe towing starts with a good hitch installation.

Hello, I’m Norman. I work as a car researcher. I am the voice behind CaroraHub. I have over 15 years of experience. I give simple and useful car advice. I help with car care, cleaning, and small repairs. My goal is to help you keep your car healthy. I want car care to be easy and cheap for you. You can trust my tips to keep your car working well for a long time.