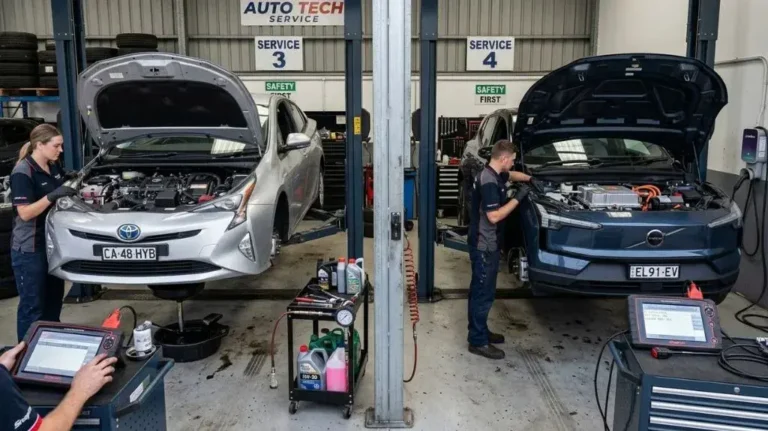
If you own a Toyota Prius, you know every part matters to keep your hybrid running smoothly. One component that often gets overlooked is the inverter coolant pump.
When the inverter coolant pump begins to fail, the hybrid inverter can overheat. That leads to trouble codes, limp-home mode, or expensive repairs. I’ve replaced mine, and with the right tools and a careful approach you can do the job yourself. This guide gives clear, step-by-step instructions that are easy to follow — even if you’re not a pro mechanic.
Read on and I’ll walk you through prep, removal, installation, bleeding the cooling system, and final tests so you can get back on the road with confidence.
Tools And Materials Needed
Replacing the inverter coolant pump on a Toyota Prius calls for the right tools and parts. I like to lay everything out before I start. That saves trips back to the garage and keeps the job tidy. Below is a practical list of what you’ll want on hand.
Basic Hand Tools
Start with a basic hand tool kit. You’ll typically need:
- Ratchet and socket set (10mm and 12mm commonly used).
- Flathead and Phillips screwdrivers for clamps and clips.
- Pliers (needle-nose and regular) for hoses and clamps.
- Torque wrench to tighten bolts to the manufacturer’s specs (consult the repair manual).
- Small tray or magnetic dish to keep bolts and clips organized.
Coolant And Fluids
Use Toyota-approved inverter coolant or a coolant that the repair manual specifies. I always keep a clean container or drain pan to catch old coolant. Never use plain water — that can corrode parts and reduce cooling performance. When you dispose of old coolant, follow local regulations.
Replacement Parts
Order the correct inverter coolant pump for your Prius model year. OEM parts give the best fit. Also buy replacement O-rings, seals, and new hose clamps if the originals look worn. Small parts are cheap insurance against leaks later.
Safety Equipment
Protect yourself. I always wear:
- Mechanic’s gloves to keep hands clean and protected from hot coolant.
- Safety glasses to prevent splashes into the eyes.
- Work in a well-ventilated area to avoid breathing fumes.
Additional Supplies
Other helpful items:
- Clean rags or paper towels for spill cleanup.
- Funnel for refilling coolant without spilling.
- A small container or tray for screws and bolts.
- Service manual or access to a repair database for torque specs and wiring diagrams.
Read More: Toyota Prius Combination Meter Repair DIY

Credit: ameliasurfandracquetclub.com
Preparing The Vehicle
Preparation makes this job faster and safer. I always take time here — it pays off.
Below are the steps I use before doing any work on the inverter coolant pump.
Park On A Flat Surface
Find level ground and park. Set the parking brake. Put the car in Park and remove the key. A stable car is safer when you’re under the hood.
Disconnect The Battery
Open the hood and locate the 12-volt battery. Remove the negative terminal first to avoid short circuits. Wait a few minutes before working to allow systems to power down. This step reduces the chance of accidental electrical issues.
Allow The Engine To Cool
Never open the coolant reservoir when it’s hot. Let the engine cool until the surfaces are safe to touch. I usually wait 30 minutes or longer depending on how hot it was. This prevents burns from hot coolant or steam.
Gather Necessary Tools And Supplies
Lay out tools and parts within reach. A well-organized workspace speeds the job and reduces mistakes. Double-check you have the replacement pump, coolant, and any clips or seals you’ll need.
Wear Protective Gear
Wear gloves and safety glasses. I also keep a bucket of soapy water nearby for small spills and a towel to kneel on. Comfortable, safe posture helps avoid strain when working on tight parts.
High-Voltage Safety Note
The inverter sits on the high-voltage side of a hybrid. Don’t remove any orange high-voltage wiring or covers unless you are qualified. If you see orange cables near your work area, take extra care and follow the repair manual. If you’re unsure, stop and ask a qualified hybrid technician.
Removing The Old Coolant Pump
Removing the old pump is a careful process. Take your time and keep parts organized. I break the job into small steps to avoid mistakes.
Prepare The Vehicle
Confirm the car is cool and the negative battery cable is disconnected. Put on gloves and eye protection. Make sure you have good light and clear space around the engine bay.
Drain The Coolant
Place a drain pan beneath the pump area. Open the reservoir cap to allow air in. Carefully disconnect the lower hose or drain valve to let coolant flow into the pan. Catch all used coolant and dispose of it according to local rules.
Remove Surrounding Components
Remove any covers, brackets, or hoses that block access to the pump. Use the correct socket sizes and keep fasteners in order. I label or group bolts so reassembly is straightforward.
Disconnect Electrical Connectors
Locate the pump’s electrical connector. Press the release tab and pull gently. Don’t yank on wires — use the connector body. Inspect connectors for corrosion or damage and clean them if needed.
Unbolt And Remove The Coolant Pump
Remove the bolts that hold the pump in place. I start bolts by hand to avoid cross-threading. Support the pump as you loosen the final bolts so it doesn’t drop. Pull the pump straight out and set it on a clean rag.
Inspect The Mounting Area
Check the mounting surface and hose fittings for corrosion or old gasket material. Clean the area with a rag and light solvent if needed. A clean surface helps the new pump seal better and reduces leak risk.
Installing The New Coolant Pump
Installing the new pump is straightforward if you follow the steps. Work methodically and re-use organized fastener groups from removal.
Preparing The New Coolant Pump For Installation
Inspect the new pump for damage. Remove protective plugs and verify the part number matches your vehicle. Replace any O-rings or seals that came with the pump. Lightly lubricate new O-rings with fresh coolant for a better seal.
Positioning The Pump Correctly
Align the pump with the mounting holes and fit it into place as the old one came out. Don’t force the pump. If it doesn’t seat easily, re-check for obstructions or leftover gasket material.
Securing The Coolant Pump
Hand-start the mounting bolts to avoid cross-threading. Then use a torque wrench to tighten to Toyota’s specified torque. If you don’t have the exact numbers available, consult the service manual or a trusted repair database. Correct torque prevents leaks and damage.
Reconnecting The Coolant Hoses
Slide the hoses fully onto the pump’s fittings. Secure them with new or good-condition clamps. Make sure hoses are routed without sharp bends, kinks, or contact with hot surfaces. A proper hose fit stops leaks and premature failures.
Refilling The Coolant System
Refill the reservoir with the correct coolant mix. Fill slowly to reduce trapped air. After initial fill, you’ll need to bleed the system to remove air pockets (see next section).
Replace Any Removed Covers or Brackets
Before moving to bleeding, reattach all removed covers, brackets, and small parts. This keeps the engine bay secure and reduces the chance of missing pieces later.
Refilling And Bleeding The Coolant System
Refilling and bleeding is critical. Air trapped in the coolant can cause poor flow and overheating. I always take extra time here to make sure the system is fully bled.
Air in the inverter cooling circuit can cause high temps and trigger fault codes. Proper bleeding prevents that.
Preparing The Coolant Mixture
Use a 50/50 mix of antifreeze and distilled water unless Toyota specifies otherwise for your model. Mix in a clean container and pour slowly to avoid introducing air.
Filling The Coolant Reservoir
Open the reservoir cap and add coolant until it reaches the “full” mark. Don’t overfill. Replace the cap loosely for now; you’ll tighten it after bleeding and a cool-down check.
Bleeding Air From The System
Start the car and let the hybrid system run. Set the cabin heater to full hot and blower speed high to open the heater core valve. Watch the coolant level and add more as air escapes. Look for steady bubbles in the reservoir — that means air is being purged.
Keep the car running until bubbling stops and the coolant level stabilizes. Turn the engine off and let it cool, then recheck the level and top off if needed. Repeat the cycle if necessary.
Checking For Leaks And Final Level
With the engine cool, inspect all hose connections and the pump for leaks. Tighten clamps if you see any seepage. Reinstall and secure the reservoir cap once the level is correct and no more air is escaping.

Credit: www.ebay.com
Testing And Final Checks
After installation and bleeding, run a set of checks. These confirm the pump works and the cooling circuit is sound. I do these checks the same way every time.
Checking Coolant Levels And Leaks
Top the reservoir to the proper level. Inspect the pump, hoses, and clamps for drips. Even a small leak can get worse under pressure, so address any evidence of seepage immediately.
Running The Hybrid System
Start the Prius and let the hybrid system run through a warm-up cycle. Listen for the pump — it should run quietly. If you hear grinding or loud rattling, stop and re-check the installation and electrical connections.
Monitoring Engine Temperature
Watch the dashboard temperature gauge. It should remain in the normal range. If the gauge climbs rapidly or a warning light appears, turn the car off and troubleshoot immediately. Symptoms like rapid temperature rise usually mean restricted coolant flow or trapped air.
Inspecting Electrical Connections
Double-check the pump’s electrical connector and nearby wiring. Ensure connectors are fully seated and free of corrosion. A loose connector can cause intermittent pump operation and trigger fault codes.
Final Visual Inspection
Do a last visual sweep. Confirm all bolts, clamps, and covers are secure. Clean up any spilled coolant and remove tools from the engine bay. When everything looks good, take a short test drive and recheck the coolant level after the car cools.

Credit: www.youtube.com
Final Thoughts
Replacing the inverter coolant pump is one of the most effective preventive repairs for Prius owners. It helps avoid inverter overheating and the costly repairs that follow. Take a careful, methodical approach: prepare well, follow safety steps, and bleed the system properly.
Doing this job yourself saves money and gives a sense of satisfaction. If at any point you’re unsure — especially around high-voltage components — stop and consult a qualified hybrid technician. Small maintenance now can prevent big problems later. Keep your Prius healthy and running smoothly.
FAQs Of How to Replace Toyota Prius Inverter Coolant Pump
What Tools Are Needed To Replace Prius Inverter Coolant Pump?
You need basic hand tools like screwdrivers, pliers, socket wrench set, and a coolant drain pan. A new inverter coolant pump and replacement coolant are also essential.
How Long Does It Take To Replace The Prius Coolant Pump?
Replacing the inverter coolant pump typically takes 1 to 2 hours. Time varies based on experience and access to tools.
Can I Replace The Inverter Coolant Pump Myself?
Yes, if you have basic mechanical skills and follow safety guidelines, you can replace it at home. Refer to the repair manual for detailed steps.
How Often Should Prius Inverter Coolant Pump Be Replaced?
Replace the inverter coolant pump every 100,000 miles or when signs of failure appear, like overheating or coolant leaks.

Hello, I’m Norman. I work as a car researcher. I am the voice behind CaroraHub. I have over 15 years of experience. I give simple and useful car advice. I help with car care, cleaning, and small repairs. My goal is to help you keep your car healthy. I want car care to be easy and cheap for you. You can trust my tips to keep your car working well for a long time.