Oil stains on car upholstery are a real headache. I’ve dealt with them myself small spots from a greasy snack and bigger drips from engine oil. They often look impossible to remove. The problem gets worse when the stain sits too long or when the wrong cleaning method is used.
But don’t worry removing oil stains from car upholstery is doable. With the right steps, the right tools, and a little patience, you can get great results at home.
Many people assume oil stains are permanent. I used to think that, too. In reality, quick action and the correct techniques can save your seats. In this guide I’ll explain why oil sticks so well, what to do immediately after a spill, and how to remove even older, set-in oil stains.
Along the way I’ll share expert tips, product comparisons, and answers to common questions. My goal is to help you clean oil stains from car seats, carpets, and mats without expensive professional help.
If you care about keeping your car clean and comfortable, learning how to treat oil and grease stains is essential. I’ll break the process into clear, simple steps so you can get your upholstery looking fresh again.
Why Oil Stains Are So Difficult To Remove
Oil stains are tricky for three main reasons. First, oil is hydrophobic. It repels water. That means water-based cleaners often fail. They can spread the oil and make the stain bigger.
Second, upholstery materials—cloth, leather, and synthetics—react differently to oils. Cloth soaks oil deep. Leather absorbs some oil but can discolor. Synthetics tend to keep oil on the surface. The longer oil sits, the deeper it bonds with fibers. That makes removal harder.
Third, many people rub the stain. I’ve done that. Rubbing pushes oil deeper into fabric. That common mistake turns a small spot into a lasting mark.
Types Of Car Upholstery And Their Oil Stain Challenges
Different upholstery needs different cleaning. Below I summarize the most common materials and what makes each one unique when dealing with oil and grease stains:
| Upholstery Type | Oil Absorption | Risk of Damage | Common Cleaning Issues |
|---|---|---|---|
| Cloth/Fabric | High | Low | Stains penetrate deeply |
| Leather | Medium | Medium-High | Can discolor, needs gentle cleaners |
| Synthetic (Vinyl/PU) | Low | Low | Stains stay on surface, easy to smear |
| Suede/Alcantara | High | High | Very sensitive, hard to clean |
Non-obvious insight: Many people use one method for all fabrics. That can do more harm than good. For example, a strong degreaser on leather can strip natural oils. That can lead to cracks and fading.
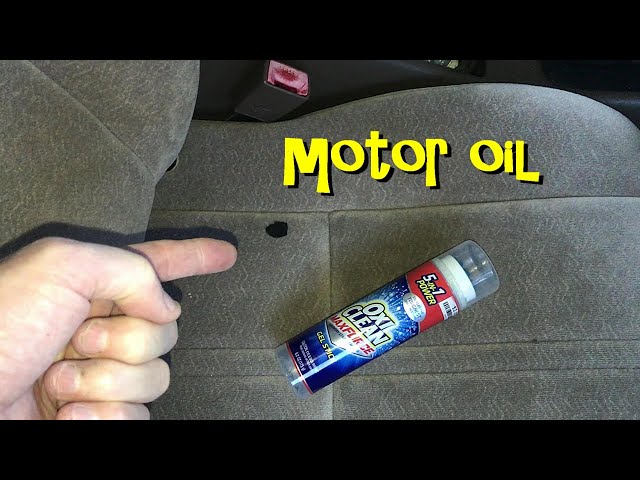
Credit: www.youtube.com
Immediate Steps: What To Do Right After An Oil Spill
Acting fast gives the best chance to avoid a permanent stain. Do these things immediately:
- Blot, Don’t Rub: Use a clean, dry paper towel or cloth to gently blot. Press to absorb oil. Don’t rub—rubbing spreads the stain.
- Add an Absorbent: Sprinkle baking soda, cornstarch, or talcum powder on the stain. These powders draw oil out of fibers.
- Let It Work: Give the powder 15–20 minutes at minimum. For larger spills, wait an hour or more.
- Vacuum or Brush Away: Remove the powder carefully using a vacuum or a soft brush.
- Repeat If Needed: If the spot still looks oily, repeat before moving to deeper cleaning.
Expert tip: Never use hot water first. Heat can set oil into fibers and make the stain permanent.
Essential Supplies For Oil Stain Removal
Having the right tools saves effort and avoids mistakes. Here’s a checklist of supplies I keep on hand when treating grease and oil stains:
- Absorbent powders: Baking soda, cornstarch, or talcum powder.
- Soft brushes: To lift powder and work cleaners gently.
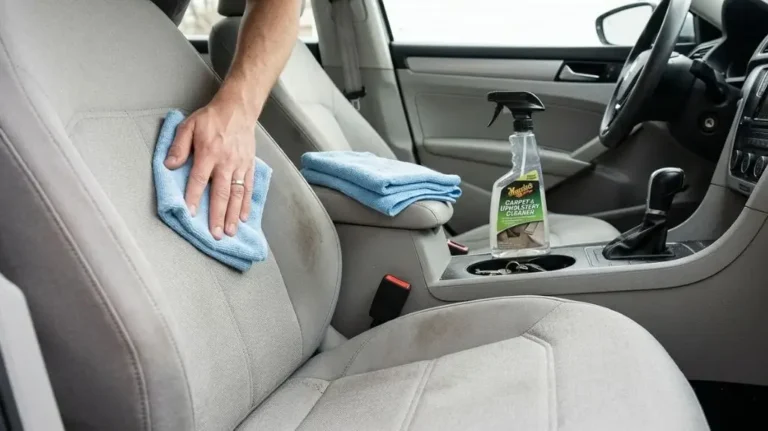
- Clean microfiber cloths: For blotting and wiping without leaving lint.
- Upholstery cleaner: Pick one safe for your material.
- Mild dish soap: Effective at breaking down grease.
- White vinegar: A mild degreaser for some fabrics (test first).
- Spray bottle: For mixing and spraying cleaning solutions.
- Vacuum cleaner: To remove powder and loosened grime.
- Leather conditioner: For protecting leather after cleaning. See cleaning and protecting leather seats.
- Protective gloves: To keep hands clean and safe.
Non-obvious insight: Use microfiber—not paper towels—on sensitive materials. Paper can leave lint and fibers, especially on suede or Alcantara.

Credit: www.youtube.com
Step-by-step Guide: Removing Oil Stains From Cloth Car Upholstery
Cloth seats are common and comfy, but they absorb oil fast. Use this clear step-by-step method for cloth, fabric, and woven upholstery:
1. Pre-treatment
- Blot excess oil with a dry microfiber cloth.
- Sprinkle a thick layer of baking soda or cornstarch over the stain.
- Let it sit 20–30 minutes so it soaks up oil.
- Vacuum up the powder carefully.
2. Cleaning Solution
- Mix a few drops of mild dish soap with warm water (not hot) in a spray bottle.
- Lightly spray the stained area. Avoid soaking the fabric.
3. Gently Scrub
- Use a soft-bristled brush to work the solution into the fabric.
- Scrub in small circles, from the outside in. This keeps the stain from spreading.
4. Blot And Rinse
- Blot with a clean, damp microfiber cloth to lift oil and soap.
- Repeat until the stain fades. Avoid over-wetting the seat.
5. Dry The Area
- Press a dry towel over the spot to absorb moisture.
- Open the windows or use a fan for faster drying.
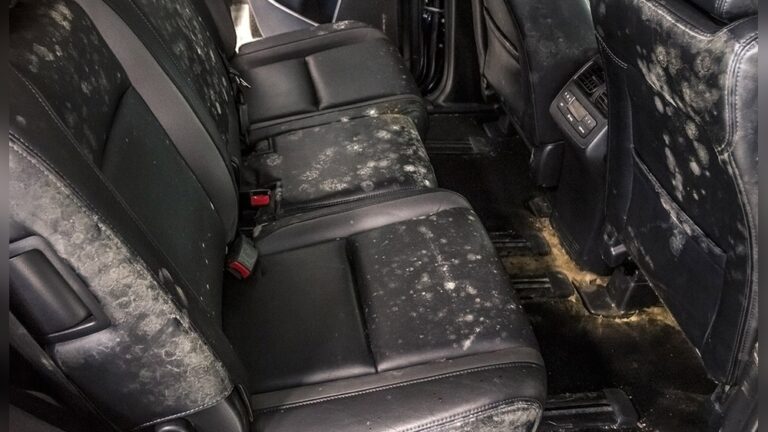
Common mistake: Over-wetting can lead to water marks or mold. Use as little water as needed and dry quickly.
Step-by-step Guide: Removing Oil Stains From Leather Car Upholstery
Leather needs gentler care than fabric. These steps minimize damage while lifting oil:
1. Immediate Action
- Blot the oil gently with a microfiber cloth.
- Sprinkle cornstarch or talcum powder on the stain to absorb oil.
2. Let The Powder Absorb
- Leave powder in place for at least 8 hours, or overnight for best results.
3. Remove Powder
- Use a soft brush or vacuum to remove the powder. You should see less oil transfer to the leather.
4. Clean The Leather
- Dampen a cloth with a mild dish soap and water mix.
- Gently wipe the stain. Do not scrub hard—this can damage the leather finish.
5. Condition The Leather
- After cleaning, apply a quality leather conditioner. This restores oils and prevents cracks.
Pro tip: Avoid bleach, ammonia, or strong solvents on leather. They can strip protective finishes and cause permanent damage.
Step-by-step Guide: Removing Oil Stains From Synthetic Upholstery
Vinyl and synthetic seats usually do not absorb oil deeply. That makes them easier to treat if you act correctly:
1. Wipe Up Excess Oil
- Blot with a dry microfiber cloth as soon as possible to remove excess oil.
2. Use A Mild Cleaner
- Mix a few drops of dish soap with warm water.
- Wipe the area with a damp cloth and mild solution.
3. Rinse And Dry
- Use a clean, damp cloth to remove soap residue.
- Dry with a towel or microfiber cloth.
4. For Stubborn Stains
- Use a small amount of isopropyl alcohol on a cloth to wipe the stain gently.
- Always test on a hidden area first to avoid discoloration.
Step-by-step Guide: Removing Oil Stains From Suede Or Alcantara
Suede and Alcantara are beautiful but delicate. Treat them carefully to avoid ruining the nap or texture:
1. Act Quickly
- Blot the stain with a dry microfiber cloth. Do not use water—water can leave rings.
2. Apply Absorbent Powder
- Use cornstarch or a suede-specific powder.
- Let it sit for several hours to draw oil out of the nap.
3. Brush Gently
- Use a suede brush to remove powder and help lift the stain.
- Repeat as needed, but be gentle to preserve the nap.
4. Avoid Water-based Cleaners
- Water can cause rings or damage the nap. Stick to absorbents and dry treatments.
Non-obvious insight: For Alcantara, the manufacturer often recommends only approved cleaning products. Check your car manual for specific advice before trying solvents or cleaners.
Credit: www.reddit.com
Diy Vs. Commercial Upholstery Cleaners
Should you use a homemade cleaner or a commercial product? Both work, but each has pros and cons depending on the stain and material.
| Cleaner Type | Pros | Cons | Best For |
|---|---|---|---|
| DIY (Dish Soap, Vinegar) | Cheap, easy to find, gentle | May require repeat treatments, not for all fabrics | Fresh stains, cloth seats |
| Commercial Upholstery Cleaner | Stronger, designed for cars, faster results | More expensive, can damage sensitive materials | Old stains, tough fabrics |
| Specialty Leather Cleaner | Protects and cleans leather, prevents drying | May not remove deep stains | Leather seats |
Pro tip: Always test any cleaner—DIY or commercial—on a hidden spot. Check results before treating the main stain.
When To Call A Professional
Some oil stains need pro-level tools and know-how. Call a professional if:
- The stain is old and already set deep into fibers.
- The material is rare, delicate, or expensive (high-end suede or vintage leather).
- Home treatments made the stain worse.
- The upholstery smells bad after cleaning (possible trapped oil or mold).
Detailers use tools like hot water extractors, steam cleaners, and pH-balanced stain removers to deep-clean without damaging materials.
Expert tip: If your car is under warranty or has a care agreement, check before cleaning. Some DIY actions can void coverage.
Preventing Future Oil Stains
Prevention beats repair. Here are practical steps to reduce future oil and grease stains:
- Use Seat Covers: Removable covers protect seats and wash easily.
- Be Careful with Food and Drinks: Avoid eating greasy foods in the car.
- Clean Up Quickly: The faster you act, the less likely a stain will set.
- Apply Fabric or Leather Protectant: These sprays create a barrier against oil and spills.
- Regular Maintenance: Vacuum and wipe seats often to remove surface oils before they build up.
Non-obvious insight: Some new cars include “factory protection” on seats. That layer wears off in a year or two. Reapply protectant regularly, especially after deep cleaning.
Comparing Popular Oil Stain Removers
Many stain removers exist. Here is a quick comparison of some reliable options tailored to automotive upholstery and grease removal:
| Product | Type | Works On | Average Price | Effectiveness (1–5) | Notes |
|---|---|---|---|---|---|
| Folex Instant Carpet Spot Remover | Spray | Cloth, some synthetics | $7–$10 | 4 | Good for fresh stains, safe for most fabrics |
| Blue Coral Upholstery Cleaner | Foam | Cloth, vinyl | $6–$8 | 3.5 | Includes brush cap, mild scent |
| Leather Honey Cleaner | Liquid | Leather | $16–$20 | 4.5 | Best for leather, also conditions |
| Meguiar’s Carpet & Upholstery Cleaner | Aerosol | Cloth, synthetic | $7–$12 | 4 | Strong on old stains, quick-drying |
| Homemade (Dish Soap & Water) | Liquid | Cloth, some synthetics | Less than $2 | 3 | Gentle but may need repeat treatment |
Pro tip: Read product reviews and check recommendations from auto detailers. Some brands work better on certain materials.
Removing Old Or Set-in Oil Stains
Old oil stains take more work but can often be reduced significantly. Here’s a step-up approach for set-in oil and grease:
- Loosen the Oil: Cover the stain with baking soda or cornstarch and leave it overnight. This draws remaining oil out.
- Vacuum Thoroughly: Remove all powder—the powder should have absorbed some oil.
- Use a Stronger Cleaner: Apply a commercial stain remover made for upholstery. Follow label instructions carefully.
- Repeat If Needed: Tough stains often require multiple treatments. Be patient and test first.
- Try Steam or Hot Water Extraction: For cloth seats, a steam cleaner or hot water extractor can lift oil from deep fibers.
- Don’t Overdo It: Too many treatments can harm the fabric or leather. If nothing works after 2–3 tries, seek professional help.
Non-obvious insight: Fast-food oils often have dyes and spices. That creates two stains: oil and color. Treat oil first, then treat the colored stain separately.
How To Handle Oil Stains On Car Carpets And Floor Mats
Oil also lands on carpets and floor mats. Here’s how I treat removable and fixed mats:
For Removable Mats
- Take out the mat and place it flat outside.
- Sprinkle absorbent powder on the stain and let it sit.
- Vacuum the powder off.
- Scrub with dish soap and water using a stiff brush to work on rubber-backed mats or thick carpet mats.
- Rinse with clean water and air dry fully before returning them to the car.
For Fixed Carpets
- Blot up excess oil right away.
- Apply powder, let it absorb, then vacuum.
- Use a carpet/upholstery cleaner and scrub gently. Blot with a clean towel.
- Keep a towel underneath when cleaning to avoid water soaking the car floor. This prevents rust or mildew.
Expert tip: For trunk or cargo-area spills, remove items and check for oil that may have soaked into padding or underlayment. Treat those areas promptly to avoid lingering smells.
Common Mistakes To Avoid
Here are frequent errors people make when cleaning oil and grease stains—and how to avoid them:
- Rubbing the stain: This pushes oil deeper into fabric. Blot instead.
- Using hot water: Heat can set oil into fibers permanently.
- Over-wetting: Too much moisture risks water marks and mold.
- Using harsh chemicals: Bleach and ammonia damage upholstery and finishes.
- Skipping a test spot: Always test on a hidden area to check for color loss or damage.
- Not drying fully: Damp seats lead to mildew and bad odors. Dry well after cleaning.
Real-world Examples: Success Stories And Lessons Learned
Real stories help. Here are two cases that show what works—and what to expect:
Example 1: Grease from Fast Food
A driver spilled a hamburger on the front seat, leaving a large oily patch. She acted fast. She blotted up oil, covered the area with baking soda, waited 30 minutes, then vacuumed and cleaned with dish soap and water. After two treatments the stain faded and the seat looked near new. The key was speed and not over-saturating the fabric.
Example 2: Old Engine Oil on Leather
A mechanic found an old oil spot on his leather seat. He applied talcum powder overnight, then wiped gently with a damp cloth and mild soap. After drying he applied leather conditioner. The stain lightened but a faint shadow remained. That shows old oil on leather is tough to remove fully. Regular cleaning and quick response help most.
FAQs About How to Remove Oil Stains from Car Upholstery
What Is The Best Home Remedy For Oil Stains On Car Seats?
The best home remedy is baking soda or cornstarch. Sprinkle it on the stain, wait 20–30 minutes, then vacuum. Follow with a gentle dish soap and water mix to remove residue. This method lifts oil without harsh chemicals.
Can I Use Vinegar To Clean Oil Stains From Car Upholstery?
White vinegar can help with some oil stains when mixed with dish soap. It’s not as effective as absorbent powders for lifting oil. Always test vinegar on a hidden spot first—some fabrics discolor with vinegar.
How Do I Remove Oil Stains From Leather Car Seats?
Blot up oil, then cover with cornstarch or talcum powder for several hours. Brush away the powder, clean with a damp cloth and mild soap, and finish with a leather conditioner to restore oils and protect the seat.
Are Commercial Cleaners Better Than Homemade Solutions?
Commercial cleaners are stronger and often act faster on old or tough stains. Homemade mixes are cheaper and gentler on delicate fabrics. Both have a place. Always test on a hidden area first. For trusted product recommendations, see this Consumer Reports review.
What Should I Do If An Oil Stain Won’t Come Out?
If a stain resists after several treatments, consider professional cleaning. Detailers have tools like hot water extractors, steam machines, and solvent-based cleaners that are safer at removing deep-set oil without damaging upholstery. Avoid endless scrubbing—overworking a stain can make it worse.
Treating oil stains on car upholstery comes down to speed, the right products, and gentle methods. With a careful approach you can reduce or remove most oil and grease stains. Keep the tools and tips in this guide handy, and your car will stay cleaner and more comfortable for longer.

I am Julian Drive, an automotive enthusiast and repair expert with over 7 years of hands-on experience in vehicle maintenance. At Carora Hub, I simplify complex car issues into easy-to-follow DIY guides to help drivers stay safe and save on repair costs.